
From the makers of Verdun and Tannenberg …
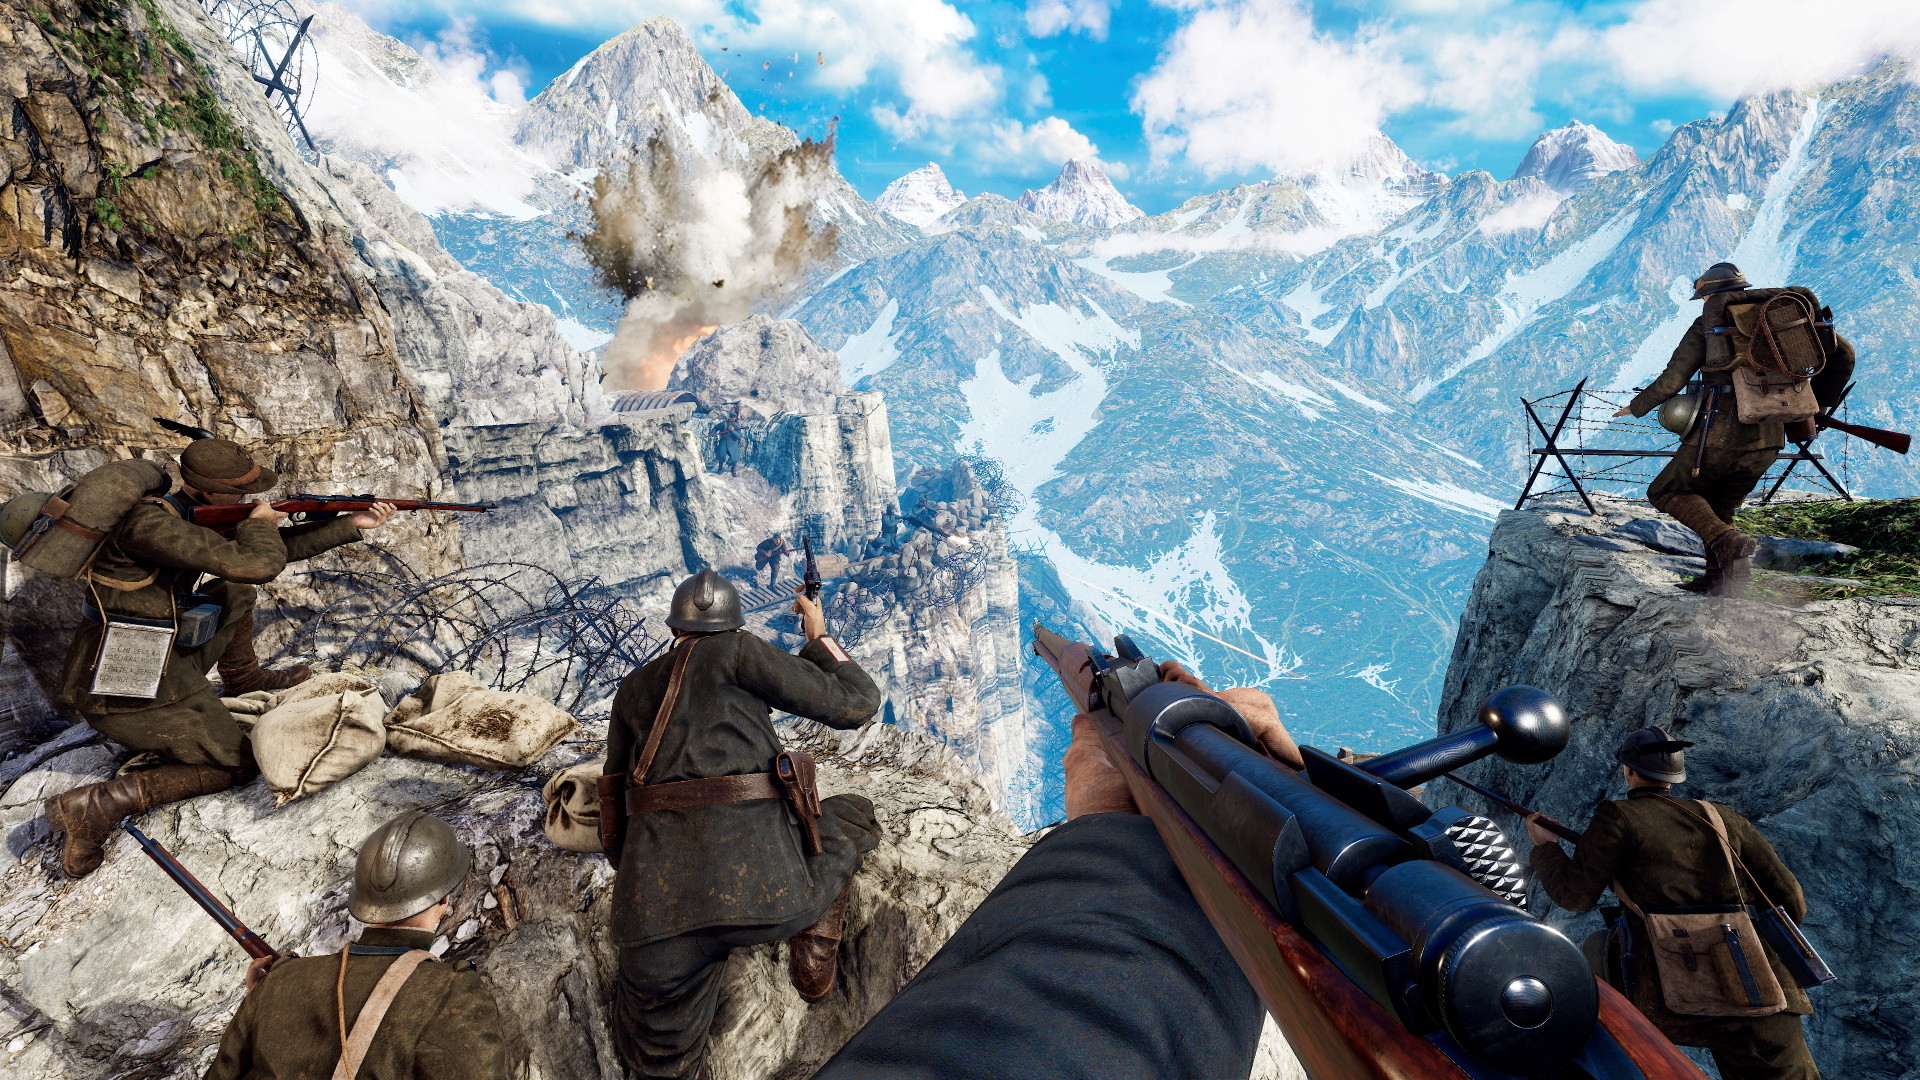
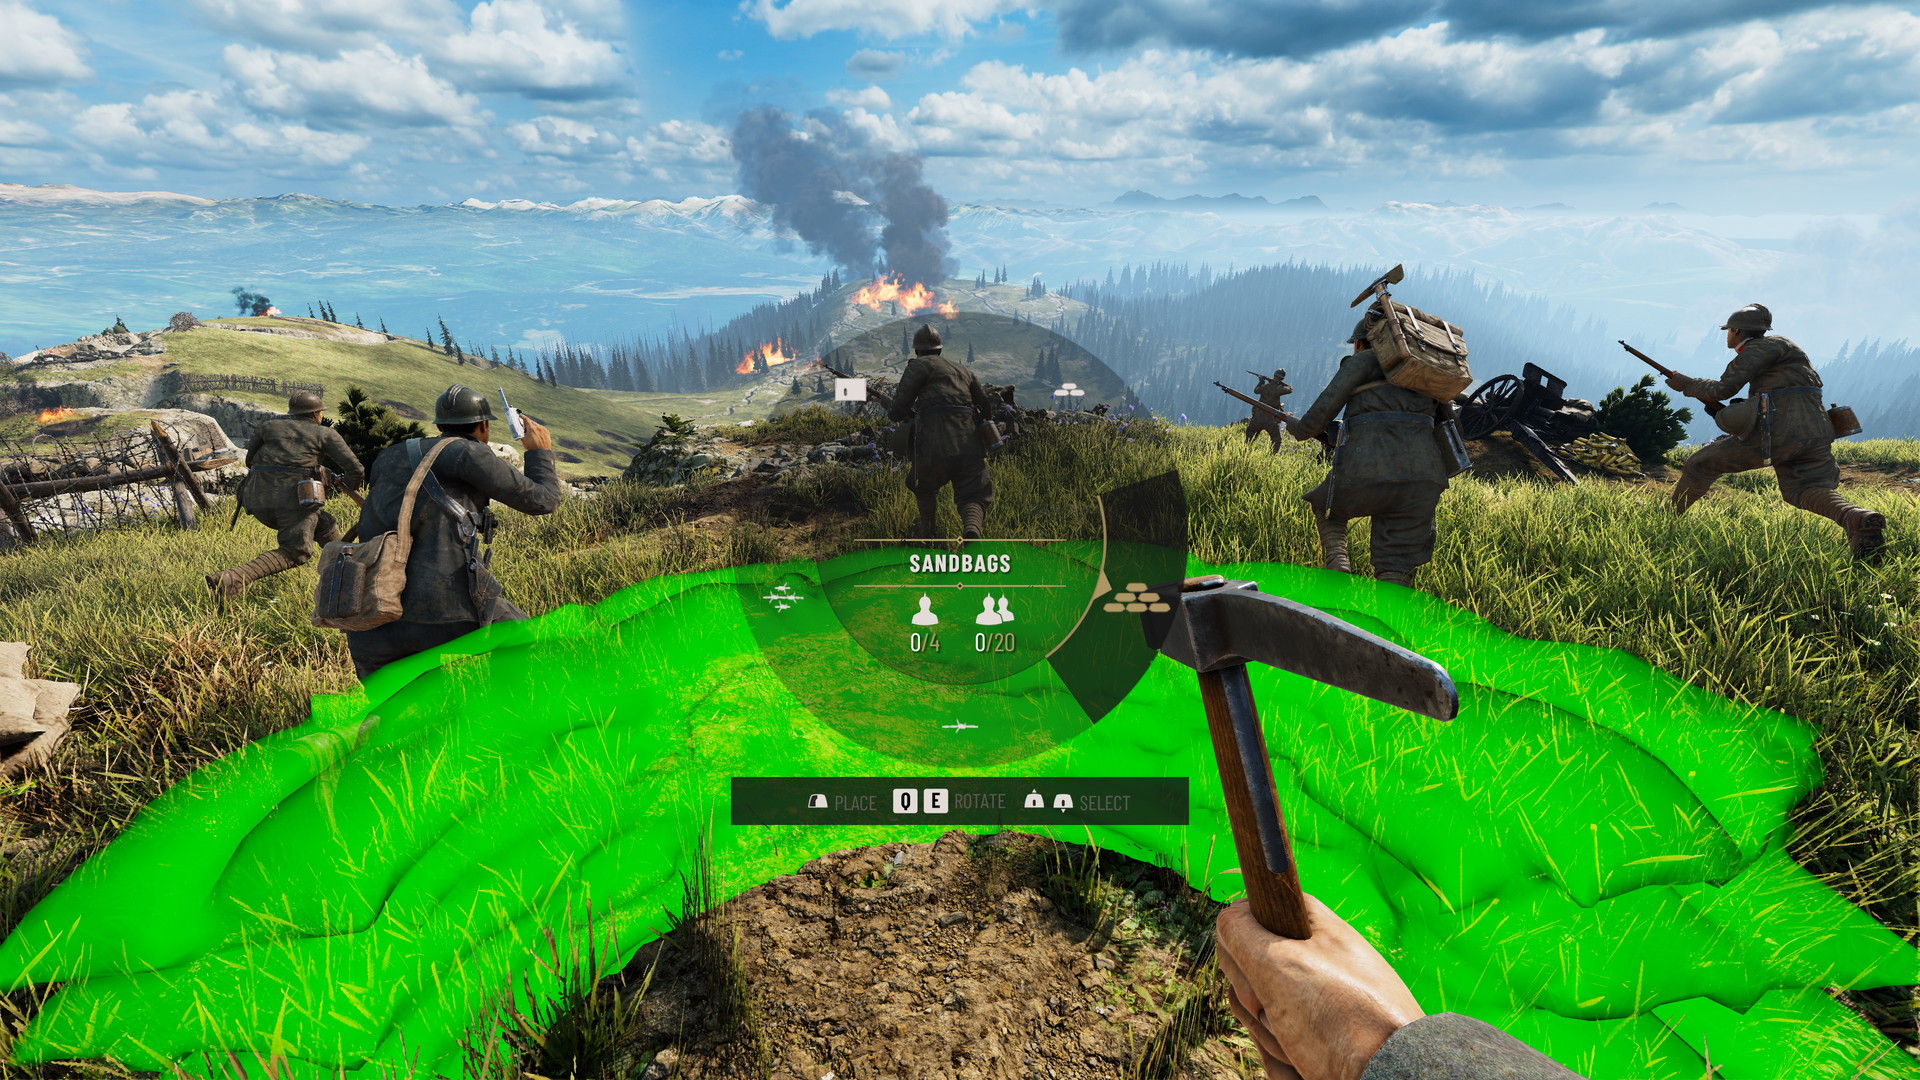
The new Offensive game mode puts you right in the middle of key historical offensives on the Italian Front. Lead the charge across stunning Italian landscapes as you choose your path to victory - cut paths through barbed wire, flank your enemies by following mountain trails, or man a mortar to blast a way through. Shape a dynamic battlefield by laying sandbags and wire, placing ammo crates, deploying trench periscopes or sniper shields, and more.

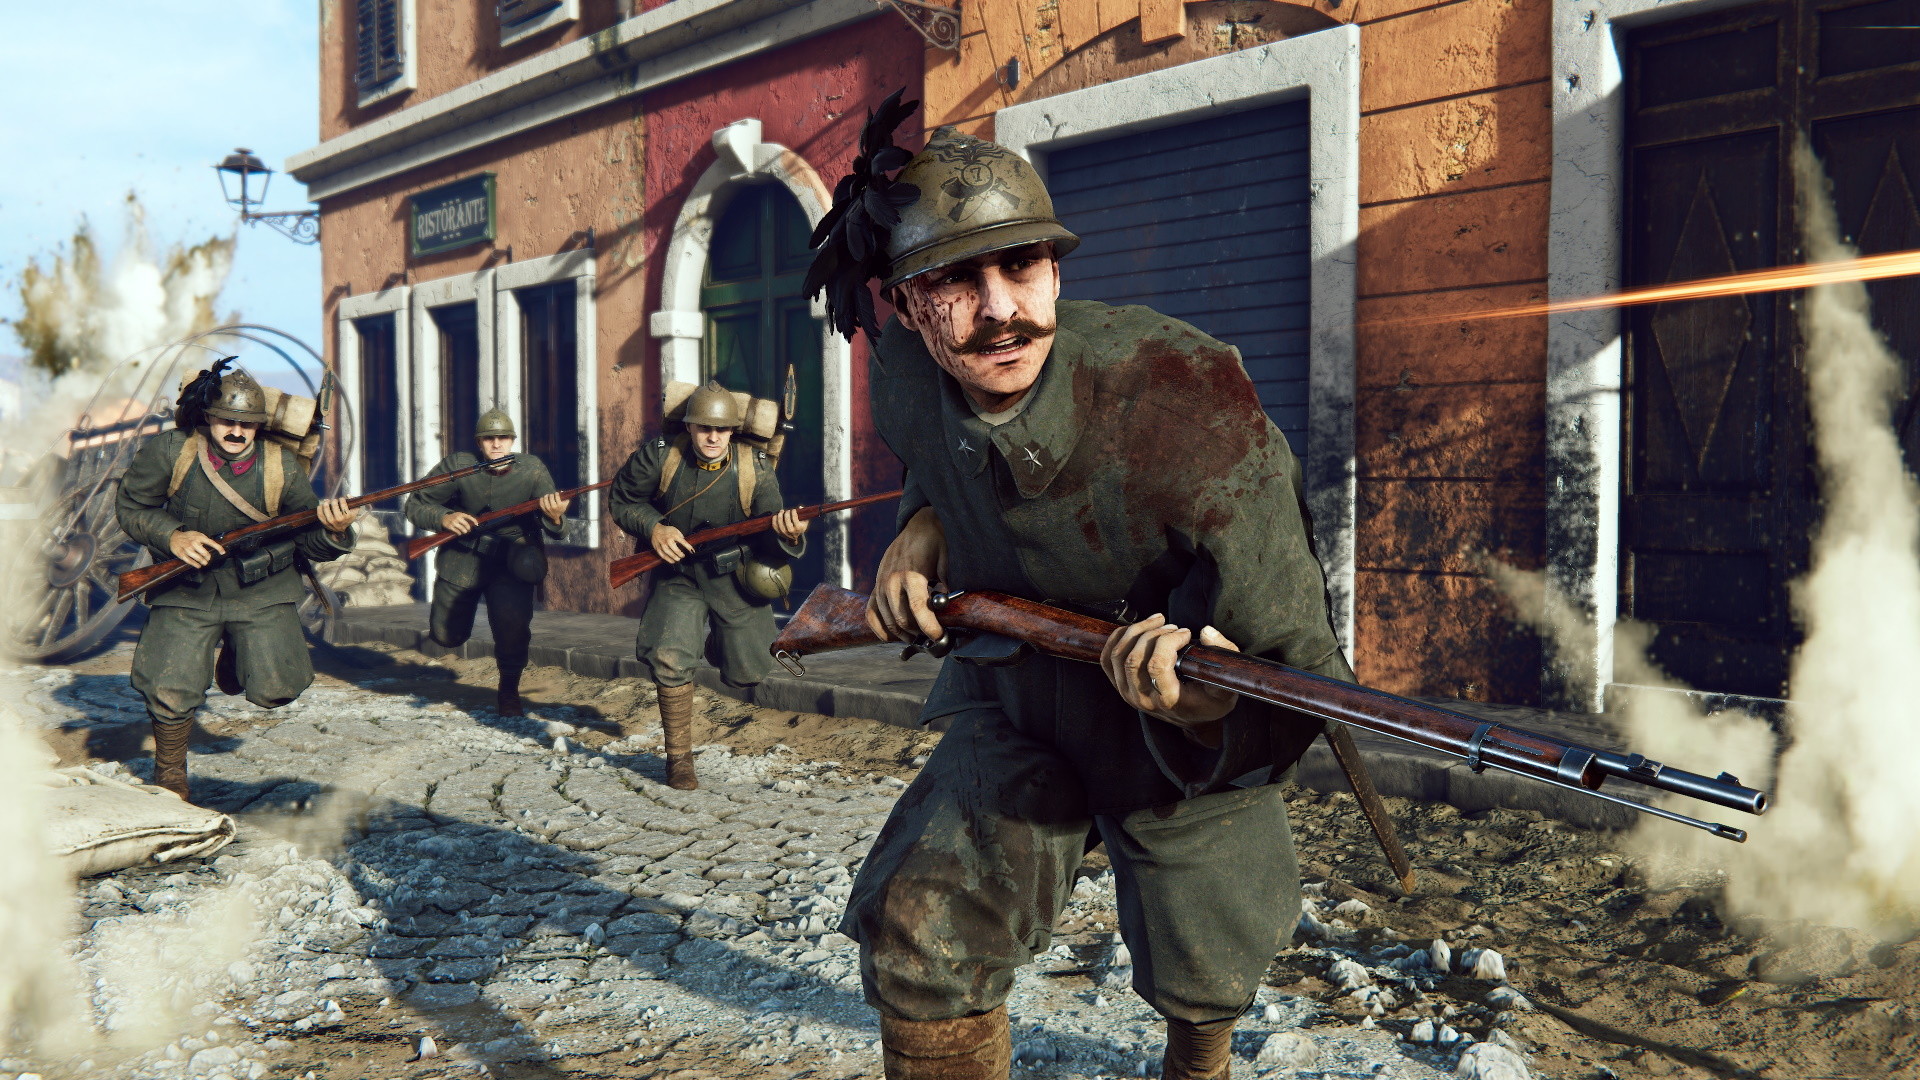
Take part in historical offensives from the Sixth Battle of the Isonzo to the Strafexpedition. Reflecting the course of the actual battles, as the attackers advance the fighting will shift through vastly different landscapes within a single offensive: from hillside fortresses to mountain trenches and fierce urban combat on city streets. Everything is recreated based on research and field trips, from sound effects and uniforms down to the houses, vineyards and trenches you’ll be fighting over.

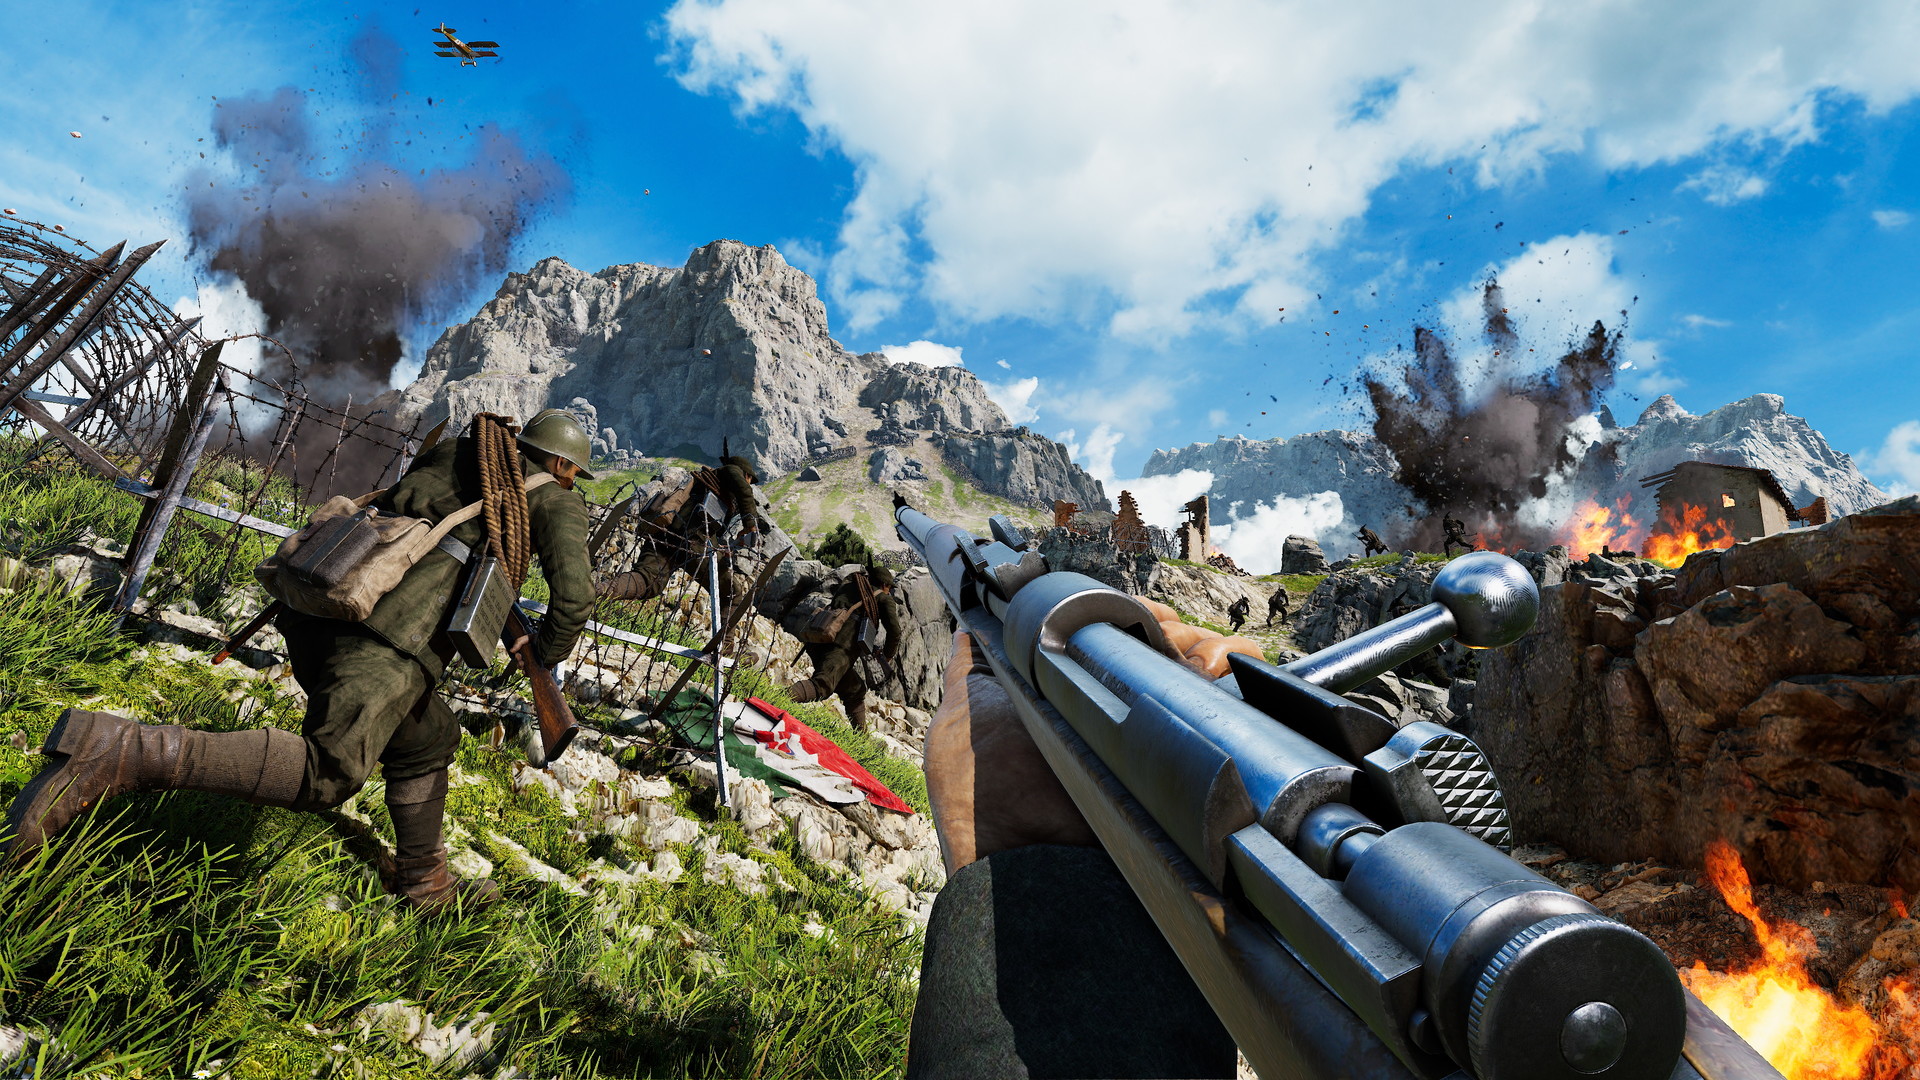
Call in support with a unique historically accurate flare system: flare guns can mark targets for artillery or biplane flybys, or different colored flares can be used to guide your team. Once the big guns have softened up the enemy, finish the job at close quarters with an Arditi dagger or mountaineer’s pickaxe. Man heavy machine guns, mortars and even mountain guns for more direct fire support.
Choose from six classes based on historical combat roles and build your loadout from a selection of weapons, equipment and perks linked to that class, giving flexibility and variety while staying grounded in what real soldiers might have carried. You’ll be operating wire cutters, bandaging yourself and wounded teammates, and blowing the whistle to start an assault. One shot can kill and even lighter injuries can lead to quickly bleeding out.
Being an effective soldier in Isonzo is not just about being a good marksman. Mastering the terrain is also key - the mountain can be a friend or foe. Learn how to navigate well to maintain cover and surprise your enemies or support your allies.
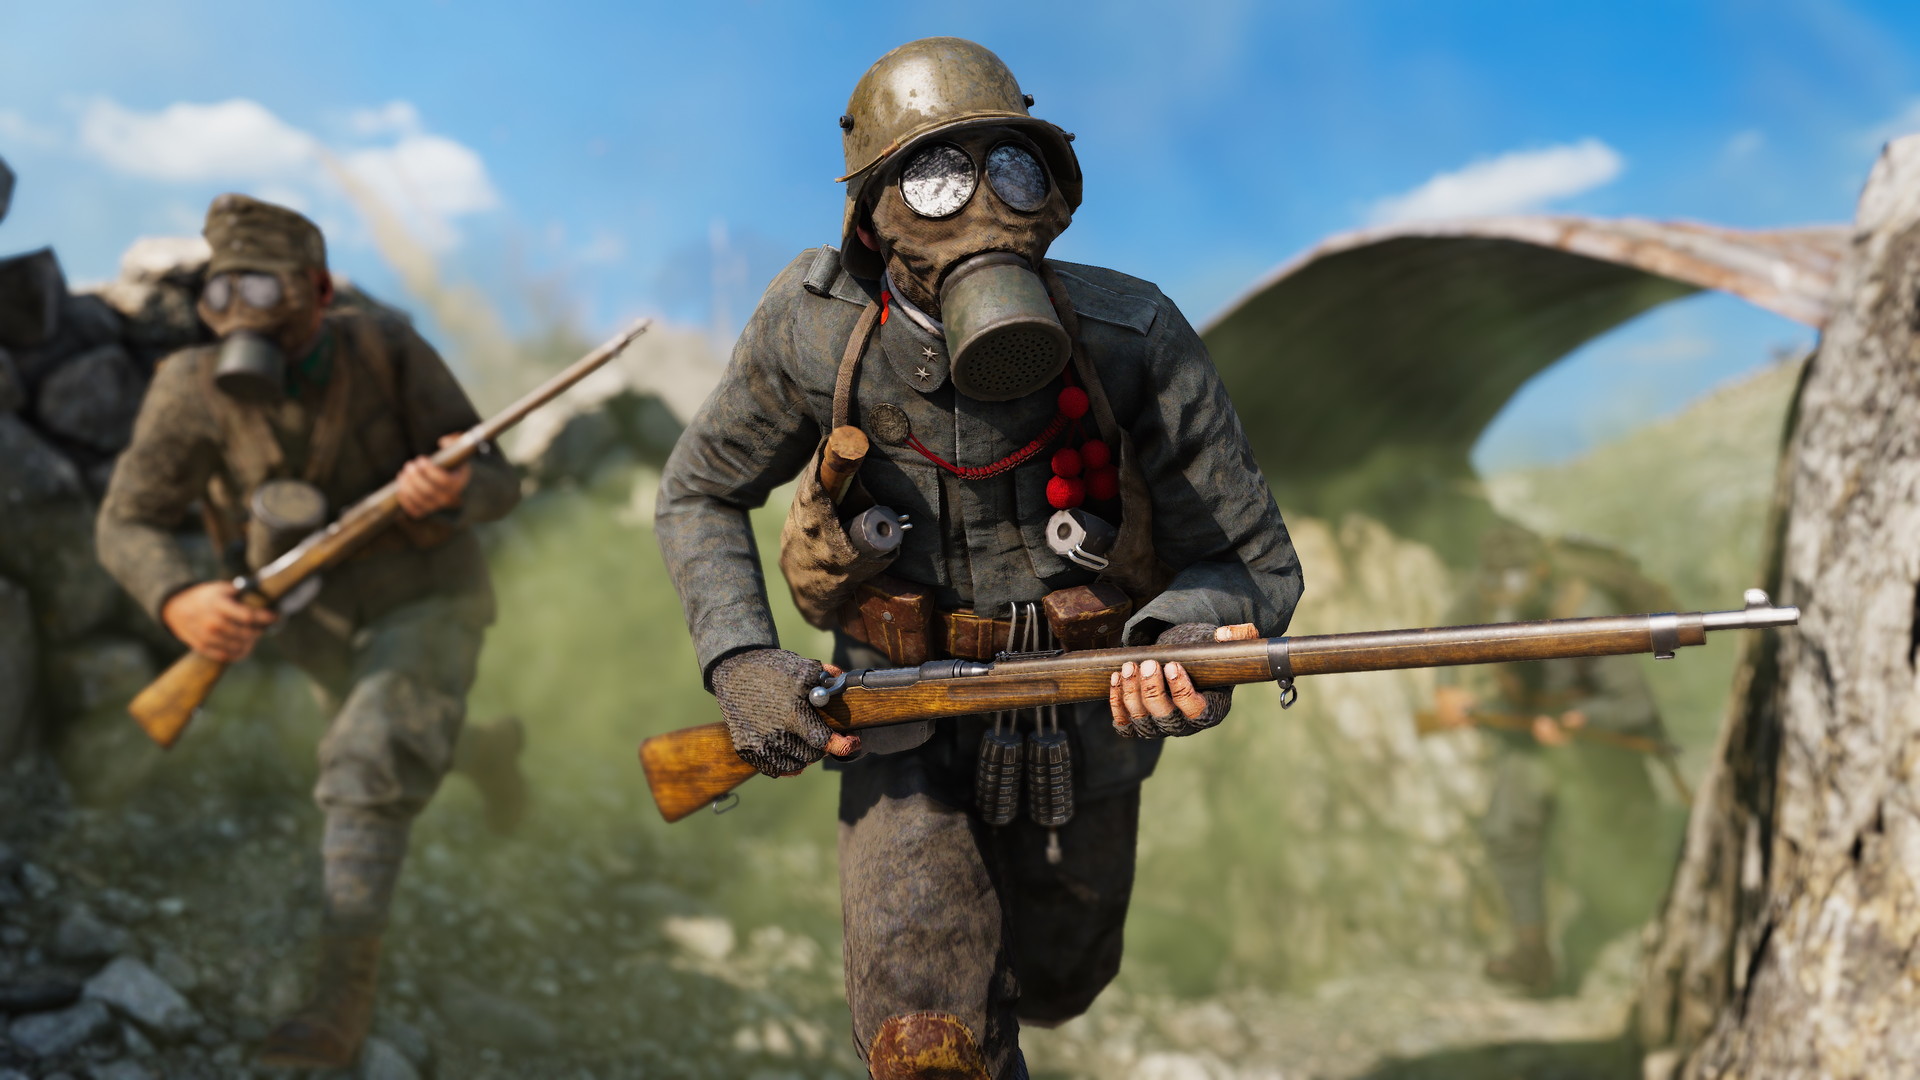
Finally… watch out for the dreaded poison gas. You’ve never experienced WW1 action quite like this!
Isonzo key features include:
- Mountain warfare: Assaulting mountain fortifications, battling through ruined towns, and fording rivers are just a few of the challenges you’ll face as you fight your way through numerous enemy positions
- Tactical multiplayer FPS: Choose your role and loadout carefully to survive this high altitude combat - play a sniper to pick off the enemy engineers before they can cut your wire, use rifle grenades to clear enemy machine guns, and much more
- World War One Gameplay: Historical Offensive game mode based on real battles and focused on the unique challenges of Alpine warfare. Fight with 30+ WW1 weapons, poisonous gas attacks, and intense artillery barrages
- Build for victory: Place your own wire, sandbags, trench periscopes, and more! Whether you’re digging in or on the attack, shaping the battlefield to your advantage will be key to victory
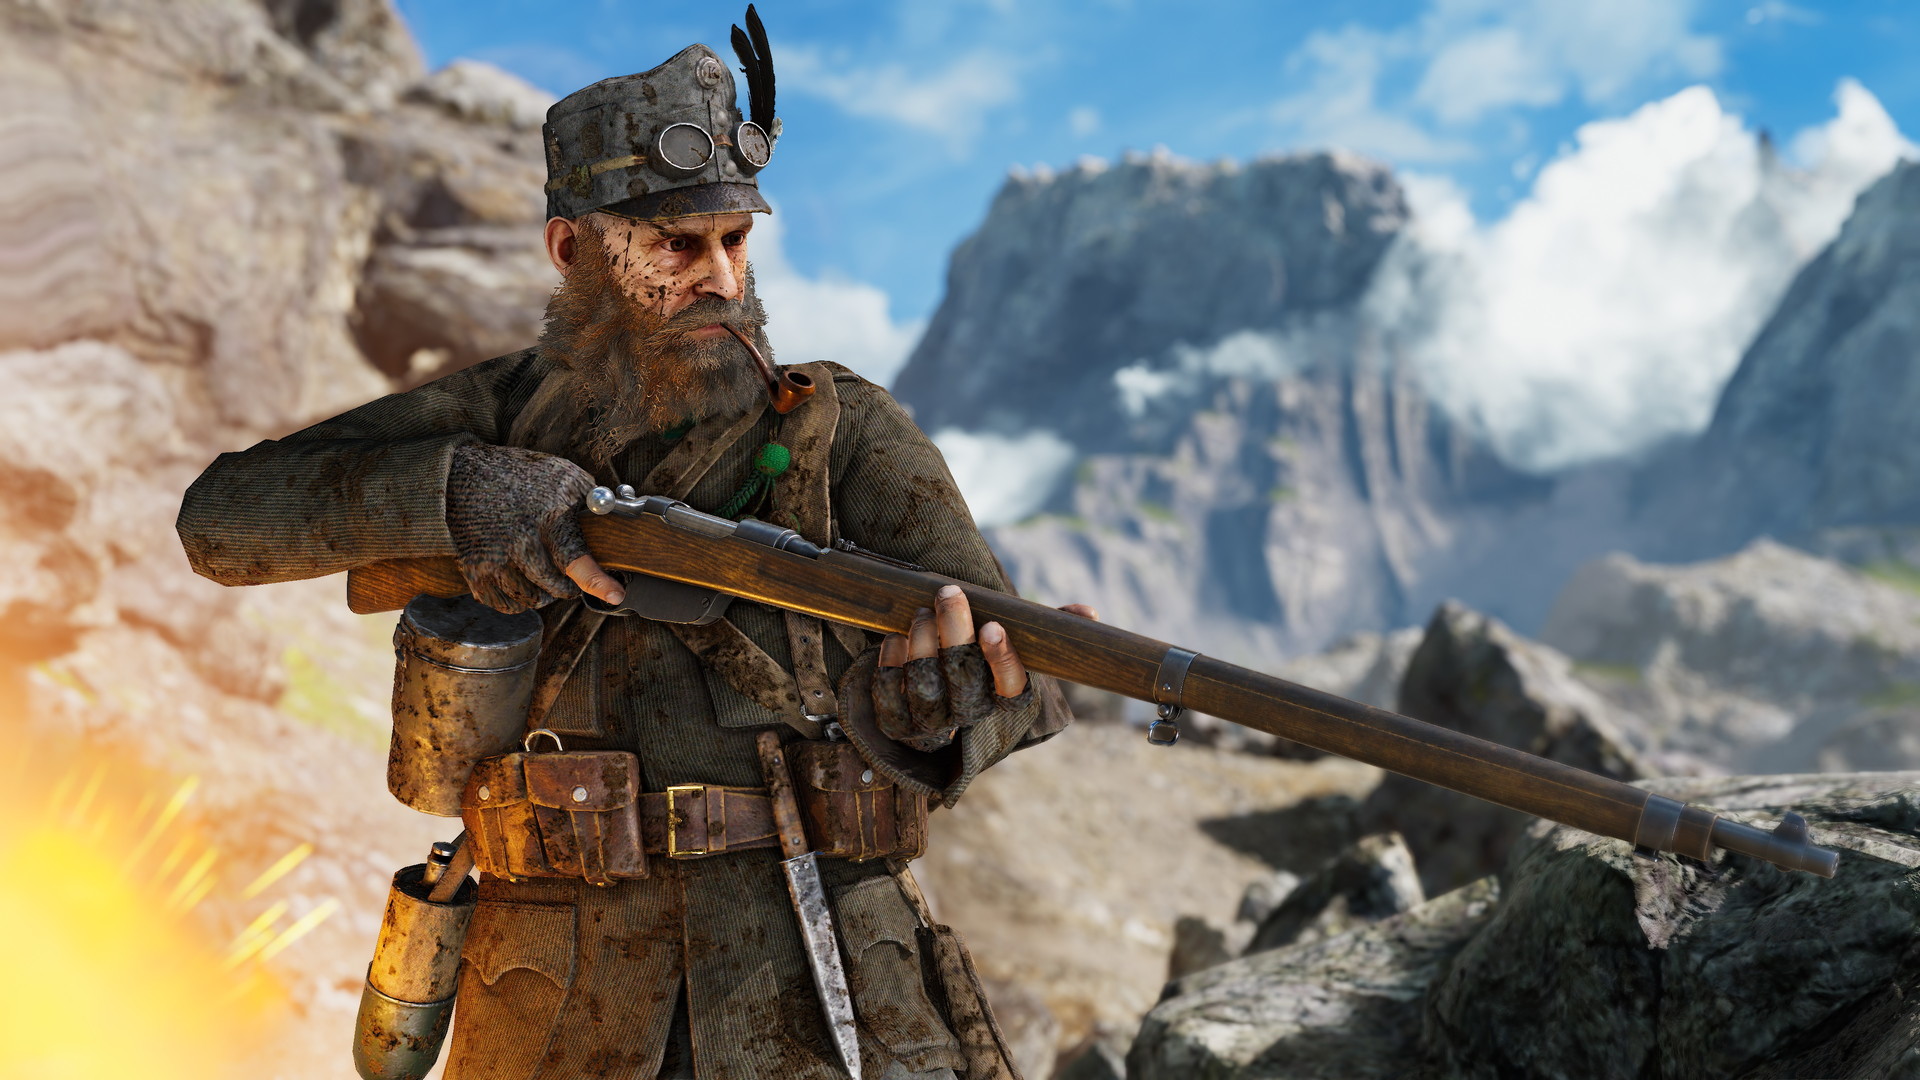
- Faces of war: Make every class your own by picking from a variety of historically class-appropriate uniforms, accessories and headgear. As a finishing touch, you can even pick your mustache from several famous period-accurate styles!
- Authentic WW1 atmosphere: Accuracy in everything from maps and weaponry to music and the uniforms – fight for the Kingdom of Italy or the Austro-Hungarian Dual Monarchy
More Games in the Authentic WW1 Game Series
Immerse yourself in more WW1 action with our other standalone titles Tannenberg and Verdun. Experience trench warfare on the Western Front in Verdun, or maneuver for control of key sectors in Tannenberg on the Eastern Front. These authentic WW1 shooters let players choose from a range of squads from across the war, as they fight for control of the ever-changing frontlines.
🎮 Full Controller Support
- K Station Windows Content [17.84 G]
In May 1916, Austria-Hungary launched a large offensive operation attacking across the Vicentine Alps into the Autonomous Province of Trento (known as Trentino). Despite their German allies refusing to assist with the attack - and even going so far as trying to dissuade General von Htzendorf from carrying out the plan - the Austro-Hungarians massed thousands of guns and hundreds of thousands of men. If they managed to break through they would be in a position to outflank all the Italian troops fighting along the Isonzo river. This was called the Strafexpedition - punitive expedition - intended to punish the Italians for their betrayal of the Central Powers when they went against an earlier defensive agreement to join the Entente instead.
Facing them was the Italian First Army. Low on manpower and lumbered with some poor quality officers, the Italian defenders did not see the attack coming. The Strafexpedition did not come as a surprise to everyone though! The Italians did have intelligence suggesting a major offensive aimed at Trentino was in the works a month ahead but General Luigi Cadorna refused to consider the possibility since it went against his own thinking.

Many WW1 generals get sometimes unfair criticism for their performance when you consider the unprecedented scale of the war and the new technologies used. Luigi Cadorna was not one of them, and can be criticized for a great number of things.
In Isonzo the Strafexpedition is a two map offensive, of which Fior is the second map, named after the mountain which is the focus of the attack. The final objective is the Fior Peak, which stands at 1824m high (5984ft). An interesting feature of the area is the unusual limestone formations called the Citt di Roccia (or city of rock). The Austro-Hungarian attackers will need to fight their way through these to reach their final objective at the peak of the mountain. But climbing a mountain takes time, and before they get anywhere near the Citt di Roccia there are two other defensive lines to break

Photograph of the Citt di Roccia today.
The Austro-Hungarian attackers must first storm a forest to sabotage a gun position and capture a command post. The attackers begin sheltered in a treeline, but will need to force their way across a road and strip of grass before they can reach the shelter of more trees. Fortunately (for some) a convoy has been ambushed and destroyed on the road, providing useful cover in addition to the low stone walls running along the road.

The devastated convoy - the attackers are coming from the left side of this view.
Trenches and barbed wire positions lie throughout the forest on the other side of the road - some are proper dugouts with weapon emplacements and forward spawn points, while others are little more than rows of sandbags piled atop banks of dirt. The forest and undergrowth present on Fior mean its important to understand the distinction between cover and concealment: rocks, sandbags and fallen logs provide cover that will protect you from bullets, while the tree leaves and plants will conceal you from the enemy but not save you from gunfire or shrapnel.

Some of the Italian defensive positions in the forest.
One objective calls for the Austro-Hungarians to sabotage one of those forest defensive positions, but the other is a capture objective set among a trio of houses on the wooded slopes. The houses and stone walls are potentially a major challenge for the attackers, especially since the buildings are intact and will offer good shelter from artillery and aviation call-ins.
The hillside houses - the one on the right contains the command post.
However, should the attackers gain a foothold it may not be easy for the Italian defenders to counterattack. The main house has two stories, with the top story including windows facing towards the Italian positions - an excellent spot for an LMG! Additionally defending reinforcements are forced to route around the side of the house, or go down a narrow set of steps which could easily be blocked by wire or become a killing zone if a few enemies are watching it.

Viewed from above - you can see the narrow stairway down between the two closest houses.
The second defensive line also has one sabotage and one capture objective. Before reaching those is more forest, much of it heavily shelled and devastated (including a ruined building) and a series of forward spawn points. As always, its up to you and your team how much effort you want to put into dominating the forward spawn points - if the defenders are putting too much manpower into holding their forward spawn point, you might be able to sneak past and hit the main objectives while facing less resistance!
Defensive positions overlooking a shelled area of the forest.
If the Austro-Hungarians conquer the first two lines, before them lie those distinctive limestone cliffs, the Citt di Roccia. Well get to them along with the final two defensive lines in our next blog post, and you can see them at the end of this first half of our Fior Flyover video!
Isonzo goes to Germany
One more thing this week - were happy to announce that the WW1 Game Series team will be attending Gamescom in Cologne, Germany! This will be our final big event before Isonzos release so its going to be extra exciting for us! This time, were highlighting Isonzo especially for the press/media and content creators - so if youre attending Gamescom on business related matters, be sure to come find us at the Netherlands Pavilion | 4.1 A021g - B030g.Furthermore, we'll showcase something special at Gamescom besides of our first hands-on for the press, so be sure to keep an eye out for the Gamescom live streams and our social media!

Dont forget that Isonzo is available for wishlisting ahead of the September 13th release!
https://store.steampowered.com/app/1556790/IsonzoMinimum Setup
- OS: Requires a 64-bit processor and operating system
- Processor: Intel Core 2 Quad Q9550Memory: 4 GB RAM
- Memory: 4 GB RAM
- Graphics: NVIDIA GeForce GT 640
- Storage: 20 GB available space
Recommended Setup
- OS: Requires a 64-bit processor and operating system
- Processor: Intel i7-4770Memory: 16 GB RAM
- Graphics: NVIDIA GeForce GTX 1050
- Storage: 20 GB available space

[ 6362 ]
[ 5873 ]
[ 1991 ]
[ 1943 ]
[ 988 ]

Time left:
356099 days, 6 hours, 27 minutes

Time left:
356099 days, 6 hours, 27 minutes

Time left:
3 days, 14 hours, 27 minutes

Time left:
31 days, 14 hours, 27 minutes

Time left:
34 days, 14 hours, 27 minutes

Time left:
35 days, 14 hours, 27 minutes

Time left:
9 days, 0 hours, 27 minutes
Time left:
4 days, 8 hours, 27 minutes
Time left:
10 days, 8 hours, 27 minutes
Time left:
11 days, 8 hours, 27 minutes
Time left:
16 days, 8 hours, 27 minutes
Time left:
18 days, 8 hours, 27 minutes
Time left:
22 days, 8 hours, 27 minutes

Time left:
1 days, 21 hours, 28 minutes

Time left:
6 days, 14 hours, 28 minutes

Time left:
8 days, 13 hours, 28 minutes
Time left:
13 days, 20 hours, 38 minutes


