

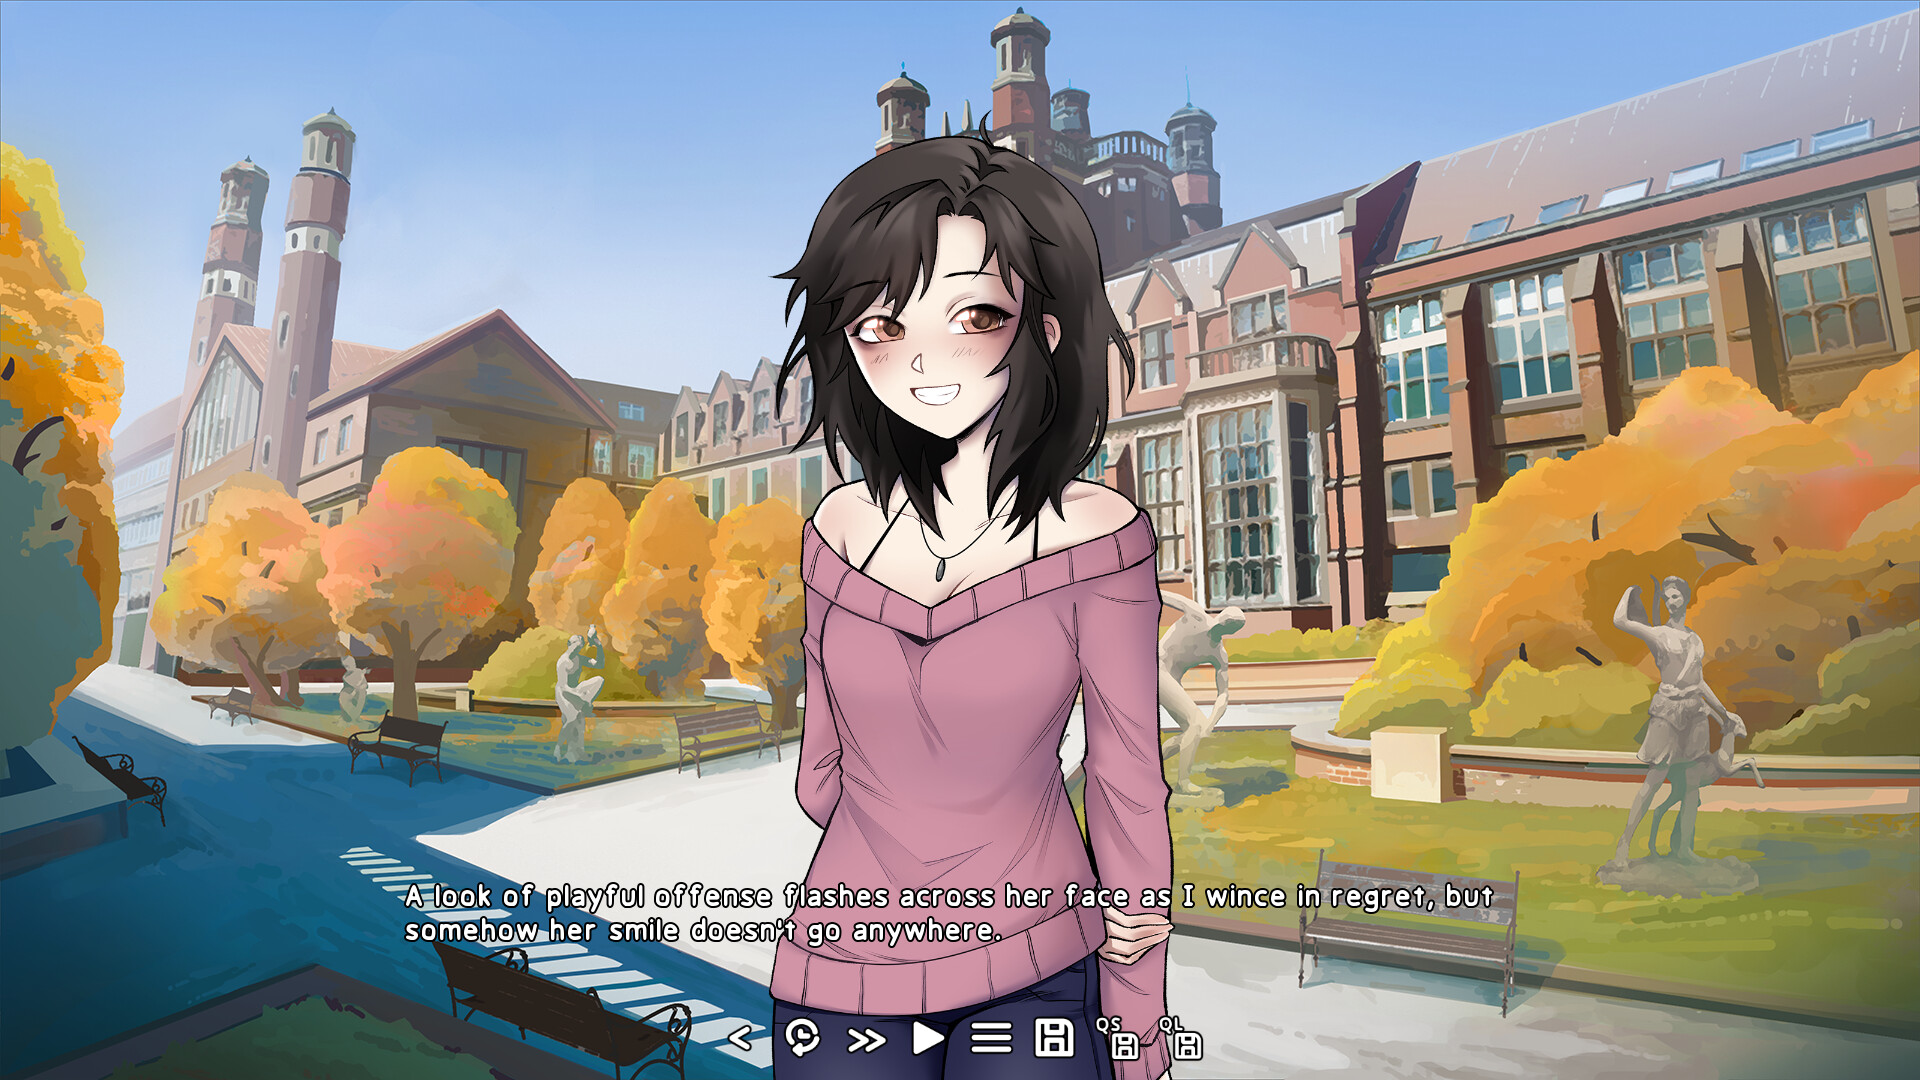


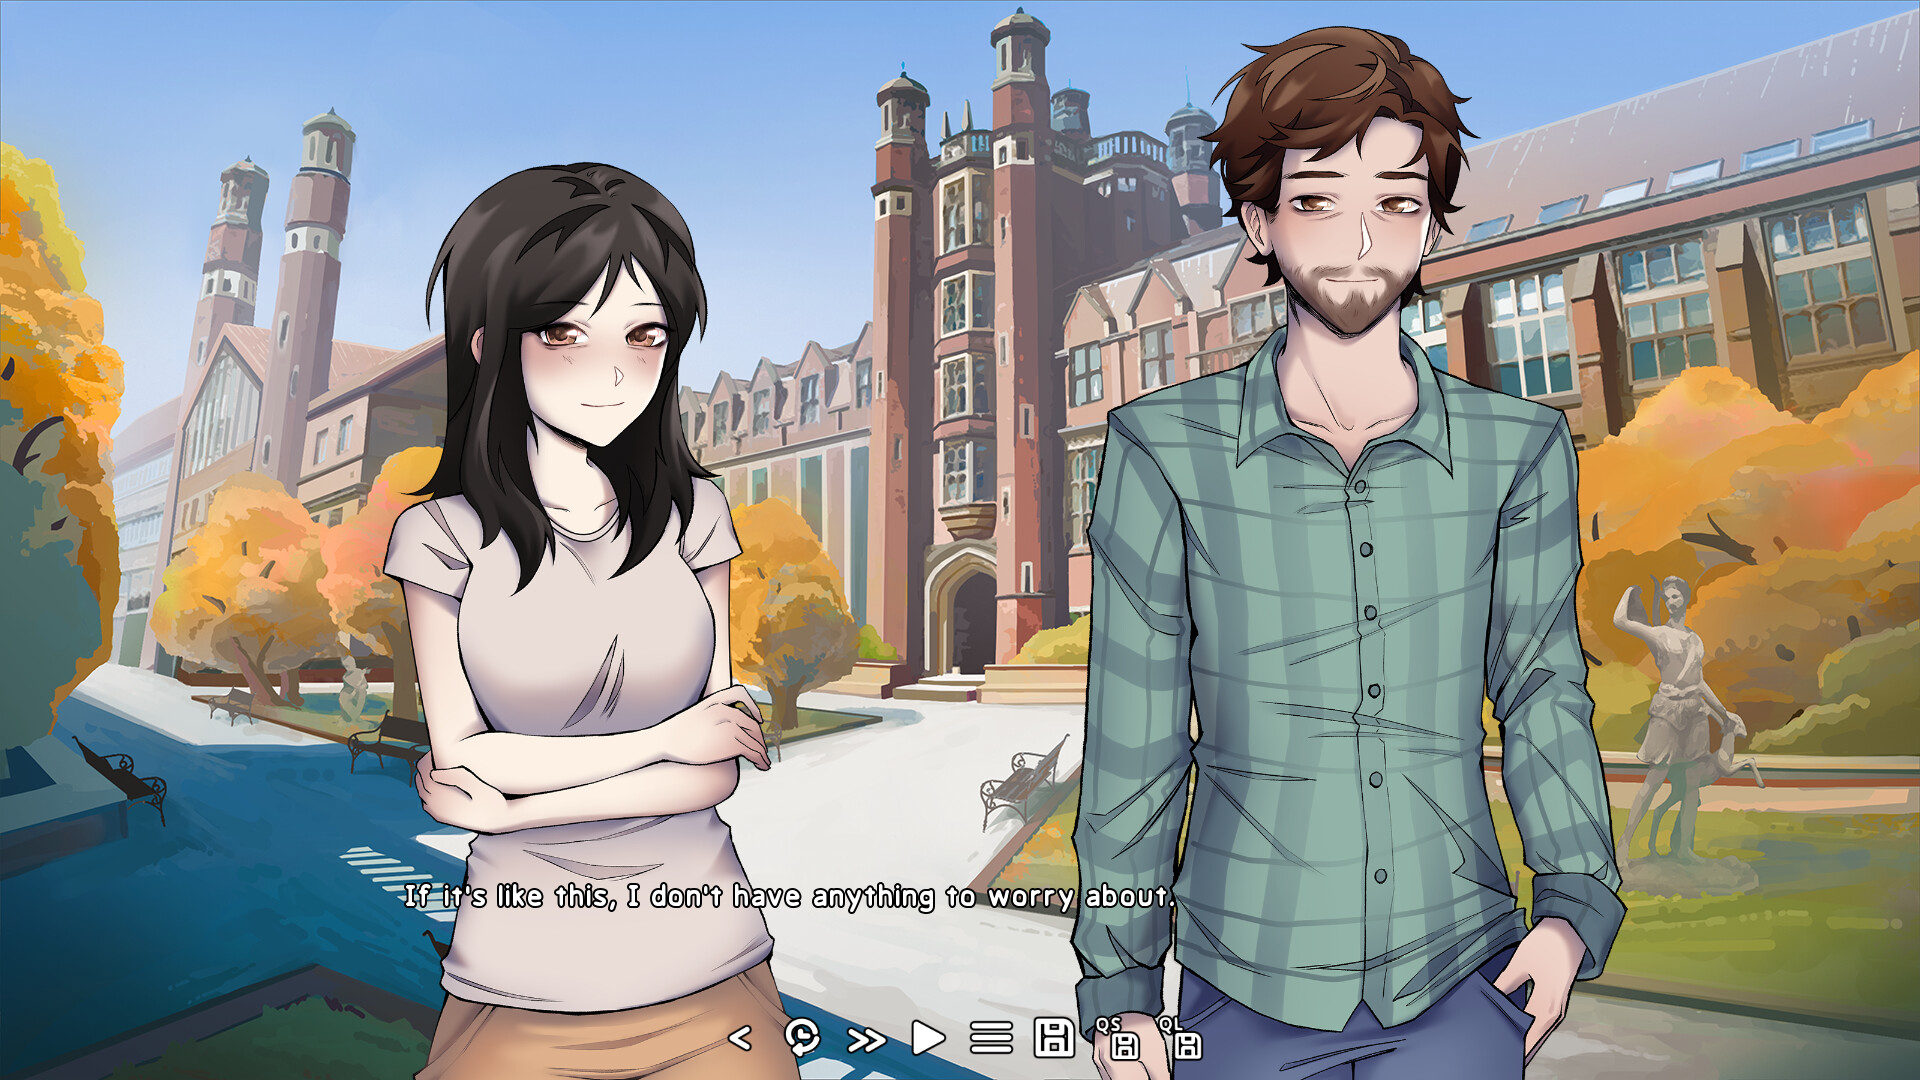
Alex's Journey to the Grave is a visual novel about a boy trapped by fate and a girl in dire need of a friend. Help guide them through some of the hardest decisions of their lives as they experience warmth, connection, tragedy, the inevitability of death... and the antics of a mysterious black cat.
Development Status
The full game is currently still in early development, but a 15,000 word or ~1.5 hour long polished demo is coming to this very Steam page in the near future!
Please note that much of the background art in the screenshots is still in progress.
Features
- Immersive and intensely emotional storytelling
- Hand-drawn character and background art
- Emotionally driven original soundtrack
- 4+ different possible endings
- A cute cat
This visual novel contains dark themes and graphic depictions that may be distressing to many individuals, including:
- Depression
- Anxiety
- Self Harm
- Suicide
- Loss/Grieving
Hello everyone, Duhop here!
This month, I\'m pivoting the devlog away from the specific, technical topics I\'ve been discussing recently. I want to talk about something that\'s helped me tremendously as a game dev, but also has the potential to help pretty much anyone doing anything.
From a game dev perspective, you might\'ve guessed from the title that this is an article about marketingbut you\'d be dead wrong. There\'s a reason I emphasized it as your community, not your studio\'s or your game\'s.
Human beings are collaborative, social creatures. No matter how independent, introverted, or stubborn one may be, their quality and enjoyment of work or a hobby can almost always benefit from the input of another. Plus, without any interaction at all, they\'re quite liable to lose their motivational steam entirely
The caveat is, though, that their interests, experiences, or motivations need to align to at least a certain extent with yours.
This devlog is about how and where I found those people for myself, and why you should look for yours.
~~~
When I first started Violet Horizons two years ago, I had almost no community to speak of. Not for the business side of game dev, not for visual novel development, and not even for any of my hobbies.
I did of course have communities before that, for various games I used to play and other activities like school, college, etc., but at the time I had pretty much nothing but a handful of friends I only interacted with occasionally.
The first community I gained was the team I assembled. A character artist, two background artists, two music producers, and growing larger since. All great people, and with aligned motivations to make an amazing visual novel!
Already, the collaborative nature of our effort had a massive impact on my motivation to get things done. But despite skills in writing, art, music, and programming, none of us had ever actually, uhh... made a visual novel before.
The second community I found filled that gap for me. The [u]DevTalk [/u] discord server is an incredible hub of activity for visual novel and narrative game devs all around the worlda goldmine full of people with interests and experiences mirroring my own! It\'s hard to even put into words how helpful it has been even on just a psychological level to be in this server and see all my fellow VNdevs putting in so much passion and effort into the same discipline I\'d been going at completely in the dark beforehand. It\'s so big and active it\'s almost overwhelming, but I\'ve never once regretted getting stuck in a conversation there about the intricacies of topics my prior self would\'ve hardly even believed anyone else ever thought about.
I would extend this bubble to include the [u]Ren\'Py [/u] discord server as well, for the more technical side of my VNdev experience. The Ren\'Py community is incredibly open and welcoming, and you will almost always find someone willing to spend some time helping you get over that one last pr ogramming hurdle you can\'t seem to crack on your own. Seriously, many of AJG\'s awesome custom features never would\'ve been possible without their help!
At this point, I had a community. But it was all online; it felt far away, like I was the only member in a thousand mile radius, and not without good reason.
I live in Winnipeg. A mid-sized Canadian city quite literally located directly in the middle of absolutely nowhere, 1200 kilometers or about 750 miles from the next major city in the country, and a frozen wasteland colder than any other settlement of its size outside of northern Siberia.
I\'d never heard of a local game dev community other than a Ubisoft office and a couple small 3rd party developers. For a long time, I kind of just assumed there wasn\'t one.
Imagine my surprise when I came across the Winnipeg Game Collective, a discord server with over one thousand members that runs monthly local meetups, post-mortems for successful local indie games I\'d never even heard of before, and massive yearly game jams with hundreds of participants.
Oh yeah, by the way I took part in one of those. I helped make a cute little game called [u]Zlorp Life [/u] about a sentient microscopic creature forced to battle to the death with pathogens in the cruel name of [strike]capitalism [/strike]science.
My discoveries didn\'t end there, either. Through WGC, I also found out about New Media Manitoba, a non-profit organization dedicated to supporting the growth of the local film and interactive digital media industries. Interactive digital media includes video games, of course, and they run a program called the GameBiz Lab specifically to help new studio owners learn and grow the business side of their endeavors.
In other words, specifically to help people like me.
...
How did I not know about this earlier?!
Since then, NMM\'s GameBiz Lab has allowed me to join a local cohort of new studio owners in almost the exact same position business-wise as me, give or take a couple months/years of progress and experience. It\'s filled in the previously empty gap of a gamedev-business-focused community perfectly, especially considering the local relevance which is incredibly important for this context!
In fact, NMM and the friends I\'ve made there have gone far above and beyond just the social duties of a community to support me. Earlier this month (November), their support allowed me to attend the Montreal International Game Summit, an event I never would have been able to consider attending otherwise.
NMM generously provided a free ticket to the conference, a food allowance, and a 50% reimbursement for all other event-related costs. When even that wasn\'t enough to convince me, a couple of my friends from the GameBiz Lab invited me to attend along with them and crash for free on the couch of their AirBnB. What could I do but cave when all I had to pay was half the cost of airfare for a trip to the very heart of Canadian gamedev?
At the conference, I attended presentations by developers, publishers, and others from all across the globe, and made direct connections with some incredible localizers that I\'m doubtful I ever would have had the chance to connect with otherwise.
The highlight for me, though, was a tour of the Montreal-local Indie Asylum, organized through my connection to NMM.
[img src=\"https://cdn.cloudflare.steamstatic.com/steamcommunity/public/images/clans/45100000/6939bb49d87729f9d8ac2ad57ef4aabbfdeda746.jpg\"][/img]I\'m second from the left in the bottom row here between my friends Sasha and Annie from Prairie Interactive!
Indie Asylum is a collection of indie game studios that share a physical space, pool resources such as equipment and support staff, and support each other through difficult times. To me, it\'s the singular brightest-shining example of community that I\'ve ever heard of in my life.
After a tour through their incredible space and a long talk about how their collaboration works, I was honestly a little stunlocked by the non-profit organization\'s very existence. Indeed, according to them and as far as I could verify, there\'s no other place quite like it in the world.
I\'m jealous. Someday, if I ever find it feasible, I want to help start something like it in Winnipeg.
Anyway, I think I\'ve rambled enough about the communities I\'ve found centered around game dev. I said this was a topic that could potentially help anyone, right?
These past few years, I\'ve struggled a lot with some of the issues that come with physically sitting your ass at the computer all day. I\'ve never been one particularly motivated to exercise, or excited about participating in team sports, and both my hobbies and work were all on the computer for far too long.
I finally managed to change that at the start of this year by picking up rock climbing! Exercise for the point of exercise is boring, painful, and constantly makes me feel like I want to stop doing it, but climbinglike gamingengages my brain in a way that no other sport or physical activity ever really has for me.
Climbing has been a well needed addition to my life to get me outside and moving. For the first time pretty much ever, I actually feel motivated to push my body to its limits, and somehow even find myself having fun doing it! Combined with physio and massage therapy, it finally has me feeling like I have a functional body again.
Plus, my fingers and forearms are strong as hell now, and I can crank out half a dozen pull-ups when I previously couldn\'t even do one!
So what does this have to do with community?
Well, usually when I climb, I just go to the local bouldering gym on my own. Talking, climbing, and trying to figure out problems together with other gym regulars is a lot of fun and the highlight of most sessions, but I eventually found myself wanting more.
I scratched my head for a long time trying to think of how to become more immersed in the climbing community, once again hindered by the Winnipeg problem. All we have is a couple of commercial climbing gyms with occasional community events, right?
Nope! Through a family friend that\'s also into climbing, I found out about the Alpine Club of Canada\'s Manitoba section. Turns out, they do a whole bunch of awesome stuff for members that I\'d never even heard about, like run a huge outdoor climbing and ice climbing tower free for them to use throughout the year, free educational courses, and free guided climbing trips to western Ontarioprovided you help to clear some trails and such.
Surprised, I signed up for a membership (which is under $100 annually!), and participated in the last Fall climbing trip for the year.
It was amazing. Everyone involved was incredibly passionate and excited to help me out as a newbie outdoor climber; unlike the gym who does it at least partly to make money, for them it was nothing but a genuine love of climbing and a pure-hearted desire to see the community grow further. In return, I had to be socially engaged as a new member of the community, and help to keep clear the climbing areas they treasure.
I think this example paints a pretty important picture of what community truly is and what you have to do to get the most from it.
If I want climbing, I go to the gym, give them money, and I climb. No socialization is actually required of me.
If I want climbing with community, I go to the gym, give them money, and make an effort to socialize while I climb. I won\'t necessarily be successful every time, because that\'s not what everyone is there for, but there\'s a good chance some will reciprocate and I will find success eventually.
If I want community climbing, I join the club, do my fair share helping out with volunteer work, and climb. At least some level of socialization is required from me; this is a social agreement, not a business transaction. However, I could just do the bare minimum and focus mostly on the climbing if I really wanted to.
If I want community climbing with community, I join the club, do my fair share helping out with volunteer work, and make an effort to socialize while I climb. I will almost always get engagement back for the effort I put in, and most likely even extra while I\'m still a new member.
Essentially, you have to put in at least some effort to enjoy the benefits of community. There\'s no guarantee of success when creating a community from nothing, but there is a guarantee of failure if you never even try in the first placelikewise, if you don\'t put enough effort into engaging with an existing community, you won\'t be able to reap the full rewards of its membership.
My biggest takeaway is that you shouldn\'t just assume a community doesn\'t exist because you\'ve never seen or heard of it. Look for it! You might be pleasantly surprised by what you find!
Community doesn\'t need to be large, or have a specific theme or purpose to it either. If you have a friend group, that\'s community, andthough it will inevitably start smallyou can even build your own from scratch if you make sure to put in the effort.
Sometimes, all that effort really entails is engaging with someone earnestly.
[p align=\"center\"][img src=\"https://cdn.cloudflare.steamstatic.com/steamcommunity/public/images/clans/45100000/1c1f148dd4cf8bc61532bd4944adb13369e6055f.png\"][/img][/p]Opportunities will often come to you at unexpected moments. It\'s up to you to take advantage and follow through on them.
-Duhop
Duhop here, back again with another devlog for October!\n
I\'ve recently been working on putting some of our new sprite assets to use, so this month I want to talk about a surprisingly simple part of the process that really brings the characters to life.\n
Also because seeing the before and after of this step really makes me happy :D\n
A lot of this might seem obvious to an experienced developer, but I think the most useful way for me to write devlogs on topics like this is probably just to explain everything I wish I knew when I first went into it myself.\n
So! Here\'s a quick look at a short, unfinished scene that I recently did the character expressions for:
[img src=\"https://i.imgur.com/ppgyMQs.gif\"][/img]
What sticks out to you at first glance?\n
If you\'re anything like me, probably the fact that Jenna\'s sprite doesn\'t move an inch throughout the entire scene. Obviously it looks a whole lot better in real time, but that utter lack of movement is still played out to the viewer, subconsciously boring the visual portions of their brains half to death as the scene remains static, expressions grow repetitive, and the dialogue box becomes their only source of engagement.\n
It is supposed to be a visual novel, after all.\n
Well, it\'s easy enough to identify lack of movement as a problem in a scene, but how do you fix it? Interspersing CGs (ideally with dynamic camera movement) or swapping to alternate backgrounds angles are a couple visually fantastic ways to alleviate it, but those are expensive and don\'t actually address the base problem of not doing enough with your sprites.\n
Thankfully, the brain-stimulating movement that VN players crave is only ever a few lines of code away! Ren\'Py\'s [u]transforms[/u] are an incredibly powerful, easy to use, and often underutilized tool for adding much-needed liveliness to your scenes. You might be using them for some things already, but I\'m here to tell you that your creativity is the limit when it comes to making visuals more dynamic with transforms, and you should probably use them more.
Step 1: Visualize.\n
Read through your scene again, and focus on the portions most lacking in on-screen movement. Are there any moments where movement is implied or described through writing/dialogue, but hasn\'t been depicted visually? If not, are there any simple movements you think it would be natural for the characters to make, even if they aren\'t implied in the writing at all?\n
Do you have a movement in mind? Cool, keep it there! For the purposes of this devlog, I\'m just gonna pretend it\'s a character getting bopped on the top of her head.\n
Now, picture how the movement would look like in reality, and try your best to imagine how that movement would simplify down to a static 2D sprite. It might not come easily if you haven\'t done much of this before, but I\'ll have plenty of examples in this devlog that will hopefully help you get into the flow of it.\n
The main thing to remember for this step is that a gross simplification of the movement is still far better than nothing, even if it doesn\'t capture every last nuance of how the character would move in reality. In our head-bopping example, I imagine the character would probably flinch down with just her head, bringing it closer to her shoulders, but we are unable and don\'t really need to capture that nuance anyway.\n
All we need to do is quickly have her sprite move down and back up again, like this:
[img src=\"https://i.imgur.com/yXrGhgB.gif\"][/img]
At this point, you should have an idea of how you want the movement to look in-game.
Step 2: Create a transform.\n
Here\'s the transform I used in the scene above:\n
[c]transform chop:[/c]
[c]ease 0.15 yoffset 15[/c]
[c]ease 0.15 yoffset 0[/c]\n
Adding easeor any other kind of [u]transition [/u]to a transform is what allows you to have it change the position of a sprite in a fashion other than just instantly. In this case, Flora is taking 0.15 seconds to ease 15 pixels down, then 0.15 seconds to ease back up.\n
Ease uses a cosine-based curve to slow down the start and end of the movement, where the simpler transition move would create linear movement that\'s usually much too jarring and mechanical. I pretty much only use ease when making transform animations for sprites, since most other transitions are not really intended for this use case and move looks so unnatural. (Perhaps move could look good if used with a robot/android character?)\n
If you want diagonal or other types of combined movement like with zoom, you can change multiple variables at once with a transition like this:\n
[c]ease 0.5 yoffset 15 xoffset 15 zoom 1.5[/c]\n
You might be wondering how to come up with the right values to make an animation look good, but truthfully, it\'s nothing but experience and professional guesstimation. At first, just put in some random values that seem reasonable.
Step 3: Apply the transform and iterate.\n
Apply the animation transform to a sprite\'s show statement the exact same way you would a regular transform:\n
[c]show flora at chop[/c]\n
OR you can define the transform directly under the show statement if you don\'t intend to reuse it:
[c]show flora:[/c]
[c]ease 0.15 yoffset 15[/c]
[c]ease 0.15 yoffset 0[/c]\n
Chances are it\'s not going to look good right away.\n
If something seems particularly haywire, check the last transform you used on the sprite and make sure you really are starting with the values you think you are. (Personally I always try to keep the x and y offsets at 0 in non-animation transforms so I can always just assume they\'re starting at 0 when making animations.)\n
Otherwise, just slowly adjust the variables and test until it does look good. You\'ll get a whole lot better at guessing and zeroing in variables as you go, and you\'ll quickly build up a library of transforms that can potentially be reused for similar movements in other situations as well.
Step 4: Don\'t forget to continue using poses and expressions at the same time.\n
So after fiddling with the variables for a while, you now have your animation looking as you imagined it. However in our case, the full effect of the head chop in the gif isn\'t finished yet.\n
As you can probably guess, transform animations aren\'t at their best unless used together in harmony with the rest of your toolbox for character movement and expressiveness as well.\n
In this case, combining the transform together with a change of pose and expression, like this:\n
[c]show flora body_armdown eyes_smilesquint mouth_bigsmile at chop[/c]\n
is what really brings it to the next level and creates the full illusion of movement seen in the gif.
Step 5: Learn new techniques.\n
Hopefully, you can already see the value of what simple animations like my first example bring to the table. In my opinion, the movement they bring to a scene is absolutely critical, especially if it had nothing but unmoving sprites cycling through expressions to offer beforehand.\n
And thankfully, Ren\'Py\'s transforms aren\'t limited to mono-directional or finite movements. Creativity really is the limit, I\'ve still yet to find a single movement in writing that can\'t at least be emphasized with a transform.\n
Here\'s a slightly more complicated example from our demo, where the animation is looped instead of finite:
[img src=\"https://i.imgur.com/SPPyd7T.gif\"][/img]
In this case, all you need to do is add `repeat` to the transform. Simple!\n
[c]transform ruffled:[/c]
[c]ease 0.125 xoffset -4[/c]
[c]ease 0.125 xoffset 0[/c]
[c]repeat[/c]\n
And that\'s just the beginning. Once you start chaining multiple animations and expression changes, you might just start to go mad with power:
[img src=\"https://i.imgur.com/gYQ8E5G.gif\"][/img]
Look at how she\'s moving up and down and around all over the screen, with changes of expression mixed in! She\'s even moving... forward?! It\'s starting to feel like anything is possible!\n
For this particular sequence, my code looks like this:\n
[c]\"I grab our drinks from the counter, and Flora leads me over to a table for two.\"[/c]
[c]show flora eyes_neutral at f_center[/c]
[c]with ease[/c]
[c]pause 0.75[/c]
[c]show flora at f_sit1[/c]
[c]with ease[/c]
[c]pause 0.2[/c]
[c]show flora eyes_happy:[/c]
[c]ease 0.3 zoom 1.2 xoffset 60 yoffset -100[/c]
[c]\"She immediately looks across at me after we sit down, ignoring the latte I placed in front of her.\"\n[/c]
P.S. If you want to quickly animate a movement between two existing, purely positional transforms, you can just directly apply an ease to the show statement the same way you would any other transition, as seen here.\n
As an aside, the reason the xoffset variable changes in that final transformdespite it appearing to have no horizontal movementis because Flora\'s sprite is technically centered on the canvas but asymmetric enough to look otherwise, and needs to be aligned slightly off-center horizontally to appear like it\'s centered. Zooming in or out on a misaligned displayable can very quickly throw off the corrective alignment and make it look off-center again or appear to move horizontally. It took some rather annoying trial and error to counteract that effect and get that final zoom-in to keep Flora looking centered, whilesince this is far from the only issue that misalignment causesI probably should\'ve just bit the bullet and re-exported the images to fix the source of the problem instead XD\n
Yoffset also changes for a similar reason as above, but in this case it couldn\'t be fixed by realigning the base sprite images since it\'s visually necessary to center the image vertically closer to her face rather than the true center of her body. Whenever you want to zoom in on a sprite anywhere other than dead center, this is unfortunately just a fact of life as far as I\'m aware.\n
You will inevitably run into this and other various Ren\'Py quirks and problems as you try out more and more ideas with transforms, so just remember not to back down and give up on those ideas too easily. The [u]Ren\'Py docs[/u] andif you\'re really stuckthe [u]Ren\'Py Discord[/u] are your friends if you can\'t figure it out on your own!\n
Anyway, let\'s wrap back around to the scene I showed you at the start of this month\'s devlog.\n\nAlex and Jenna don\'t really have much in the way of interesting, clearly described physical movements and interactions like the ones from my examples to work off here. That\'s partly my own fault for not considering how to make the scene more visually interesting as I was writing it, but even on second review my mind was void of any reasonable ideas for such additions. Sometimes it\'s just inevitable that you\'ll have to reach a bit more to get things moving.\n
As I went through the scene, I primarily used small, non-specific movements that weren\'t described in the text to break up the stillness. My biggest go-to was moving Jenna slightly up and down as her confidence or mood rose and fell, adding a simple representation of body language that meshed surprisingly well with her expression changes.\n
Example:
[img src=\"https://i.imgur.com/328BnIh.gif\"][/img]
[c]show jenna:[/c]
[c]ease 0.5 yoffset 5[/c]
[c]with charDissolve[/c]
[c][/c]
[c]jq \"So...\"[/c]
[c]show jenna eyes_worriedclosed mouth_neutral:[/c]
[c]ease 0.5 yoffset 10[/c]
[c]with { \'master\' : charDissolve } # this is a dict transition so it doesn\'t interrupt the text being extended on the same line afterward[/c]
[c]extend \" umm...\"[/c]
[c]show jenna eyes_worried mouth_neutralspeak:[/c]
[c]ease 0.5 yoffset 5[/c]
[c]with charDissolve[/c]
[c][/c]
[c]jq \"Do you think you could pass on a message for me?\"\n[/c]
There were also a few interspersed moments of small movements described in writing, which I obviously jumped at the opportunity to animate.\n
Example:
[img src=\"https://i.imgur.com/iIlYg9B.gif\"][/img]
[c]show jenna eyes_worriedclosed:[/c]
[c]pause 0.1[/c]
[c]ease 0.5 yoffset 3[/c]
[c]pause 0.1[/c]
[c]ease 0.5 yoffset 13[/c]
[c]with charDissolve\n[/c]
And one moment where I did come up with an idea to add some movement in the writing:
[img src=\"https://i.imgur.com/vxIXK7A.gif\"][/img]
[c]j \"But...\"[/c]
[c]show jenna eyes_worriedclosed mouth_neutral[/c]
[c]with charDissolve[/c]
[c]pause 0.5[/c]
[c]show jenna mouth_surprised:[/c]
[c]ease 0.6 yoffset 3[/c]
[c]with charDissolve[/c]
[c][/c]
[c]pause 1.0[/c]
[c][/c]
[c]show jenna mouth_surprised:[/c]
[c]ease 0.6 yoffset 13[/c]
[c]pause 1.0[/c]
[c]show jenna eyes_neutral mouth_neutral[/c]
[c]with charDissolve[/c]
[c]\"She straightens herself up after taking a deep breath in, resolve clear as her eyes meet mine.\"\n[/c]
Now, this is where I would show you an after comparison of that gif at the start of the devlog, but it\'s not actually all that satisfying to look at when all the animations are sped up and mushed together like that. The important part is that Jenna actually moves around now, please just judge the value of the animations in real time \n
To wrap this up, I don\'t think I\'ve anywhere near tried out the full breadth of possibilities that transform animations have to offer yet, but I\'m super excited to keep experimenting with them as I continue on with this stage of development!\n
Once again, thank you so much for reading to the end. If you\'re a fellow developer, I hope this gave you some cool new ideas for your games!\n\n-Duhop
Hello again everyone, Duhop here.\n\nAfter spending the last week or so sick in bed, I\'m finally back at it and ready to share our progress for September :D\n\nWhile we have been making progress on the development side, there isn\'t really much new and exciting to talk about. We\'ve been biting down on the meat of what we need to get done, which basically just means a whole lot of writing for me, and plenty more of the exact same sprite and CG work I talked about over the past two months for the artists.\n\nMuch more interestingly, we had an amazing boost to visibility this month thanks to the wonderful Fall in Love community VN fest run by Studio lan! In contrast to the overcrowded official Steam festivals we\'ve taken part in, the hand-picked, romance-focused Fall in Love fest blessed us with a huge influx of visibility and wishlists. If that\'s how you found us, welcome!!\n\nStudio lan also very kindly provided some awesome templates and assets for use on social media during the festival, including a chibi base that Paintedtrash used to make this absolutely adorable sticker:\n\n \n\nThe whole experience has really made me fall in love all over again with the VNdev community. I think coming together like this and sharing audiences is something that benefits everyone, players and developers alike. I\'m definitely going to be on the lookout for any similar opportunities going forward, and when the time is right, I\'d like to try and work with some more great and relevant devs to cross-promote our games!\n\nI can\'t say for certain how consistently effective or important this kind of collaboration really is just yet, but it\'s definitely something to think about if you\'re in game dev yourself. This very likely won\'t be the last time I mention it.\n\nThanks so much for reading and continuing to support us!\n\n-Duhop\n
Hi everyone! I\'m super excited to announce that Alex\'s Journey to the Grave is a part of Studio lan\'s Fall in Love Visual Novel Festival , an awesome community-driven event on Steam featuring romance VNs of all genres handpicked by the masters of yuri themselves.\n\nNow\'s a great time to check out our https://store.steampowered.com/app/3139420/Alexs_Journey_to_the_Grave_Demo/\"" style="color:#bb86fc;text-decoration:none;">demo if you haven\'t already, along with all the other incredible romance VNs featured in the festival. \n\nThis Autumn, I hope all visual novel lovers alike can find something new that truly plucks at their heartstrings!
Hello everyone, Duhop here.\n\nThis month, I have an update on the release timeline for Alex\'s Journey to the Grave in addition to the usual development anecdote.\n\nThe the new timeline, though, is essentially just this; it\'ll be finished when it\'s finished, and it\'ll be finished in 2026.\n\nIt\'s true that following the passing of our team member, motivation to finish the game has never been higher. However, that same intense emotion doesn\'t only affect motivationit\'s also a constant reminder that we have to make incredibly sure to do things right.\n\nFor me personally, as the game\'s sole writer and director, that means an itching need to take things slow, and overthink everything. And the worst part is, it\'s not even irrational. Because how could anyone let themselves half-ass something dedicated to their friend in the afterlife?\n\nAs it seems to be with most creators, I\'ve never truly been 100% confident in the quality of my work. \"Is this really any good?\" has been a question constantly ringing in the back of my mind since I began this endeavor, and now, it\'s impossible to ignore. It feels like all I can do going forward is make sure we take the time to do our best.\n\nAll that is to say; after the delay and rethinking this tragedy caused, it\'s no longer an option for us to rush the game to completion before the end of 2025. Our new simple hard goal is a release in 2026, which should give us far more time than we need.\n\nThe scope isn\'t changing, the story isn\'t being rewritten. And of course, an internal timeline with goals and deadlines still exists, because no project like this gets completed otherwise. But it\'s flexible, as I\'ve learned time and again it needs to be, and each piece of the game will receive all the time in the oven it needs.\n\nI\'m also excited to continue keeping you all updated with these devlogs. I think in addition to showing our progress on the game, this has already become a great way for me to share some of the thought process and emotions behind it.\n\nNow, moving on to your regularly scheduled devlog content.
Learn Big by Doing Small
In game dev, it\'s never quite possible to do everything right the first time around. No matter how much you think you know about a task beforehand, actually doing it will force you to learn so many more details than you ever even considered. Even if you start on a much smaller scale.\n\nThis month, I want to talk about one such process that changed dramatically after our first game, and how bringing forth an old character sprite gave us a stark reminder of that fact. It\'s just another reason that I\'m so, so grateful we took on and completed at least one small project before beginning our more ambitious work, and I want to share that lesson with everyone I can.\n\nFor our first game, Alex\'s Hope & Alex\'s Solitude, we used a much simpler system for sprites and their expressions than what we use now. Every single possible expression and pose combination for each sprite was an entirely separate, full body sprite image:
[p align=\"center\"][img src=\"https://cdn.cloudflare.steamstatic.com/steamcommunity/public/images/clans/45100000/69d59fee1a249e74769625f25b80d6dc48eb9b31.png\"][/img][/p]This is the easiest and simplest way to set up sprites in Ren\'Py, but as you can probably imagine, it\'s also by far the most inefficient. Both on filesize, as well as time spent exporting images.\n\nDid I know about layeredimagesthe far more efficient way to do thisat the time? Yeah, actually. I just chose not to use them because I hadn\'t learned how yet, and the efficiency wasn\'t really a problem for the smaller game. Of course, I know now that it probably would have taken me like 15 minutes to learn, and the smaller filesize would have actually been nice, but thankfully it did make me realize that I needed to learn and implement them into AJG from the start.\n\nBut was that the only thing we did wrong? Of course not!\n\nI usually sing Paintedtrash\'s praises in these devlogs, and rightfully so, because her art is absolutely amazing. However, it was both of our first times working on a visual novel back then, so...\n\nEvery single sprite image was exported at the wrong resolution, and extremely off-center.\n\nThat meant that even after all the time she spent exporting them, I had to manually resize and painstakingly reposition every single one to the exact right position on the canvas before exporting them a second time.\n\nHere\'s the kicker; if I so much as dared to close Photoshop between export sessions, the new exports would magically end up a very noticeable 1-2 pixels off from the old ones, even at the exact same size and coordinates. To complicate things further, sometimes it was actually Paintedtrash\'s original exports that were a few pixels off and not mine, so false positives and negatives on the cause of each case were flying around all over the place.\n\nIn the end, we had to re-export every single sprite image for each character multiple times. Like, 4-5 times total. It was a mess.\n\nThe main lesson I learned from that debacle was to be incredibly precise and specific when providing technical instructions for exporting images, lest you create a whole lot more work for everyone. Putting that into practice, my re-exporting duties since then have been reduced to nothing but simple resizing when multiple resolutions are needed.\n\nBut of course, that still isn\'t all we do differently with our sprites these days.\n\nJenna is the one and only character from AH&AS making a return in AJG with some of the same sprite art, and bringing her old sprite forward into the new game has been a massive headache for Paintedtrash. A headache that clearly demonstrates just how much her process has evolved since she first drew it, and therefore is perfect to share with you all here :)\n\nIn the original project files for our first game, the layers and organization looked about like this:
[img src=\"https://cdn.cloudflare.steamstatic.com/steamcommunity/public/images/clans/45100000/555bcda2d0fc51cf17114b73deee577906a95cb6.png\"][/img]
Putting aside the obvious lack of proper nomenclature here, a layer count above the high thirties might actually seem like more than enough at first glance. However, many of those layers contained multiple elements that needed to be separated to allow for changes to expressions, poses, and clothing, and they were all sat unorganized in just a couple of folders that made the export process hell.\n\nOf course, Paintedtrash now knows exactly how the layers and folders for a sprite need to be separated and organized ahead of time. Doing so from the start saves her massively on busywork, and makes any future revisions or additions so much easier to work on and export.\n\nBut because Jenna\'s old sprite was made before she had such wisdom, bringing it up to date meant having to sift through and address every single layer in the project file. In the process, she painstakingly cut and pasted every mis-combined element of the lineart and color into new layers, renamed everything, and reorganized it all into dozens of beautiful folders like this:
[img src=\"https://cdn.cloudflare.steamstatic.com/steamcommunity/public/images/clans/45100000/5eb12a1480bae19afedb6339f4258a2ffca39e89.png\"][/img]
\nIn short, the experience of working on AH&AS taught her how to plan ahead and organize project files for our sprites to an incredible degree of efficiencyand, criticallybefore we ended up bogged down by it while working on AJG. My own shift to using layeredimages compounded that efficiency, with our current file system for sprites refined down to a science:
[img src=\"https://cdn.cloudflare.steamstatic.com/steamcommunity/public/images/clans/45100000/3ef97ee86254659ed041f65011cad0cbf4ad6a91.png\"][/img]
Wielding the combined power of layers, organization, and easy implementation, it\'s now far less time consuming for us to re-export individual pieces if we need to make changes, far easier for us to make new additions, and we now have exponentially more options for combining different layers to create unique expressions without adding filesize. And on the topic of filesize, this is down to just 4MB total from 14MB for all the expressions and poses of a similar sprite in AH&AS, which is especially good considering the sprites in AJG have nearly twice the resolution.\n\nSystems like this need experience and iteration to get right, and without our experience creating AH&AS, that would have all had to happen within the confines of our work on AJG. Either we would\'ve ended up with something inferior, or we would\'ve had to burn a whole lot of rubber spinning our tires and redoing our work to end up with what we have nowa process that on a project this size, repeated through all we ended up learning from it, probably would have taken a whole lot longer than it did for us to finish AH&AS in the first place.\n\nIn summary, always start small with game dev. Learn big by completing every part of the process on the small scale, and only then let the work itself go bigger. In addition to potentially massive increases in efficiency like our examples here, many tasks you might consider trivial at firstlike publishing your game on Steam, which is a universal learning experience regardless of scalecan reveal themselves as far more important than you might think to learn properly ahead of a larger project. I can\'t possibly stress enough how important it is to see at least one small project all the way to the end before you go bigger. \n\nPersonally, if I could go back and do it all again, I would\'ve worked smaller for even longer. We went straight from small to big with Alex\'s Journey to the Grave, and that meant skipping over medium. I would\'ve liked to have the experience with longer-term skills from medium!\n\nOn that note, thank you so much for reading to the end, and thank you so, so much for continuing to support Violet Horizons. \n\nUntil next month, \n\n-Duhop
Hello everyone, Duhop here.
I thought I would talk about something a bit more technical this time, because I\'m really proud of a scene we finished this month. Our background artist JustEmmi, our character artist Paintedtrash, and myself all worked together to let it come to life in-game, and some clever use of Ren\'Py\'s layered images, masking, and blending modes let us do it without absolutely exploding the filesize.
This devlog will be much more in-depth and technical than any I\'ve done in the past, so hopefully it\'s still interesting. And perhaps it can help out some fellow devs!
Now, here\'s the scene in question:
\n[img src=\"https://lh7-rt.googleusercontent.com/docsz/AD_4nXe3VL_U0sCtTZ2DN8zDujnisYLcJqSxbdtK8mxZ4mcF-XKaC23UwQmJ2Mvcja4F3r-Zkp35f_xjpFK0L7zxHbS-kvzsRb6u94erQJgqTPMaiCwqgHseDpRNCLdqtVkRzd3y1YIT2A?key=27TET9E9o-gEqVKxzsAvSQ\"][/img]Would you believe me if I told you the cat in this scene was actually a sprite with multiple expressions and poses, and not just part of the background image? Maybe you would at first glance, but take a closer look. Notice how the godrays continue to shine over her. Notice how her fur glows in the sunlight, and darkens in its shadow.
You might just think the lighting is part of her sprite, but adding scene-specific lighting to every single layer of a multi-use sprite with numerous alternate poses and expressions? That would be needlessly time-consuming and tedious work, not to mention the vast and unnecessary extra filesize if you intend to use the same sprite again with different lighting.
So here\'s what the scene looks like with just the cat\'s base sprite, without any of the added lighting:
[img src=\"https://lh7-rt.googleusercontent.com/docsz/AD_4nXda3CcHM27Rl6VQNRscGqznyQGpywblhUPP1HEu0ZfyYX0Jxh68Xkjq9TUo5Ug4yHOXSogchALKmo8L_ORSXBQbge8EuaFR4Hla4CJOF5VAo3YyR4DHaeEfPRDfaqvvwv3MGfRjSw?key=27TET9E9o-gEqVKxzsAvSQ\"][/img]
Now, what do we need to add to match her lighting to the background\'s? I mentioned them once already, but there are three distinct lighting elements we added here; the light shining on her side, the shadow cast over her front, and the godrays in the air in front of her.
Let\'s just start with the simplest of the three, the godrays that shine in front of her. All they are is a part of the background, so all we need to do is split the background into two images; the godrays, and the rest of it.
Then we simply show the godrays as a separate displayable, and make sure it\'s displayed above the sprite. Here\'s what we end up with:
[img src=\"https://lh7-rt.googleusercontent.com/docsz/AD_4nXdwr4M9UiWHuQHO2VAsFo2NaQh2hYBcBOLx3X7Z2eEUXJORqXq1PxMvRFlm4laTShO_mTaCqA3QReJweZF9BO_V8M0dBUuqah4TU2ffj7GHrT9zsH-TkmpJ0HoQtVqOE13lIN-ijg?key=27TET9E9o-gEqVKxzsAvSQ\"][/img]
Okay, that was easy (at least, assuming you had the godrays on a separate layer to begin with). But what about the lighting on the cat herself?
Our character artist has prepared two layers that can be added to the layeredimage for her sprite. One for the light, and one for the shadow. Here\'s what they look like on their own:
[img src=\"https://lh7-rt.googleusercontent.com/docsz/AD_4nXdI_eplRHV-yjHCgqrMIrGE13vxHRAplWjIf84ABSCmG0n5rCSzTry7Dn_bmPGsjFCRKJp-ovqpvmetbSVgfOGa5Epx54u4-iqQGtKSMNduXqw32ZOq8taDdnQqT6MNolbYwnescg?key=27TET9E9o-gEqVKxzsAvSQ\"][/img][img src=\"https://lh7-rt.googleusercontent.com/docsz/AD_4nXcy7hhc7n14xMKWOhemTXgDEHfv4Ng9qGcK38UJgZAvLcHl042KsUx7DKBVDGY0Y6L6MZtWEGBFk-nX9TU0vtW_hqrul8YCNnNLluEzqolSFj8xPOwgpI15Vab3VeBu-n6vNnA1Gg?key=27TET9E9o-gEqVKxzsAvSQ\"][/img]
These layers need to be masked to the the base pose of the sprite, but since the sprite has multiple poses, we would have to add slightly different versions of these layers for each pose individually if we masked them externally. Thankfully, Ren\'Py has an easy way to do that in-engine, so we only need the one version of each lighting layer.
Here\'s a simplified version of how the layeredimage looked before adding the lighting layers:
[code]layeredimage cat:
image_format \"sprites/cat/{image}.png\"
group pose:
attribute pose1 default:
\"catpose1\"
attribute pose2:
\"catpose2\"
group tail:
attribute tail_neutral default:
\"cattailneutral\"
attribute tail_flick:
\"cattailflick\"
group eyes:
attribute eyes_neutral default:
\"cateyesneutral\"
attribute eyes_open:
\"cateyesopen\"
attribute eyes_squint:
\"cateyessquint\"
group mouth:
attribute mouth_neutral default:
\"catmouthneutral\"
attribute mouth_open:
\"catmouthopen\"
[/code]
You might want to keep this initial layeredimage separate, and define a new one for the scene you need the specific lighting for. It\'s just code, no extra images, and you\'ll see in a moment why this could make things easier.
Now we have to add the lighting layers in a way that will have them masked to whichever pose attribute is currently being shown. It would be annoying to have to switch to the proper overlay attribute every single time you changed the pose, so the simplest way is to add them to the pose attributes themselves, right? But that won\'t work, because they also need to be displayed overtop of every other attribute, and the poses are displayed at the bottom. (You can tell because they are listed at the top! XD)
Except actually, it can work. All you need to do is add the masked overlays to those very same pose attributes at the bottom of the layeredimage definition. Because you can have displayables within the same attributes for the same groups, but on different layers of the layeredimage, simply by adding them again to the definition in a different part of the layer order. However, that means they will always be displayed together with each pose, which is why you might want to keep around that initial layeredimage without them.
Confused yet? This is something that isn\'t always obvious when learning how to use a layeredimage, but makes a lot of sense in practice.
Here\'s the finished layeredimage definition, with both lighting layers added:
[code]layeredimage cat_glow:
image_format \"sprites/cat/{image}.png\"
group pose:
attribute pose1 default:
\"catpose1\"
attribute pose2:
\"catpose2\"
group tail:
attribute tail_neutral default:
\"cattailneutral\"
attribute tail_flick:
\"cattailflick\"
group eyes:
attribute eyes_neutral default:
\"cateyesneutral\"
attribute eyes_open:
\"cateyesopen\"
attribute eyes_squint:
\"cateyessquint\"
group mouth:
attribute mouth_neutral default:
\"catmouthneutral\"
attribute mouth_open:
\"catmouthopen\"
group pose:
attribute pose1 default:
AlphaMask(\"catoverlayshadow\", mask=\"catpose1\")
attribute pose2:
AlphaMask(\"catoverlayshadow\", mask=\"catpose2\")
group tail:
attribute tail_neutral default:
AlphaMask(\"catoverlayshadow\", mask=\"cattailneutral\")
attribute tail_flick:
AlphaMask(\"catoverlayshadow\", mask=\"cattailflick\")
group pose:
attribute pose1 default:
blend \"add\"
AlphaMask(\"catoverlaylight\", mask=\"catpose1\")
attribute pose2:
blend \"add\"
AlphaMask(\"catoverlaylight\", mask=\"catpose2\")
[/code]Okay, woah. You\'ve probably noticed there\'s a lot going on here that I haven\'t explained yet.
First, I\'m using AlphaMask to create displayables that are masked by another displayable. For the pose1 attribute, I\'m using the image already used for the pose1 attribute on the bottom layer at the top of the layeredimage, and so on for pose2 and the tails. So now, the shadow and light layers will always be displayed overtop of everything, masked to the correct current pose.
Wait, what? The tails?\n\nYeah. The tails are a separate part of the cat\'s body listed in a different group than the rest of the base pose, so in addition to adding the lighting layers with masks for the pose attributes, we must add them with masks for the tail attributes as well. But because there is no part of the light overlay near her tail, in reality I only needed to do that for the shadow overlay.
And finally, the shadow and light overlays are added separately, with a different blend mode for the light overlay. The light overlay needs to be above the shadow overlay, and it needs the \"add\" blend mode to allow it to properly brighten the image below.
Here\'s what it looks like after adding the shadow layer:
[img src=\"https://lh7-rt.googleusercontent.com/docsz/AD_4nXcy7g8vrpzt_GpZCElr1dvdBLnfJAdxamqfbSdGWNXfqpquanVhpOzh86InAKzT5_0TuhkVlPJ89ZyoddqufhZxwqVUsGAaoh36M1CE_zD8lf_6SGYcIBKcM2xbP2Rn-u4xrPKXMw?key=27TET9E9o-gEqVKxzsAvSQ\"][/img]
And after adding the light layer:
[img src=\"https://lh7-rt.googleusercontent.com/docsz/AD_4nXctHZkWbvMKJfGXawvZigTZVEjWodkj6t-Sb_APTyI8fGYV1l5zhwT33w3JvkvyElt0-LaxqhUfIU7hq9gGF-p5WI0m82cjMVJKF8R34Qg4Hk46bt9jwaIc2ehPNZ9PbOAi1xfruA?key=27TET9E9o-gEqVKxzsAvSQ\"][/img]
And with a different pose, we can see how the alternate masks continue to keep the lighting layers in check:
[img src=\"https://lh7-rt.googleusercontent.com/docsz/AD_4nXf0qUwkR1QUfGgYEUxx7b6hFqhsXVFsANCw9qPukGpGd1zkzCxs3kOR53ttFsCLF4Xp78Sw5LPoluTDNJ7SKD0gv6YVil75CQ8GnRbZz7ItRWD9absuwa8ZJLpon74Tfnwod2r03w?key=27TET9E9o-gEqVKxzsAvSQ\"][/img]
And that\'s pretty much it. Hopefully you\'ve found this interesting, and if you\'re a developer yourself, maybe even helpful!
Thank you so much for reading and showing your support for the Alex\'s Journey to the Grave!
-Duhop
Hello everyone! Duhop here, glad to be back with another monthly devlog :D
This month, I want to talk about something that I have always thought is special, unique, and important about Alex's Journey to the Grave; censorship, or the purposeful lack thereof.
From the very beginning, I have set out to create a dark, emotional, and visceral experience. I've deliberately shown and exemplified the darkest of the main characters' darkest moments, in unusually graphic detail.
I want it to feel like the story is realitythat the pain and discomfort is inescapablein the very same way it feels for the characters. I don't want it to feel like there is some mysterious author, or social/corporate politics, or any other third party curating/watering down their reality. I don't want the darkest, most critically intense moments to be simply alluded to, then copped out of with a timely fade to black. I don't want the absolute most critical thoughts and experiences of the characters to be censored in any conceivable way.
Why? Because I think it's important. Important that someone shows them.
I think it's important for people to see and experience these things that so many are so scared to portray, address, or talk about directly. I think it's important for those who can relate to feel wholly seen for once; to understand that they truly aren't alone in their reality, and to realize that it really is possible to overcome the darkest depths imaginable.
I also think it's important for those who can't relate to see exactly what has been so consistently hidden from them; to learn exactly what it's like to have these experiences that society has swept under the rug so deliberately, and to gain empathy for struggles they might not have the perspective to understand otherwise.
I want parents to understand the struggles of their children, teachers the struggles of their students, and professionals the perspective of their patients. I want sons, daughters, and pupils to feel comfortable opening up about their issues, knowing that they will be taken seriously; that they won't be at risk of having their freedom stripped away from them, or being forced to endure inhumane "treatment" at the hands of someone who doesn't even have a clue what they're going through.
Unfortunately for me and my wants, there are people in this world that are sensitive to such graphic depictions. People that preferand are indeed better offavoiding them. Since the game does have a content warning, I never really planned to do much more than that to address the issue, but it's weighed on my mind for just as long as my resolution to avoid censorship in the first place.
After my perspective on the game changed more recently (see last months devlog), that weight grew even heavier. To the point it was almost suffocating.
However, much to my surprise, a certain feline appears to have taken things into her own paws recently... and honestly, I'm pretty satisfied with her new solution to directly ask the player to make a choice about censorship. It's a new direction that I believe will help the game become a lot more inclusive, without necessarily sacrificing one of the main things that makes it so unique and important to me.
And so, that's where we enter our development update for the month. Basically, we've been working on accommodating a meddling cat's unexpected early appearance.
Here's an early visual mockup I made of what she's been getting up to, to help with testing all the new dialogue:

I've been hesitant to share early mockup/reference assets like this before, but I suppose a devlog is the perfect place to do so. Especially after we've proven so many times just how polished our final art will get >:D
Something I struggled with myself was visualizing how to make a cat sufficiently expressive, but thankfully, our character artist Paintedtrash is more than knowledgeable and skilled enough to solve that for the both of us. She didn't even bat an eye at my dilemma.
Here's some of her early progress sketching out some different facial features for us to construct expressions with:

I've been very pleasantly surprised at how awesome these sketches have been looking so far. I suppose the unique physiology is why feline expressions were so hard for me to imagine originally, but it's also their strong-suit. They can be even more expressive than humans, with all the extra options you have with their ears, pupils, and tails.
I'm really excited to finally bring her to life, in her fully polished glory. Hopefully by next month's devlog, I'll have an expressive meddling cat to show you all! And again, thank you so much for taking the time to check in with us and read through this month's update :D
-Duhop
Hi everyone. Duhop here, lead developer for Alex's Journey to the Grave.
I have to apologize for our recent lack of updates and communication. Im sorry to say that was because development of the game has essentially been on hold for the past couple of months, following the news that one of our team members had passed away.
I wont get into the specifics of that right nowplans are in the works for us to preserve their memory as best we can, and I want to make sure we can take our time to do that properly. The real purpose of this devlog is to break the silence, and usher in a new era in the development of Alexs Journey to the Grave.
Im doubtful that its still possible for our small team to finish the game by Q4 of 2025 now, as we had originally projected, but were still gonna try our damn hardest. After recovering from the initial heartbreak, I personally dont think Ive ever been more motivated to finish AJG than I am right now.
Its hard to put into words, but my perspective on the game has shifted dramatically after what happened. There are some new directions Ive set my mind on; some scenes I only vaguely considered before that I now see as absolutely necessary, and some big alterations to the philosophy for how I want the game to interact with its players.
Anyway, the direction I want to take things feels as though it has solidified with some serious emotional motivation behind it, and that has lit a whole new fire inside of me. I think I will be much more open about discussing writing, story planning, and directing like that in future devlogs, but Ill still make sure to mark and tag those parts for anyone who wants to avoid spoilers.
That reminds mewe'll be posting devlogs every single month from now on (as long as nothing else cataclysmic ends up going down), as well as weekly social media posts. The social media posts have been happening for a while now, actually. (Check our Instagram !)
And finally, although we did slow down and take some long breaks over the past two months, we werent at a complete standstill. Here is a taste of some art weve finished/been working on since the last update:


Recognize this place? Maybe if you played our first game ;D

What do you think is out there?
Thank you so much for taking the time to check in with us. I look forward to bringing you more updates soon!
-Duhop

We're proud to present the extra-polished demo for Alex's Journey to the Grave in this year's Steam Visual Novel Fest!
Hello everyone, Duhop from Violet Horizons here. We've been hard at work for ages, and I'm super, super excited to be able to participate in the Steam VNFest!
A new update for the demo has just been released, fixing every one of the small number of issues we've found since it first released. You can read up on the changes here , if you're interested!
I was already incredibly proud of how well the demo came together, and now it's only gotten better. I hope the love and attention we've given it will ensure a fantastic experience for players during the fest!
If you do happen to find anything that doesn't seem quite right in your playthrough, please do let us know. Whether that's on the Steam forums, social media, or on our discord , we will be grateful for the intel!
Thank you so much for reading, and I sincerely hope you enjoy the demo if you give it a go! As a parting gift, here's a cute chibi Flora with cat:

Hello everyone! In preparation for the Steam Visual Novel Fest, we've pushed an update to the demo to make sure it's extra polished up and ready to be scrutinized.
Special thanks goes to all the streamers who played the demo in the past few days after our Keymailer campaign! Tuning into their streams is what ended up helping us find some of the last few hidden little typos and bugs that we're fixing in this patch.
You can find and watch their VODs here , so go check out their reactions to the demo and give them some love!
Now for the informational part:
AJG Demo 2.1 Changelog
Programming:
- Updated to a newer version of Ren'Py.- Fixed several incompatability issues that came up. (Shoutout to renpytom for fixing one of these on the engine side!!)
- Fixed the line "And I'm... being hugged." getting skipped past automatically after 2 seconds.
Writing:
- Fixed typos: "actuall" to "actually", "from all side" to "from all sides", "lifegaurds" to "lifeguards".- Added em dashes to the font and switched from hyphens to em dashes where appropriate.
Art:
- Fixed calendar length in Tombstone's room.- Updated Flora's room with better details and lighting.
- Made cute chibi art of Flora and cat.
Thank you so much for reading!
Alex's Journey to the Grave is finally going to hit the public eye this Monday, November 4th, in the form of a free demo covering Act 1 of the 6 that will be in the final game! Here's the store page for the demo!
Act 1 is 15,000 words or around 1.5 hours long for the average reader. It tells the story of how our two main characters met and had their fates intertwined. A dark room, an online chat, a new perspective, a bright smile, a warm embrace... and a growing, inescapable fear.
I'm extremely proud of how polished the demo has turned out, and I believe it will definitely catch the attention of anyone within the target audience. If you have any interest in Alex's Journey to the Grave at all, please give it a play through!
I've opened up some threads for feedback here on the Steam forums, or more directly you can join our Discord community and discuss the game there: https://discord.gg/9XQVquY4U8
See you on Monday!!!
Minimum Setup
- OS: Ubuntu 16.04+
- Processor: 2.0 Ghz 64-bit Intel-compatibleMemory: 2 GB RAM
- Memory: 2 GB RAM
- Graphics: OpenGL 3.0
- Storage: 1 GB available space

[ 6377 ]
[ 5865 ]
[ 751 ]
[ 2194 ]

Time left:
356103 days, 10 hours, 12 minutes
Time left:
356103 days, 10 hours, 12 minutes
Time left:
7 days, 18 hours, 12 minutes

Time left:
35 days, 18 hours, 12 minutes

Time left:
38 days, 18 hours, 12 minutes

Time left:
39 days, 18 hours, 12 minutes

Time left:
13 days, 4 hours, 12 minutes
Time left:
0 days, 12 hours, 12 minutes
Time left:
1 days, 12 hours, 12 minutes
Time left:
8 days, 12 hours, 12 minutes
Time left:
14 days, 12 hours, 12 minutes
Time left:
15 days, 12 hours, 12 minutes
Time left:
20 days, 12 hours, 12 minutes
Time left:
26 days, 12 hours, 12 minutes
Time left:
2 days, 22 hours, 12 minutes

Time left:
10 days, 18 hours, 13 minutes
Time left:
12 days, 17 hours, 13 minutes
Time left:
18 days, 0 hours, 23 minutes


