
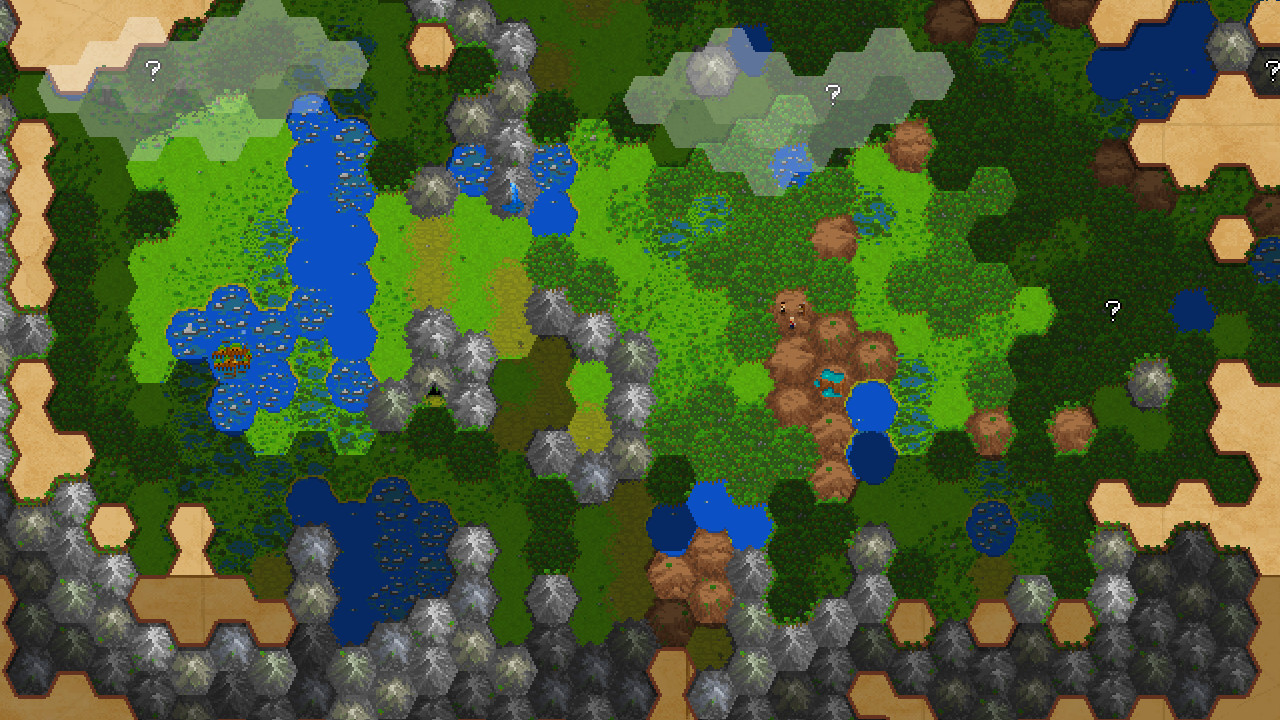
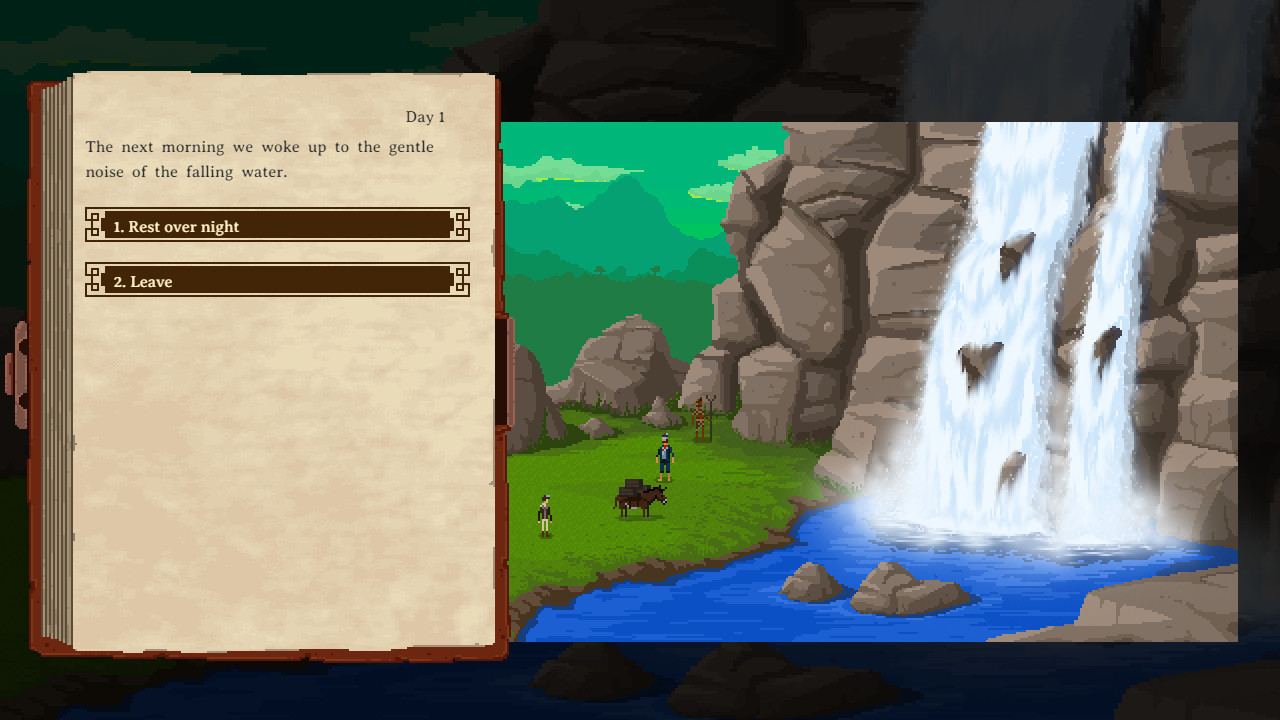
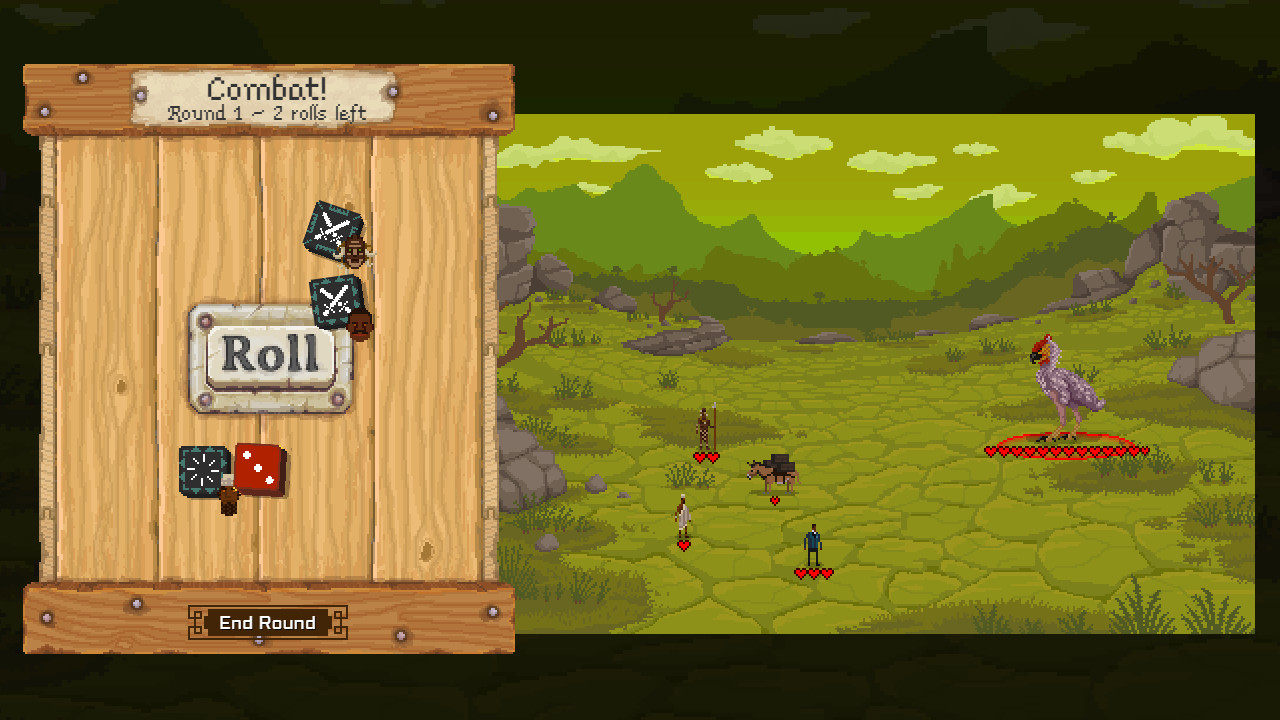
Curious Expedition is a roguelike expedition simulation set in the late 19th century. Together with famous personalities you will venture on unprecedented expeditions to regions never explored before for fame, science and treasures. Put on your pith helmet and khakis and make your way through a lush, procedurally generated world full of wonder and mystery. Now go explore, adventure awaits!
Gameplay overview
- Experience your very own adventure through a procedural story which makes every game unique.
- Explore procedurally generated worlds, each with its own distinctive set of challenges for the ambitious explorer.
- Plan and equip your trek. A good explorer is prepared for any eventuality.
- Manage your resources to keep your trek alive and sanity high. Balance your needs with the desire to carry all that precious treasure back home.
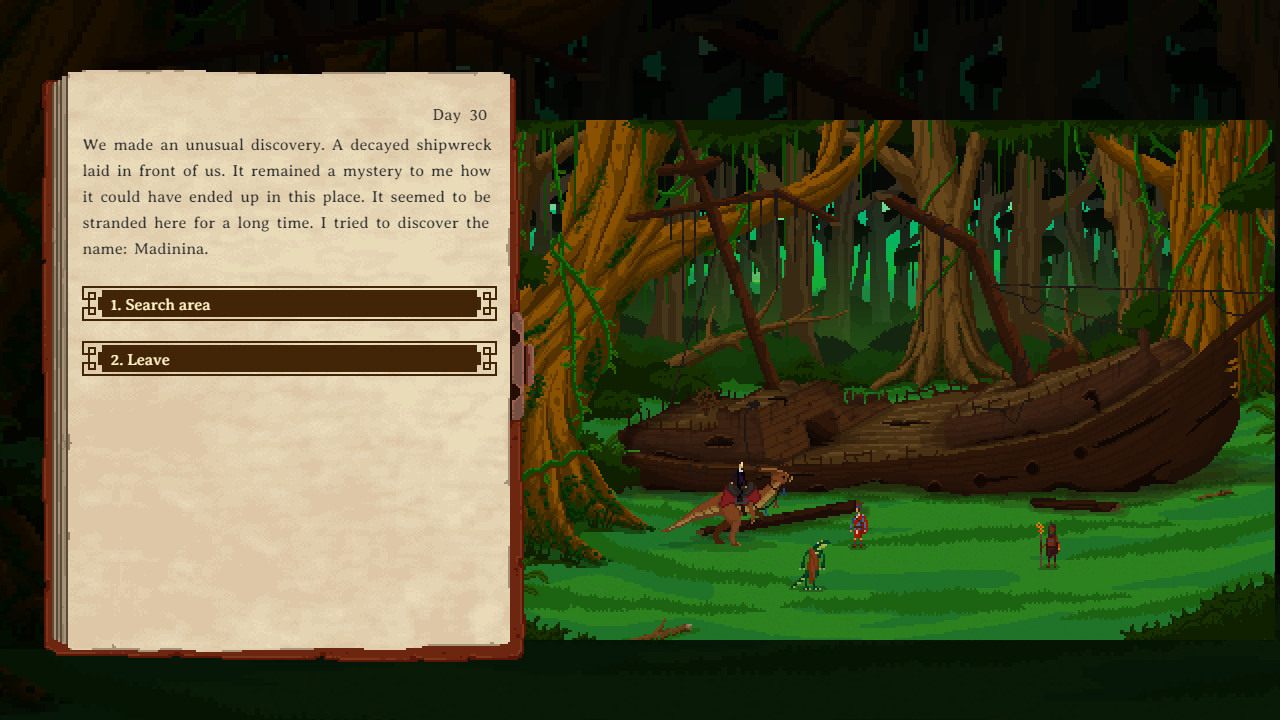
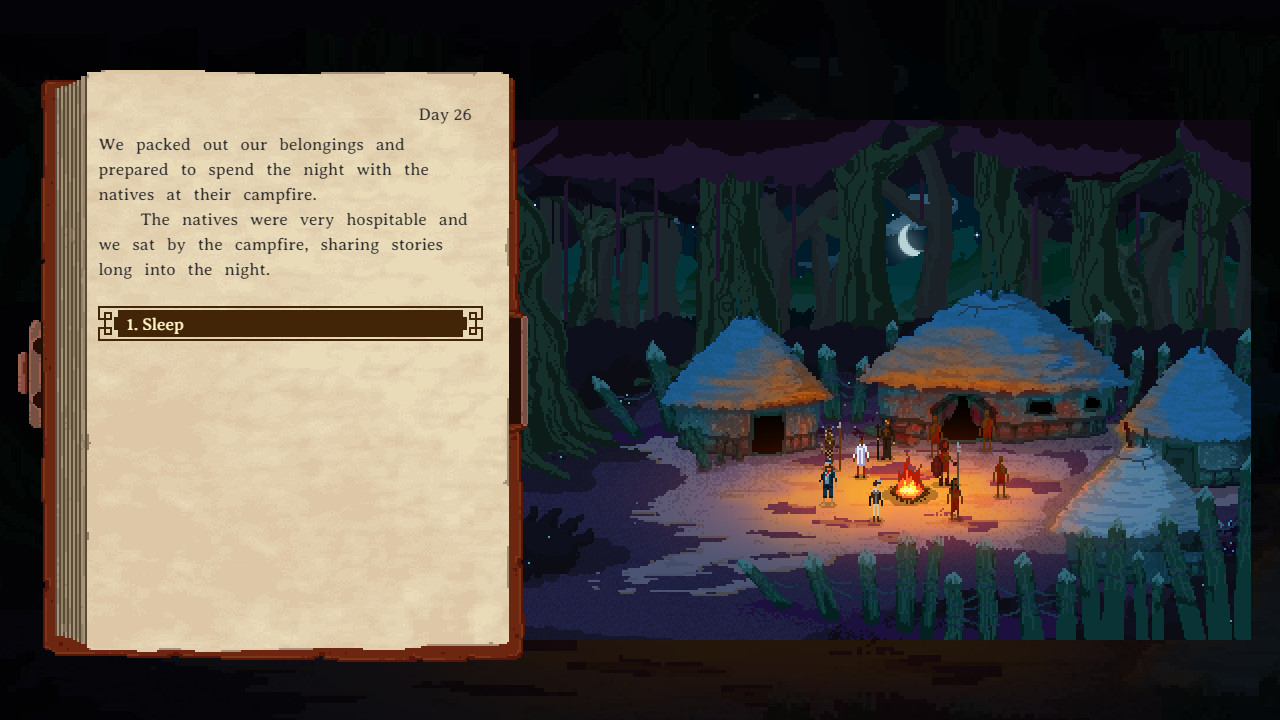
- Visit and interact with the land’s natives. Enter villages, trade and communicate with local tribes and civilizations that are unknown to mankind.
- Loot mysterious temple ruins to gain fame and treasures, but watch out for deadly traps and curses that will compromise your trek and the world around you.
- Equip and utilize miraculous treasures to gain advantages, but be wary of unforeseeable side effects.
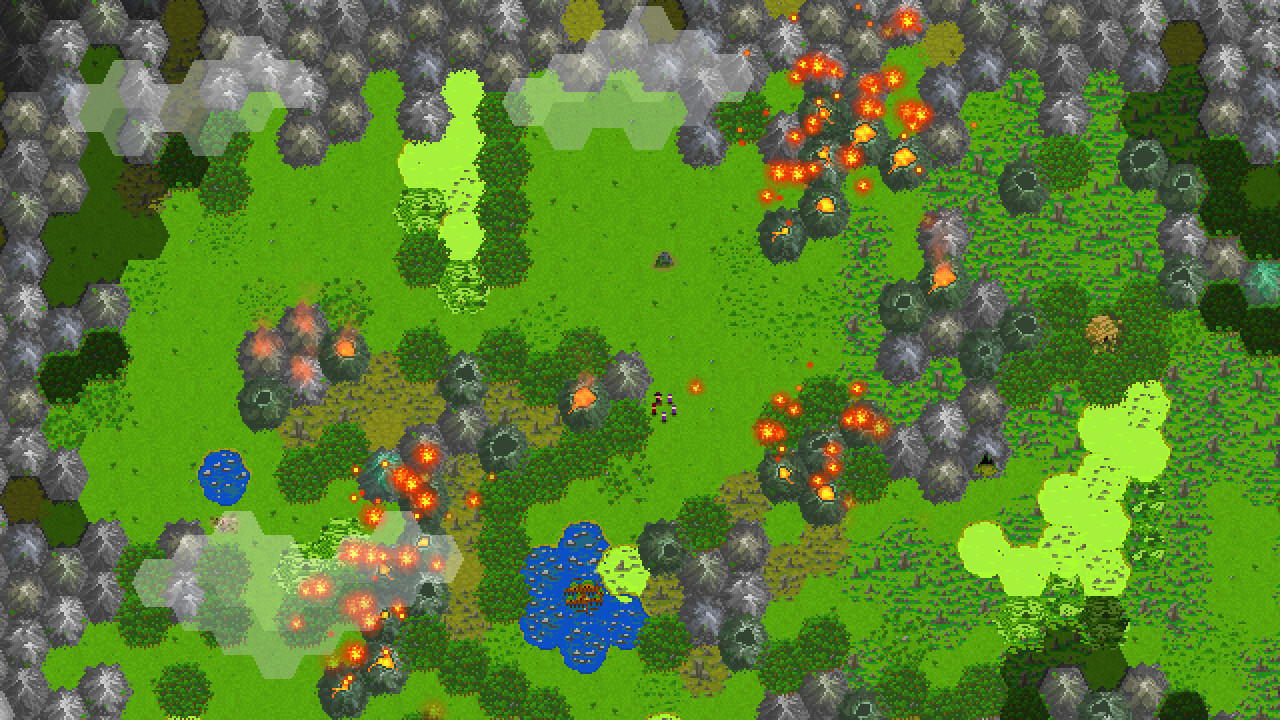
- Fight and defend your trek against a wide range of wild animals, mystical creatures and even dinosaurs.
The Art of Chaos
https://store.steampowered.com/app/1555980/Mother_Machine/
Its pretty wild when you think about the shift in genre, but I was eager to apply our knowledge of procedural generation to the more immediate, physical gameplay that platformers offer. At its core, Mother Machine still shares a lot with the Curious Expedition games we've made before. You explore a procedurally generated world filled with obstacles, dangers, and rewards to overcome. We also wanted to keep the gameplay loop short and engaging, structuring it around runs that provide a satisfying experience within 15 to 30 minutes.
From the very beginning, we knew we would once again rely heavily on a sophisticated procedural world generation system to create an extremely replayable game structure. However, this time, players will use the roguelite repetition to master their platforming abilities and experiment with mutations, special active abilities that let them personalize their movement and define their role in a multiplayer group.

With this article, I'm trying to give a not-too-technical overview of how our procedural generation is set up. Bear in mind that I'm not a programmermy role in procedural generation has always been to focus on conceptual design and then tune and balance the systems. Theres a huge part of the coding side missing from this, but it would take my partner in procedural crime, Isaac Ashdown, the technical director of Mother Machine, to write that part.
I would like to give a shoutout to Derek Yus Spelunky and Darius Kazemis Spelunky Generator Lessons , which were, of course, very influential in shaping the initial starting points of our procedural design.
The basic building blocks of our caves are called "chunks." A chunk is a hand-designed piece, similar to a puzzle piece, that contains a set number of what we call "anchors." These anchors allow chunks to connect seamlessly to other chunks with matching anchors.

Chunks are created by drawing simple splines in the Unreal Editor. This approach allows us to achieve organic shapes, long slopes, rounded corners, and other features that would be difficult to create using pre-made building blocks. Another advantage of using splines to define the shape is the ability to iterate quickly on the geometry. Adjusting the 2D spline and hitting play instantly updates the level, making it easy to test how the shape interacts with gameplay mechanics and how it feels spatially, an aspect I care a lot about.

Another advantage of using splines is that they allow us to generate any type of geometry. This means that all designed chunks can be used in any biome of the game. As a result, creating additional chunks benefits all biomes, regardless of when they are released.
The process of generating 3D geometry from a 2D spline is a complex topic that could easily warrant its own in-depth article. In short, we use Houdini, a powerful node-based 3D tool by SideFX, to handle this process. Specifically, we integrate it as an Unreal plugin, the Houdini Engine, where we feed in the 2D spline along with anchors and some additional meta-information. Houdini then runs in the background, without the level designer ever needing to open the tool, calculating the 3D geometry and updating it in the engine almost instantly.
The instant part refers to the simple greybox geometry, while the more complex biome-specific geometry requires significantly more computational power and is processed offline on a dedicated server.
Additionally, we use Unreal's PCG system to place foliage on the generated geometry, but diving deeper into that would go beyond the scope of this article. Heres an example of how a chunk spline is used to generate three different types of geometry:

Okay, back to chunks and how they are stitched together!
Even though I follow a minimum grid of 50 Unreal Units (UU) when designing splines, it isn't strictly necessary for the internal shape of a chunk. However, I still adhere to it for easier debugging, maintaining repeatable patterns, and simplifying distance measurements for jumps and other gameplay elements.
What does need to align with a grid is the position of the anchors and the outer shell of a chunk. Specifically, these elements must follow a 1000UU grid to ensure that chunks connect seamlessly without clipping into each other. This 1000UU grid is what we refer to as our "base grid."

Each anchor must always be placed precisely in the center of the base grid's outline and must maintain a distance of 300UU from the surrounding geometry on each side. This ensures that passages between chunks are standardized, consistently measuring 6 meters, and function seamlessly across all chunk designs.
There are actually two types of anchors: normal and wide. The wide variant allows for larger openings between chunks. However, for the sake of simplicity in this article, I will focus only on normal anchors.
Here's a small selection of different chunks. As you can see, they come in various shapes, sizes, and anchor positions. However, the outer shells and the placement of the anchors always conform to the base grid.

There are various sizes of chunks, each with a different number of anchors. They are categorized by usage types, such as "connector" (which usually has only a few anchors), "hall" (which typically has wider openings and higher ceilings), "mini" (the smallest possible chunks, measuring 1000UU x 1000UU, or 10 meters x 10 meters, the base grid size), and "deadend" (which have only one anchor). However, these names do not influence how the procedural system uses the chunks, they simply help me keep an overview. In total, we will be shipping the game with 496 different chunks.

When a cave is generated, the system aims to reach a specific "path length." One unit of path length corresponds to the size of our base grid. The path length is determined by the cave generation setup, which I'll discuss later. For now, heres an example of how a simple cave typically looks.
At the top, you can see a simplified debug version, which we call the "cave explorer," while the bottom shows a zoomed-out view of the actual gameplay geometry. In the cave explorer, youll notice colored dots representing the positions of all chunk anchors.

This example cave is made up almost entirely of "mini" chunks and has a path length of 50. The path concludes with a large hall chunk, which serves as the standard goal area for our caves.

The exact length of a cave and the selection of chunks along its path depend on two key factors: "chunk sets" and "sections."
A chunk set is a collection of different chunks that are randomly selected when the system places a chunk.
A section, on the other hand, is the core of cave generation design. It defines several important parameters, including:
This example shows a very simple section. It has a path length of 10, uses the "Small Halls" chunk set, and spawns a few "gumba" enemies, our internal name for a basic enemy type:

This is what the generation of this section looks like in practice. Note that the cave itself doesnt have a defined end section, so it simply stops. The emojis you see in the debug display indicate where enemies and other cave objects are placed (the pig icons represent basic enemies).
Also, notice how this cave setup never requires players to pass through an upward anchor while following the main path. This is because the section setup forbids upward anchors. Since upward traversal is generally more difficult in gameplay, weve excluded them from this example to keep movement smoother and more accessible.


Here are a few variations of how this section can be generated. Each one maintains an exact path length of 10 and ensures that players never have to traverse an upward anchor connection.

The example section used the chunk set "small halls." Only the chunks included in this set can be placed when generating the section. Here, you can see the chunks that belong to the small halls chunk set:

For reference, this is how the section setup for the much more complex goal-type "cave trek" looks in the shipped version of the game. The branching paths represent the different supported difficulty levels: easy, normal, and hard.

Here, you can see how the generation places each chunk step by step for a normal difficulty cave.

And here are some generation results from the same setup, this time using the hard difficulty:

Now let's talk about how our gameplay actors, such as enemies, resources or other interactive things are placed inside chunks. Whenever a chunk is created or adjusted, the system will automatically place "sockets", approximately one socket every meter along the spline. For each socket, a couple of measurements are made to define different tags, such as:
All these values are stored in each socket. When defining a gameplay actor, we can specify which socket requirements the actor must meet to be placed inside a chunk.
For example, our basic enemy has very few placement requirements. It only needs the "Player Path" tag, making it easy to spawn almost anywhere in a chunk.

The acid plant, which drops dangerous acid on players, has much more restrictive placement requirements. It can only be placed on the underside of a spline, as it hangs from the ceiling. Additionally, it requires a height of at least 7 meters (H7) to ensure that the acid drips from a logical height and gives players enough time to react before it reaches them.

To test the placement and requirements of actors within a chunk, we use a special tool called the "theatre." In the theatre, we can specify which chunk is generated and set up a collection of actors to be spawned inside. This is extremely useful for observing the different permutations that a set of actors can take when placed within a chunk in the generated cave.

The theatre can also be used to test an entire section setup instead of just a single chunk. In this case, it generates one permutation of a defined section, as described earlier.
The following example shows multiple generations of a section called "Exploration," a general area that spawns various enemy types, resources, platforming obstacles, and more. This demonstrates how the combination of different chunks from the designated chunk set and the selected gameplay actors creates a wide variety of unique gameplay situations.

Typically, there are many different ways gameplay actors can be spawned within a single chunk. When combined with the fact that the chunk itself is randomly selected from a predefined chunk set, this results in a vast variety of possible combinations within a section.
I hope this article provides some interesting insights and a good, if basic, overview of our procedural generation setup. Having worked on many different procedural systems in the last 10+ years I can proudly say that what we have achieved with Mother Machine is definitely our procedural masterpiece.
For me, it is extremely fulfilling to work on procedural generation. Observing the different outcomes of a growingly complex system is deeply satsfying.
If you want to follow the development of Mother Machine, or support us in developing it please consider wishlisting the game on Steam , this helps us a lot!
https://store.steampowered.com/app/1555980/Mother_Machine/
Thank you!
Johannes Kristmann
About Mother Machine
After working for 10 years on games that rely heavily on procedural generation, we are about to release our latest game, Mother Machine , on March 26th. Unlike our previous games, which were tile-based strategy games, Mother Machine is a 2.5D multiplayer platformer with a strong emphasis on exploration.https://store.steampowered.com/app/1555980/Mother_Machine/
Its pretty wild when you think about the shift in genre, but I was eager to apply our knowledge of procedural generation to the more immediate, physical gameplay that platformers offer. At its core, Mother Machine still shares a lot with the Curious Expedition games we've made before. You explore a procedurally generated world filled with obstacles, dangers, and rewards to overcome. We also wanted to keep the gameplay loop short and engaging, structuring it around runs that provide a satisfying experience within 15 to 30 minutes.
From the very beginning, we knew we would once again rely heavily on a sophisticated procedural world generation system to create an extremely replayable game structure. However, this time, players will use the roguelite repetition to master their platforming abilities and experiment with mutations, special active abilities that let them personalize their movement and define their role in a multiplayer group.
With this article, I'm trying to give a not-too-technical overview of how our procedural generation is set up. Bear in mind that I'm not a programmermy role in procedural generation has always been to focus on conceptual design and then tune and balance the systems. Theres a huge part of the coding side missing from this, but it would take my partner in procedural crime, Isaac Ashdown, the technical director of Mother Machine, to write that part.
I would like to give a shoutout to Derek Yus Spelunky and Darius Kazemis Spelunky Generator Lessons , which were, of course, very influential in shaping the initial starting points of our procedural design.
From Splines to Chunks
Since our game revolves around exploring the caves of an alien planet, we refer to our levels as "caves." A cave typically has a starting and ending point and follows a mostly sequential structure. However, we incorporate branching paths and loops that can reconnect different routes. The structure of a cave also varies depending on its goal type. There are six different goal types in the shipping version of the game. For now, I'll keep things simple, as these aspects are not essential to explaining the procedural setup.The basic building blocks of our caves are called "chunks." A chunk is a hand-designed piece, similar to a puzzle piece, that contains a set number of what we call "anchors." These anchors allow chunks to connect seamlessly to other chunks with matching anchors.
Chunks are created by drawing simple splines in the Unreal Editor. This approach allows us to achieve organic shapes, long slopes, rounded corners, and other features that would be difficult to create using pre-made building blocks. Another advantage of using splines to define the shape is the ability to iterate quickly on the geometry. Adjusting the 2D spline and hitting play instantly updates the level, making it easy to test how the shape interacts with gameplay mechanics and how it feels spatially, an aspect I care a lot about.
Another advantage of using splines is that they allow us to generate any type of geometry. This means that all designed chunks can be used in any biome of the game. As a result, creating additional chunks benefits all biomes, regardless of when they are released.
The process of generating 3D geometry from a 2D spline is a complex topic that could easily warrant its own in-depth article. In short, we use Houdini, a powerful node-based 3D tool by SideFX, to handle this process. Specifically, we integrate it as an Unreal plugin, the Houdini Engine, where we feed in the 2D spline along with anchors and some additional meta-information. Houdini then runs in the background, without the level designer ever needing to open the tool, calculating the 3D geometry and updating it in the engine almost instantly.
The instant part refers to the simple greybox geometry, while the more complex biome-specific geometry requires significantly more computational power and is processed offline on a dedicated server.
Additionally, we use Unreal's PCG system to place foliage on the generated geometry, but diving deeper into that would go beyond the scope of this article. Heres an example of how a chunk spline is used to generate three different types of geometry:
Okay, back to chunks and how they are stitched together!
Even though I follow a minimum grid of 50 Unreal Units (UU) when designing splines, it isn't strictly necessary for the internal shape of a chunk. However, I still adhere to it for easier debugging, maintaining repeatable patterns, and simplifying distance measurements for jumps and other gameplay elements.
What does need to align with a grid is the position of the anchors and the outer shell of a chunk. Specifically, these elements must follow a 1000UU grid to ensure that chunks connect seamlessly without clipping into each other. This 1000UU grid is what we refer to as our "base grid."
Each anchor must always be placed precisely in the center of the base grid's outline and must maintain a distance of 300UU from the surrounding geometry on each side. This ensures that passages between chunks are standardized, consistently measuring 6 meters, and function seamlessly across all chunk designs.
There are actually two types of anchors: normal and wide. The wide variant allows for larger openings between chunks. However, for the sake of simplicity in this article, I will focus only on normal anchors.
Here's a small selection of different chunks. As you can see, they come in various shapes, sizes, and anchor positions. However, the outer shells and the placement of the anchors always conform to the base grid.
There are various sizes of chunks, each with a different number of anchors. They are categorized by usage types, such as "connector" (which usually has only a few anchors), "hall" (which typically has wider openings and higher ceilings), "mini" (the smallest possible chunks, measuring 1000UU x 1000UU, or 10 meters x 10 meters, the base grid size), and "deadend" (which have only one anchor). However, these names do not influence how the procedural system uses the chunks, they simply help me keep an overview. In total, we will be shipping the game with 496 different chunks.
Cave Generation
When a cave is generated, the system aims to reach a specific "path length." One unit of path length corresponds to the size of our base grid. The path length is determined by the cave generation setup, which I'll discuss later. For now, heres an example of how a simple cave typically looks.
At the top, you can see a simplified debug version, which we call the "cave explorer," while the bottom shows a zoomed-out view of the actual gameplay geometry. In the cave explorer, youll notice colored dots representing the positions of all chunk anchors.
This example cave is made up almost entirely of "mini" chunks and has a path length of 50. The path concludes with a large hall chunk, which serves as the standard goal area for our caves.
The exact length of a cave and the selection of chunks along its path depend on two key factors: "chunk sets" and "sections."
A chunk set is a collection of different chunks that are randomly selected when the system places a chunk.
A section, on the other hand, is the core of cave generation design. It defines several important parameters, including:
- Which chunk set is used
- The path length for this section
- The types of gameplay actors that spawn
- Which anchor directions are allowed or excluded
- The mood of the section (which determines color and lighting settings)
This example shows a very simple section. It has a path length of 10, uses the "Small Halls" chunk set, and spawns a few "gumba" enemies, our internal name for a basic enemy type:
This is what the generation of this section looks like in practice. Note that the cave itself doesnt have a defined end section, so it simply stops. The emojis you see in the debug display indicate where enemies and other cave objects are placed (the pig icons represent basic enemies).
Also, notice how this cave setup never requires players to pass through an upward anchor while following the main path. This is because the section setup forbids upward anchors. Since upward traversal is generally more difficult in gameplay, weve excluded them from this example to keep movement smoother and more accessible.
Here are a few variations of how this section can be generated. Each one maintains an exact path length of 10 and ensures that players never have to traverse an upward anchor connection.
The example section used the chunk set "small halls." Only the chunks included in this set can be placed when generating the section. Here, you can see the chunks that belong to the small halls chunk set:
For reference, this is how the section setup for the much more complex goal-type "cave trek" looks in the shipped version of the game. The branching paths represent the different supported difficulty levels: easy, normal, and hard.
Here, you can see how the generation places each chunk step by step for a normal difficulty cave.
And here are some generation results from the same setup, this time using the hard difficulty:
Gameplay Actor Placement
Now let's talk about how our gameplay actors, such as enemies, resources or other interactive things are placed inside chunks. Whenever a chunk is created or adjusted, the system will automatically place "sockets", approximately one socket every meter along the spline. For each socket, a couple of measurements are made to define different tags, such as:
- Is the socket on the top of a spline, the side or the underside?
- When shooting a ray away from the surface the socket is located on, how long will it travel before it hits another spline? This defines the height of the socket
- What are the neighbor sockets?
- Which "ribbon" is the socket located on? There are 3 ribbons in our game which define in which depth an object exists:
[list] - Player Path is the pink ribbon on which the player will move
- FrontPath is in front of the player. Typically we spawn only smaller objects here
- BackPath is behind the player. Here we can spawn larger objects.
All these values are stored in each socket. When defining a gameplay actor, we can specify which socket requirements the actor must meet to be placed inside a chunk.
For example, our basic enemy has very few placement requirements. It only needs the "Player Path" tag, making it easy to spawn almost anywhere in a chunk.
The acid plant, which drops dangerous acid on players, has much more restrictive placement requirements. It can only be placed on the underside of a spline, as it hangs from the ceiling. Additionally, it requires a height of at least 7 meters (H7) to ensure that the acid drips from a logical height and gives players enough time to react before it reaches them.
To test the placement and requirements of actors within a chunk, we use a special tool called the "theatre." In the theatre, we can specify which chunk is generated and set up a collection of actors to be spawned inside. This is extremely useful for observing the different permutations that a set of actors can take when placed within a chunk in the generated cave.
The theatre can also be used to test an entire section setup instead of just a single chunk. In this case, it generates one permutation of a defined section, as described earlier.
The following example shows multiple generations of a section called "Exploration," a general area that spawns various enemy types, resources, platforming obstacles, and more. This demonstrates how the combination of different chunks from the designated chunk set and the selected gameplay actors creates a wide variety of unique gameplay situations.
Typically, there are many different ways gameplay actors can be spawned within a single chunk. When combined with the fact that the chunk itself is randomly selected from a predefined chunk set, this results in a vast variety of possible combinations within a section.
Conclusion
I hope this article provides some interesting insights and a good, if basic, overview of our procedural generation setup. Having worked on many different procedural systems in the last 10+ years I can proudly say that what we have achieved with Mother Machine is definitely our procedural masterpiece.
For me, it is extremely fulfilling to work on procedural generation. Observing the different outcomes of a growingly complex system is deeply satsfying.
If you want to follow the development of Mother Machine, or support us in developing it please consider wishlisting the game on Steam , this helps us a lot!
https://store.steampowered.com/app/1555980/Mother_Machine/
Thank you!
Johannes Kristmann
[ 2025-03-16 21:18:02 CET ] [Original Post]
Minimum Setup
- OS: Ubuntu 12.04 LTS. fully updated
- Processor: 2 GHzMemory: 1 GB RAM
- Memory: 1 GB RAM
- Graphics: 1280x720 minimum resolution. OpenGL 2.0 Support
- Storage: 150 MB available space
GAMEBILLET
[ 6437 ]
FANATICAL
[ 7253 ]
GAMERSGATE
[ 3708 ]
MacGameStore
[ 5362 ]
FANATICAL BUNDLES

Time left:
356112 days, 10 hours, 22 minutes

Time left:
356112 days, 10 hours, 22 minutes

Time left:
0 days, 18 hours, 22 minutes

Time left:
7 days, 18 hours, 22 minutes

Time left:
0 days, 18 hours, 22 minutes

Time left:
0 days, 18 hours, 22 minutes

Time left:
16 days, 18 hours, 22 minutes

Time left:
44 days, 18 hours, 22 minutes

Time left:
47 days, 18 hours, 22 minutes

Time left:
48 days, 18 hours, 22 minutes
HUMBLE BUNDLES
Time left:
0 days, 12 hours, 22 minutes
Time left:
1 days, 12 hours, 22 minutes
Time left:
9 days, 12 hours, 22 minutes
Time left:
10 days, 12 hours, 22 minutes
Time left:
17 days, 12 hours, 22 minutes
by buying games/dlcs from affiliate links you are supporting tuxDB


