Summary
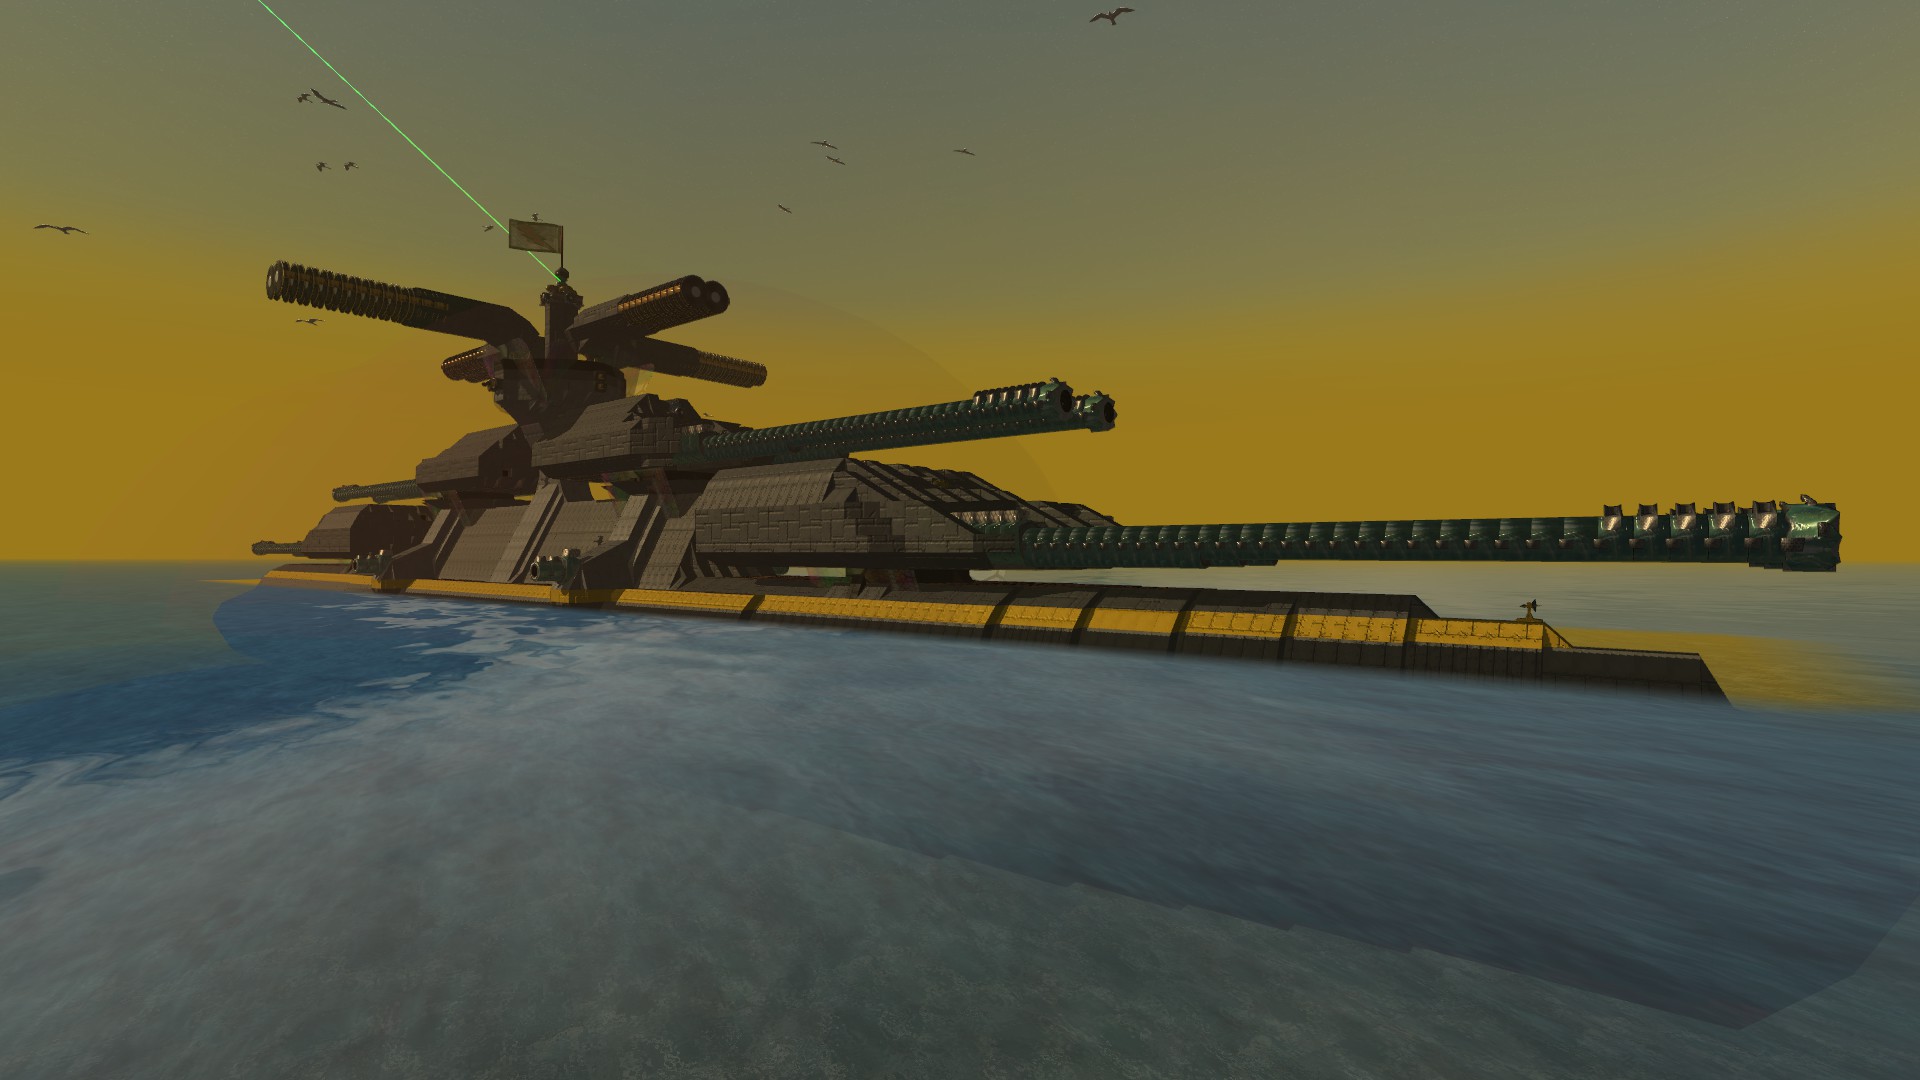
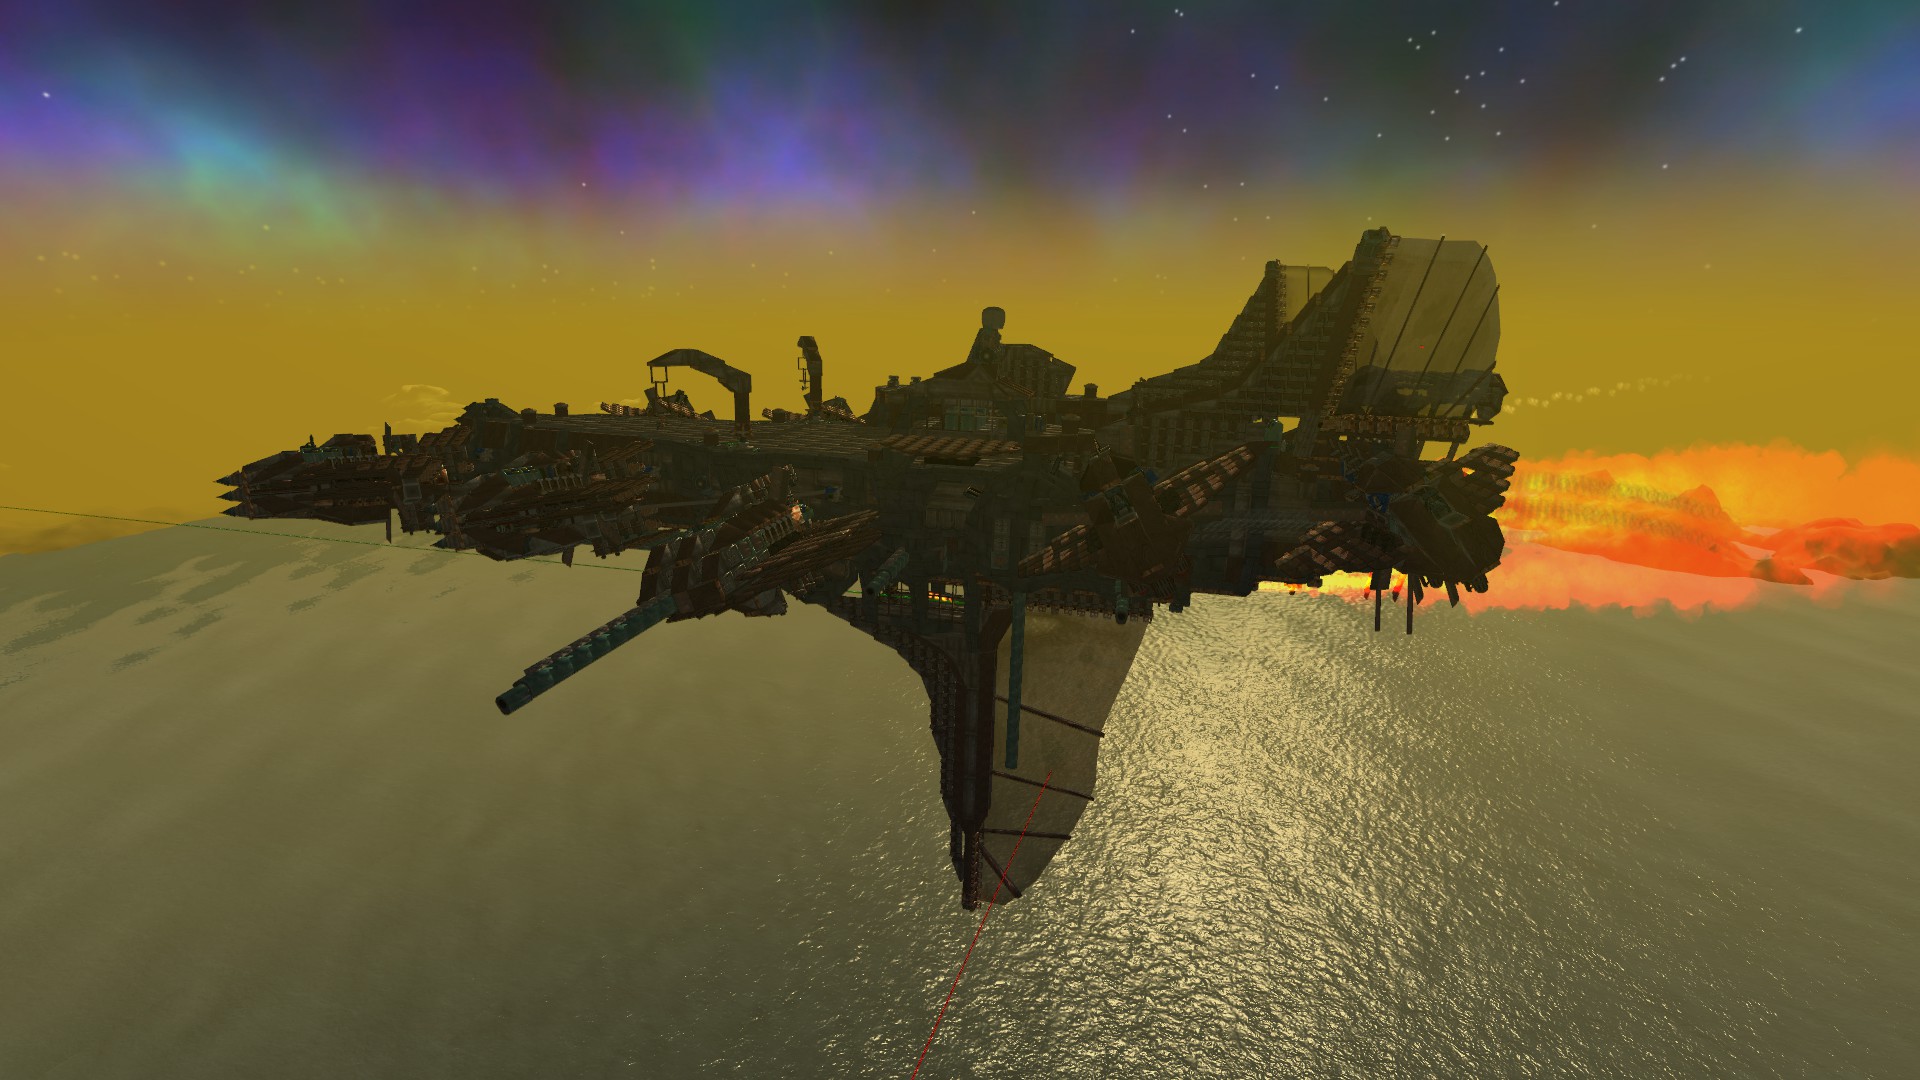
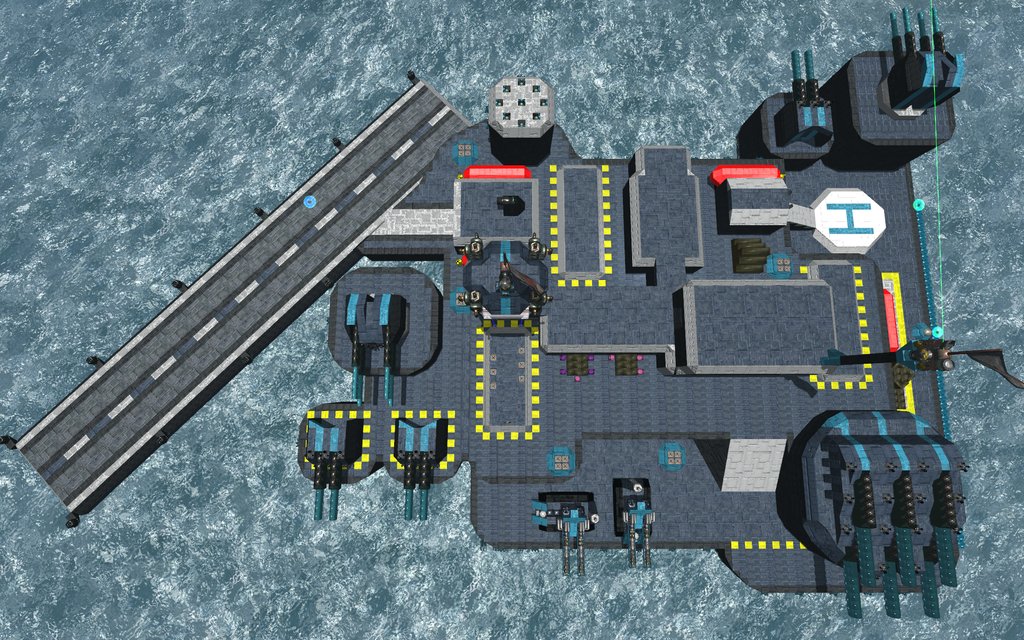
In From the Depths you can build and take first-person command of battleships, planes, submarines, space ships, hot air balloons and more! The game is currently in alpha and contains a wide range of single player content including:- A creative mode allowing you to push your designs to the limit and ensure the total annihilation of your opponents.
- A campaign waged over hundreds of islands against eight unique factions.
- A Story Mode where you can (eventually!) play 15 missions as each of the eight factions - a fantastic mixture of strategy, design and wild battles! Defend your fleet against waves of enemy forces in a series of extremely tough challenges that unlock new components.

Key Features
- Design and build your fleet, fortresses and structures however you want. The alpha currently has over 400 unique components blocks, not including 29 different components for making missiles, torpedoes, depth charges and bombs.
- The sky's the limit, you can equip your vehicle with - cannons, lasers, mines, bombs, missiles, torpedoes, propellers, rudders, jet engines, wings, hydrofoils, hot air balloons, anchors, fire control computers, blueprint spawners, repair bots, air pumps, automated control blocks and many, many more!
- Realistic physics - every block destroyed or added affects the vehicle's functionality, physics and control. Drag, inertia tensors, buoyancy and sealed compartments are all updated based on the design of your vehicle and the damage sustained.
- Be part of a fantastic community (http://www.fromthedepthsgame.com/forum), with new releases made on average once a week. Community organised challenges and blueprint sharing make it an extremely friendly place to hang out!

Customisable Components
The customisable components in From the Depths allow a unique level of engineering customisation:- Design custom missiles, bombs, depth charges and torpedoes by combining various warheads types, fuse types, IR seekers, laser beam riders, laser designators, thrusters, navigation algorithms, fuel pods, sonar seekers, buoyancy compartments and propellers, to deliver a truly bespoke weapon.
- Design custom cannons by combining four different barrel types and lengths with autoloaders, warhead types, ammo boxes and auxiliary components to create everything from AA cannons to howitzers.
- Design custom AI by combing an AI mainframe with 'AI cards' slotted into motherboard blocks. Add radar detection, laser detection and tracking and local weapon controllers to give partial or full control to AI. Create anything from a fully AI controlled aircraft carrier to a battery powered drone.
- Design custom engines using crank shafts, cylinders, carburetors, super chargers, exhausts and fuel injectors. Electric engines, generators and chargers are also available for backup power supplies and drones.
- Similar systems exist for the creation of anti-vehicle and anti-missile lasers, as well as drills that can cut even the largest of battleships in half.

Workshop

Alpha Test 3.5.0!
Acceleration and evasion being very cheap, and having basically no downside is a very old FtD problem. It makes cannons unreliable, ships relatively weak and kiting disproportionately strong. The new stability mechanic adds a benefit for having a stable platform.
Overview
4 values are tracked
Example vehicles
The changes mean stable vehicles and fortresses gain a slight boost against projectile weapons. Faster, and especially more evasive vehicles have a harder time shooting down projectiles, and at long distances their weapon efficiency is noticeably reduced. Makes slow vehicles, cannons and IR/radar/sonar missiles more useful in general.
One of the first big changes is custom propellers.
We have created a very in-depth system for customising the look of the custom propellers and we also suggest updating your builds to the new custom propellers, as power usage and thrust have been tweaked.
You can remove blades and rotate any blade around the hub if you wanted to go for a 3 blade Y shape setup, yet keep the functionality of all 4 blades! The sliders are purely aesthetic only and will not change the performance of the custom propellers.
As you can see from the screenshot below, this is the default look until you start adjusting the overall shape via the sliders and also material type from the texture dropdown list.


After spending a little time getting used to the controls you can create something that may fit the style of your craft more.
To give a general overview of this UI, the top screenshot is where you set the general shape, blade orientation, size of the blade and material type.
The second screenshot above shows current nodes and where they are on the blade 0%, 25%, 75%, and 100% you can also insert nodes and set how far down the blade you want the node to be.

This propeller was created using a linear node setup. What that means is that the preset removed 3 nodes along the blade, unchecked one of the blades in the bottom section of the list and setting +/- 35 degrees to the side blades. Adding nodes along the blade gives you more points to adjust the blade thickness, rotation, width and shaping.
However, if you still want more customisation, you can always use the decoration system with Ctrl X on one of the blade segments and create something from multiple parts. (yellow decorated custom rudders)

While we are discussing propulsion, we do have a few new changes.

What you are seeing in the above screenshot has been added to all propulsion methods, auto-balancing and manual. Manual is the usual means of setting up a propulsion block to be strafe/forward/yaw/pitch... Auto-balancing on the other hand (imagine a thruster placed dedicated to looking after roll) auto-balancing can add a few points of thrust to assist in pitch or hover. Auto-balancing will automatically calculate the combination of propulsion required for smooth roll/pitch/yaw/strafe/hover/forwards motion.
Auto-balancing does not change the manual settings you have already stored, so you can turn it on and off without affecting things permanently.
Lastly, on the subject of propulsion, we have set up a function very similar to what was removed previously, which was the "always up" function and added a new method that will also assist the thrust pointing horizontal. You can choose manual control of pitch/yaw and set the two sliders up as needed as a permanent angle or, via the new breadboard component which we shall discuss next.

This new component in breadboard allows you to interact with any block on the construct that can be manipulated. I'll try to show a very basic example with a neon light.
The basic neon light has 6 attributes we can tweak within its UI: R,G,B, the intensity, the range and if it casts shadows on/off.
If we place down a number of neon lights we can tweak all of them at the same time via the GBS, however for this example we will name the neon light (Example1). If you keep the build cursor on the light and hit shift N, this will bring up the naming UI. You should see the tooltip of your light now has "? Name changed to "Example1" ".
Place down your mainframe and attach the AI breadboard to it. Scroll down to the GBS and click on the new component. You will see that the GBS has something already selected by default that it would interact with.
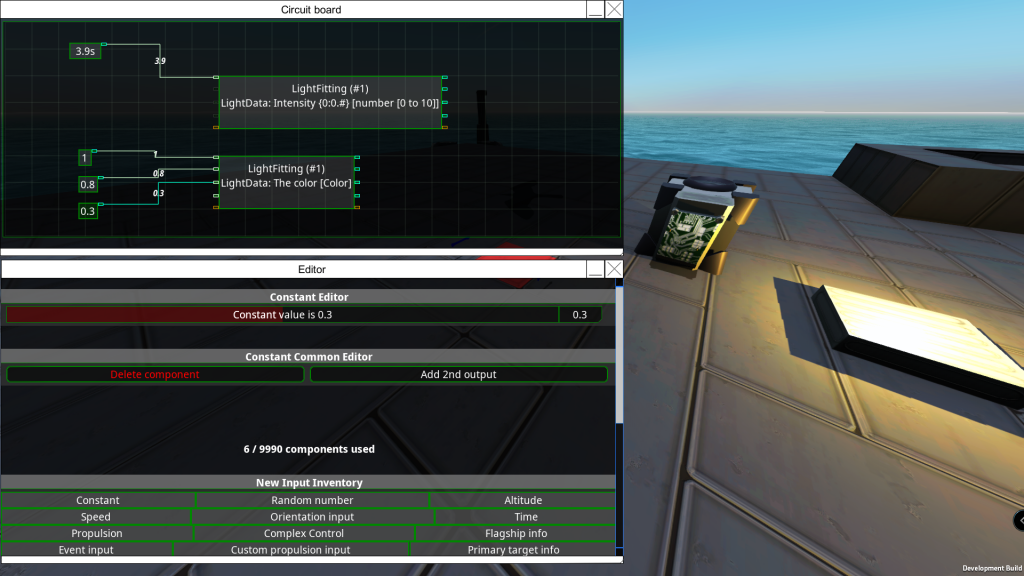
With the new module selected type the name we gave our neon light Example1 in the block name filter text box, check the dropdown list under block name filter and select neon light. You will know if everything is linked as you can see in the GBS module "LightFitting (#1) " If it still reads #0 then you may have a typo in the filter text box or when you named the neon light.
You will also see the left side notches turn from white (requires input) to grey (not used). This indicates that the attributes tied to LightData: Intensity, requires one type of input and in this case it requires a number from 0 to 10. The other notches correspond to different input types which will be used for other settings if that block type and the attribute selected from the dropdown list allow it.

In order to keep things simple, let us insert a timer and give it a max of 5 seconds. We shall plug that into the topmost notch. (Don't forget to mouse over each notch for a description as to what they require/do) If everything is working correctly your neon light should start to slowly get brighter and turn off once the timer resets and repeat.

In order to access the other attributes, we need a new GBS linked with the same name. This time we will check the dropdown list under the neon light label. Other block types can have quite the long list depending on the complexity of the block, you may also see (LOCKED) and this indicates that currently we have not enabled GBS to access these attributes. So please feel free to poke us and tell us what you need unlocked and why with hopefully some sort of example.

Select LightData: The colour, now you will see that all the notches are white. Mouse over these again and you will notice that each one represents the colour red, green and blue as well as other parameters. Drop 3 "Constant" components into the breadboard UI and attach one to the first notch. Set the constant component to something from 0.00 to 1 and as soon as you plug in your constant the light should be red if left with the default value of 1. Repeat this for the last two notches green and blue and set the colours as you wish. Try doing the same things again and setting up a method to turn on or off Lightshowdows :)
This was just a poor and easy example as you can use GBS with every block that has some tweakable options from spin blocks to turret blocks, from jets to engines, APS components, CRAMS etc... and the usual infinite amounts of trigger types that you can create via breadboard and more so now as we have created a logic gate component :D .
What is up Depthians!
Another sweet update being propelled to you epic people! Numerous changes, tweaks, bug fixes and new features!
Before we get into the changes we need to point something out for you good peeps that have been running the Alpha test. Positive/Negative force axis code has changed for custom rudders so if you made anything in alpha using them you should check their yaw/roll/pitch inputs.
Vehicle stability
Acceleration and evasion being very cheap, and having basically no downside is a very old FtD problem. It makes cannons unreliable, ships relatively weak and kiting disproportionately strong. The new stability mechanic adds a benefit for having a stable platform.
Overview
- New stat: stability. Possible range is 0-100%, it's based on the movement of the main construct in the last 3 seconds[/*]
- Added a slider to the target prioritisation AI card, from -1000 to +1000 value for each 1% stability[/*]
- Munition warner range is now a function of stability, instead of rotation rate. Varies between 20-110%, for 0-100% stability[/*]
- All direct fire weapons gain 0.004 inaccuracy for each 1% stability below 100%[/*]
- Missile laser target inaccuracy is rerolled every second, and the actual inaccuracy of the beam is interpolated to the new value over 1s Remote and lua missile error is increased by 0.1m for each 1%[/*]
4 values are tracked
- Average velocity magnitude[/*]
- Velocity magnitude change[/*]
- Velocity rotation rate * velocity magnitude[/*]
- Construct rotation rate[/*]
Example vehicles
- Ships generally have 95-100% stability[/*]
- Flyer moving in a straight line, at 220 m/s (~CJE practical limit) ~90%[/*]
- Flyer circling at 2000m distance, 220 m/s speed ~75%[/*]
- Flyer circling at 1000m distance, 220 m/s speed ~65%[/*]
The changes mean stable vehicles and fortresses gain a slight boost against projectile weapons. Faster, and especially more evasive vehicles have a harder time shooting down projectiles, and at long distances their weapon efficiency is noticeably reduced. Makes slow vehicles, cannons and IR/radar/sonar missiles more useful in general.
Custom Propellers
One of the first big changes is custom propellers.
We have created a very in-depth system for customising the look of the custom propellers and we also suggest updating your builds to the new custom propellers, as power usage and thrust have been tweaked.
You can remove blades and rotate any blade around the hub if you wanted to go for a 3 blade Y shape setup, yet keep the functionality of all 4 blades! The sliders are purely aesthetic only and will not change the performance of the custom propellers.
As you can see from the screenshot below, this is the default look until you start adjusting the overall shape via the sliders and also material type from the texture dropdown list.


After spending a little time getting used to the controls you can create something that may fit the style of your craft more.
To give a general overview of this UI, the top screenshot is where you set the general shape, blade orientation, size of the blade and material type.
The second screenshot above shows current nodes and where they are on the blade 0%, 25%, 75%, and 100% you can also insert nodes and set how far down the blade you want the node to be.

This propeller was created using a linear node setup. What that means is that the preset removed 3 nodes along the blade, unchecked one of the blades in the bottom section of the list and setting +/- 35 degrees to the side blades. Adding nodes along the blade gives you more points to adjust the blade thickness, rotation, width and shaping.
However, if you still want more customisation, you can always use the decoration system with Ctrl X on one of the blade segments and create something from multiple parts. (yellow decorated custom rudders)

While we are discussing propulsion, we do have a few new changes.

What you are seeing in the above screenshot has been added to all propulsion methods, auto-balancing and manual. Manual is the usual means of setting up a propulsion block to be strafe/forward/yaw/pitch... Auto-balancing on the other hand (imagine a thruster placed dedicated to looking after roll) auto-balancing can add a few points of thrust to assist in pitch or hover. Auto-balancing will automatically calculate the combination of propulsion required for smooth roll/pitch/yaw/strafe/hover/forwards motion.
Auto-balancing does not change the manual settings you have already stored, so you can turn it on and off without affecting things permanently.
Lastly, on the subject of propulsion, we have set up a function very similar to what was removed previously, which was the "always up" function and added a new method that will also assist the thrust pointing horizontal. You can choose manual control of pitch/yaw and set the two sliders up as needed as a permanent angle or, via the new breadboard component which we shall discuss next.

Generic block setter. (GBS)
This new component in breadboard allows you to interact with any block on the construct that can be manipulated. I'll try to show a very basic example with a neon light.
The basic neon light has 6 attributes we can tweak within its UI: R,G,B, the intensity, the range and if it casts shadows on/off.
If we place down a number of neon lights we can tweak all of them at the same time via the GBS, however for this example we will name the neon light (Example1). If you keep the build cursor on the light and hit shift N, this will bring up the naming UI. You should see the tooltip of your light now has "? Name changed to "Example1" ".
Place down your mainframe and attach the AI breadboard to it. Scroll down to the GBS and click on the new component. You will see that the GBS has something already selected by default that it would interact with.
With the new module selected type the name we gave our neon light Example1 in the block name filter text box, check the dropdown list under block name filter and select neon light. You will know if everything is linked as you can see in the GBS module "LightFitting (#1) " If it still reads #0 then you may have a typo in the filter text box or when you named the neon light.
You will also see the left side notches turn from white (requires input) to grey (not used). This indicates that the attributes tied to LightData: Intensity, requires one type of input and in this case it requires a number from 0 to 10. The other notches correspond to different input types which will be used for other settings if that block type and the attribute selected from the dropdown list allow it.

In order to keep things simple, let us insert a timer and give it a max of 5 seconds. We shall plug that into the topmost notch. (Don't forget to mouse over each notch for a description as to what they require/do) If everything is working correctly your neon light should start to slowly get brighter and turn off once the timer resets and repeat.

In order to access the other attributes, we need a new GBS linked with the same name. This time we will check the dropdown list under the neon light label. Other block types can have quite the long list depending on the complexity of the block, you may also see (LOCKED) and this indicates that currently we have not enabled GBS to access these attributes. So please feel free to poke us and tell us what you need unlocked and why with hopefully some sort of example.

Select LightData: The colour, now you will see that all the notches are white. Mouse over these again and you will notice that each one represents the colour red, green and blue as well as other parameters. Drop 3 "Constant" components into the breadboard UI and attach one to the first notch. Set the constant component to something from 0.00 to 1 and as soon as you plug in your constant the light should be red if left with the default value of 1. Repeat this for the last two notches green and blue and set the colours as you wish. Try doing the same things again and setting up a method to turn on or off Lightshowdows :)

This was just a poor and easy example as you can use GBS with every block that has some tweakable options from spin blocks to turret blocks, from jets to engines, APS components, CRAMS etc... and the usual infinite amounts of trigger types that you can create via breadboard and more so now as we have created a logic gate component :D .
Changelog
Additions
AI
- Projectiles avoidance fake-missiles now have velocity and lateral distance configuration[/*]
Animation Block
- Added emotion control for the animation block (the droid model does not support this as it is aimed at a future character pack DLC)[/*]
- Added IK control for the limbs of the avatars of the animation block. Added breadboard support for this.[/*]
APS
- Added an option to the APS menu to disable barrel retraction on firing[/*]
Auto-balancing
- Added an auto-balancing option to jet/huge jet/ion/huge ion/propeller/huge propeller/custom jet engine/propeller hub. Auto-balancing will automatically calculate the combination of propulsion required for smooth roll/pitch/yaw/strafe/hover/forwards motion.[/*]
- Auto-balancing does not change the manual settings you have already stored, so you can turn it on and off without affecting things permanently[/*]
- Auto-balancing updates when propulsion systems rotate, or when they become inoperable (i.e a submerged jet or a dead propeller)[/*]
Breadboard
- Added a new breadboard component that can theoretically 'set' any (whitelisted) setting on any block. It is called the 'Generic block setter'[/*]
- Whitelisted propulsion block, light bulb, animation block, adv cannon firing piece, cram firing piece, cram fusing box, boiler controller, fuel engine values for the 'Generic block setter'[/*]
- Added logic gates as a new breadboard component, with all standard gate types available.[/*]
Custom Control
- Custom control surface tooltips have visualisations showing their pivot axis and force direction for positive/negative input[/*]
Custom Rudders
- Mirror meshes added for all rudder parts.[/*]
Fuel Engines
- Pressing Q while looking at fuel engine parts now also brings up the overview menu of the main block[/*]
Propeller Hub
- Mesh and material customisation for propeller hub added[/*]
Propulsion
- Added automatic adjustment of yaw and pitch orientation adjustments to point the propulsion system directly up, or keep it horizontal. This is the successor to the 'always up' value of the now obsoleted dediblades. It works for jets, ions, propellers,crank propellers, steam jets, CJE and propeller hubs. The maximum angle for yaw and pitch is still 15.[/*]
Stability
- Ships generally have 95-100% stability. 220 m/s (~CJE practical) limit flyer moving in a straight line ~90%. 220 m/s flyer circling at 2000m ~75%, circling at 1000m ~65%[/*]
- Stability components: velocity magnitude change, velocity magnitude, velocity rotation rate * velocity, construct rotation[/*]
- Weapons gain 0.004 inaccuracy for each 1% below 100% stability. Remote missile error is increased by 0.1m. Missile lasers roll a new inaccuracy error each second and interpolate from the old one over 1s[/*]
Changes
ACB
- Propulsion block yaw/picth angle change triggered through ACB takes 0.25s for a full 0-15 rotation[/*]
Aero Elevator
- Now has an AC of 20 and health of 300 and a cost of 15.[/*]
Aero Rudder
- Now has an AC of 20 and health of 300 and a cost of 15.[/*]
Aileron
- Now has an AC of 20 and health of 300 and a cost of 15.[/*]
APS
- Effective impact angle for sabot head is reduced to 75% of the actual impact angle (affects ricochet and damage reduction calculations)[/*]
Breadboard
- Modules on the breadboard expand to fit the text being displayed within them[/*]
Control surfaces
- Control/flight surfaces only add 0.75 drag for each 1 unit of force generated[/*]
Custom Control Surfaces
- Custom control surface force direction is now always normal to the placement plane. Local velocity only affects the magnitude of the force[/*]
- Pivots now have an AC of 40 and health of 400 with a cost of 50 other parts have an AC of 35 and health of 350 with a cost of 40.[/*]
Custom Rudders
- Positive/Negative force axis code has changed so anything made in alpha using them should check their yaw/roll/pitch inputs.[/*]
Custom Wings
- Wing parts now have an AC of 20 and health of 300 and a cost of 15.[/*]
Debug Tools
- Explosive, EMP and impact debug tool minimum damage down to 10[/*]
Interceptors
- Improved behaviour for thruster+secondary torpedo propeller interceptors[/*]
- Interceptor hit rate is now also tracked on the controller[/*]
- Interceptor missiles reverted to the old behaviour of trying to get as close as possible before exploding. Got a fallback to make sure they always hit the main target (if possible)[/*]
Particle Cannon
- Beam coherence for the same focus value improved by 25%[/*]
Shades
- Flags, sails and balloons now have opaque shaders.[/*]
Spinners
- Precision spinblock max turn rate in rotate to angle mode scales with MASS^0.2, instead of MASS^0.25 (faster, especially for spinners with lots of mass on them)[/*]
Steam
- Stable pressure of steam containers isn't affected by the number of vent outputs[/*]
Tailplane
- Now has an AC of 20 and health of 300 and a cost of 15.[/*]
UI
- Propeller clearance visualizations aren't displayed when the hud is turned off[/*]
- V menu now also shows how many cells are occupied by subconstructs, not just the total[/*]
Wing
- The old 1x1x1 wing is now removed from the build menu to encourage more performance-friendly usage with custom wings.[/*]
Fixes
AI
- Enemy simulator can no longer be activated when in campaign mode, other than in battle.[/*]
Breadboard
- An exception in a breadboard doesn't get up to the surface now and stops that breadboard for ~40 frames[/*]
Bugs
- [BUGS-3709] A sign evaluator with NaN input also outputs NaN (doesn't stop physics now)[/*]
- [BUGS-3546] Physics breaking sometimes when copy/pasting a breadboard [/*]
- [BUGS-2905] The game configuration slider for damage factor, and the campaign "damage difficulty" now affect block health rather than affecting damage output. It was discovered that many damage types were not properly adjusting for these values and this is a more reliable way of making sure everything works. The higher the damage factor, the lower the block health will be. The higher the campaign damage difficulty the lower player block health will be and higher enemy block health will be.[/*]
- [BUGS-3726] Repaired control surface pivots now work as expected[/*]
- [BUGS-3702] Steam crank wheel connections cannot be copy-pasted to bypass restrictions[/*]
- [BUGS-3705] Transmissions and crank motors with relative RPM other than 1 can be connected now[/*]
- [BUGS-3768] Blocks placed as decoration have a slight rotation error due to float precision[/*]
- [BUGS-3768] Hiding an original mesh, and then applying mirroring makes the original mesh re-appear [/*]
- [BUGS-3768] Some decoration wireframe aren't displayed when there are too many of them (can still happen but should happen a lot less often, it's a limitation due to an optimization) [/*]
- [BUGS-3774] Priority given to hit structural blocks first when several blocks are projected into the same mainConstruct cell[/*]
- [BUGS-3666] Placement offsets for blocks larger than 1x1x1 are now wiped on switching to prefab mode[/*]
- [BUGS-3667] Fixed a multithreading issue causing erratic flight. Mostly affected control surfaces, with multiple vehicles in play[/*]
- [BUGS-3695] Fixed stable pressure for some setups being affected by game speed[/*]
- [BUGS-3700] Fixed steam stat page reporting gearbox power output instead of turbine energy/s[/*]
- [BUGS-3778] Some map markers disappearing in campaign after changing language [/*]
- [BUGS-3738] Projectiles avoidance priority evaluation not displayed correctly[/*]
Crank Wheels
- A steam crank wheel can not be added to a group if it's already part of another group[/*]
Custom Control Surfaces
- Issue with 3m inverted CS corner mirror fixed.[/*]
EMP
- Fixed EMP potentially spreading in the wrong construct for some setups[/*]
Interceptors
- Interceptors without any propulsion can target projectiles above 5m[/*]
Missiles
- Added EMP susceptibility to missile wireless transmitter and receiver.[/*]
Multithreading
- Fixed various threading problems causing aim for all weapons to be ~1-2 frames behind the current position of the target[/*]
Physics
- Changed multi-threading code to ensure the main physics calculation chain finishes in time to apply the force to the vehicle rigid body on the correct frame[/*]
- Moved buoyancy force application, sail force application, wing force application, steam calculations and all propulsion force application into the same thread that handles the bulk of force applications and the calculation and application of the rigid body force. This should improve the stability of the physics simulation.[/*]
Shaders
- Some issues with particles/VFX not playing nicely with glass have been fixed.[/*]
UI
- Force lines in build mode (toggled with backspace) now show in the correct position (previously they were showing the forces calculated on the previous frame)[/*]
Unity
- Updated to unity 2021.2.18 from 2021.2.3. This is to fix a Linux UI issue where the mouse is never properly hidden and made inactive[/*]
Vehicle Controller Small
- Fixed sub mesh misalignment on small vehicle controller.[/*]
[ 2022-04-26 09:48:51 CET ] [Original Post]
Minimum Setup
- Memory: 4 GB RAMStorage: 3 GB available spaceAdditional Notes: Steam connection required to play the game
- Storage: 3 GB available spaceAdditional Notes: Steam connection required to play the game
Recommended Setup
- Storage: 3 GB available spaceAdditional Notes: Steam connection required to play the game
GAMEBILLET
[ 6375 ]
FANATICAL
[ 5746 ]
GAMERSGATE
[ 1265 ]
MacGameStore
[ 1943 ]
INDIEGALA
[ 986 ]
FANATICAL BUNDLES
GMG BUNDLES
HUMBLE BUNDLES
INDIEGALA BUNDLES
by buying games/dlcs from affiliate links you are supporting tuxDB
