

From the makers of the Cities in Motion franchise, the game boasts a fully realized transport system. It also includes the ability to mod the game to suit your play style as a fine counter balance to the layered and challenging simulation. You’re only limited by your imagination, so take control and reach for the sky!
Main features:

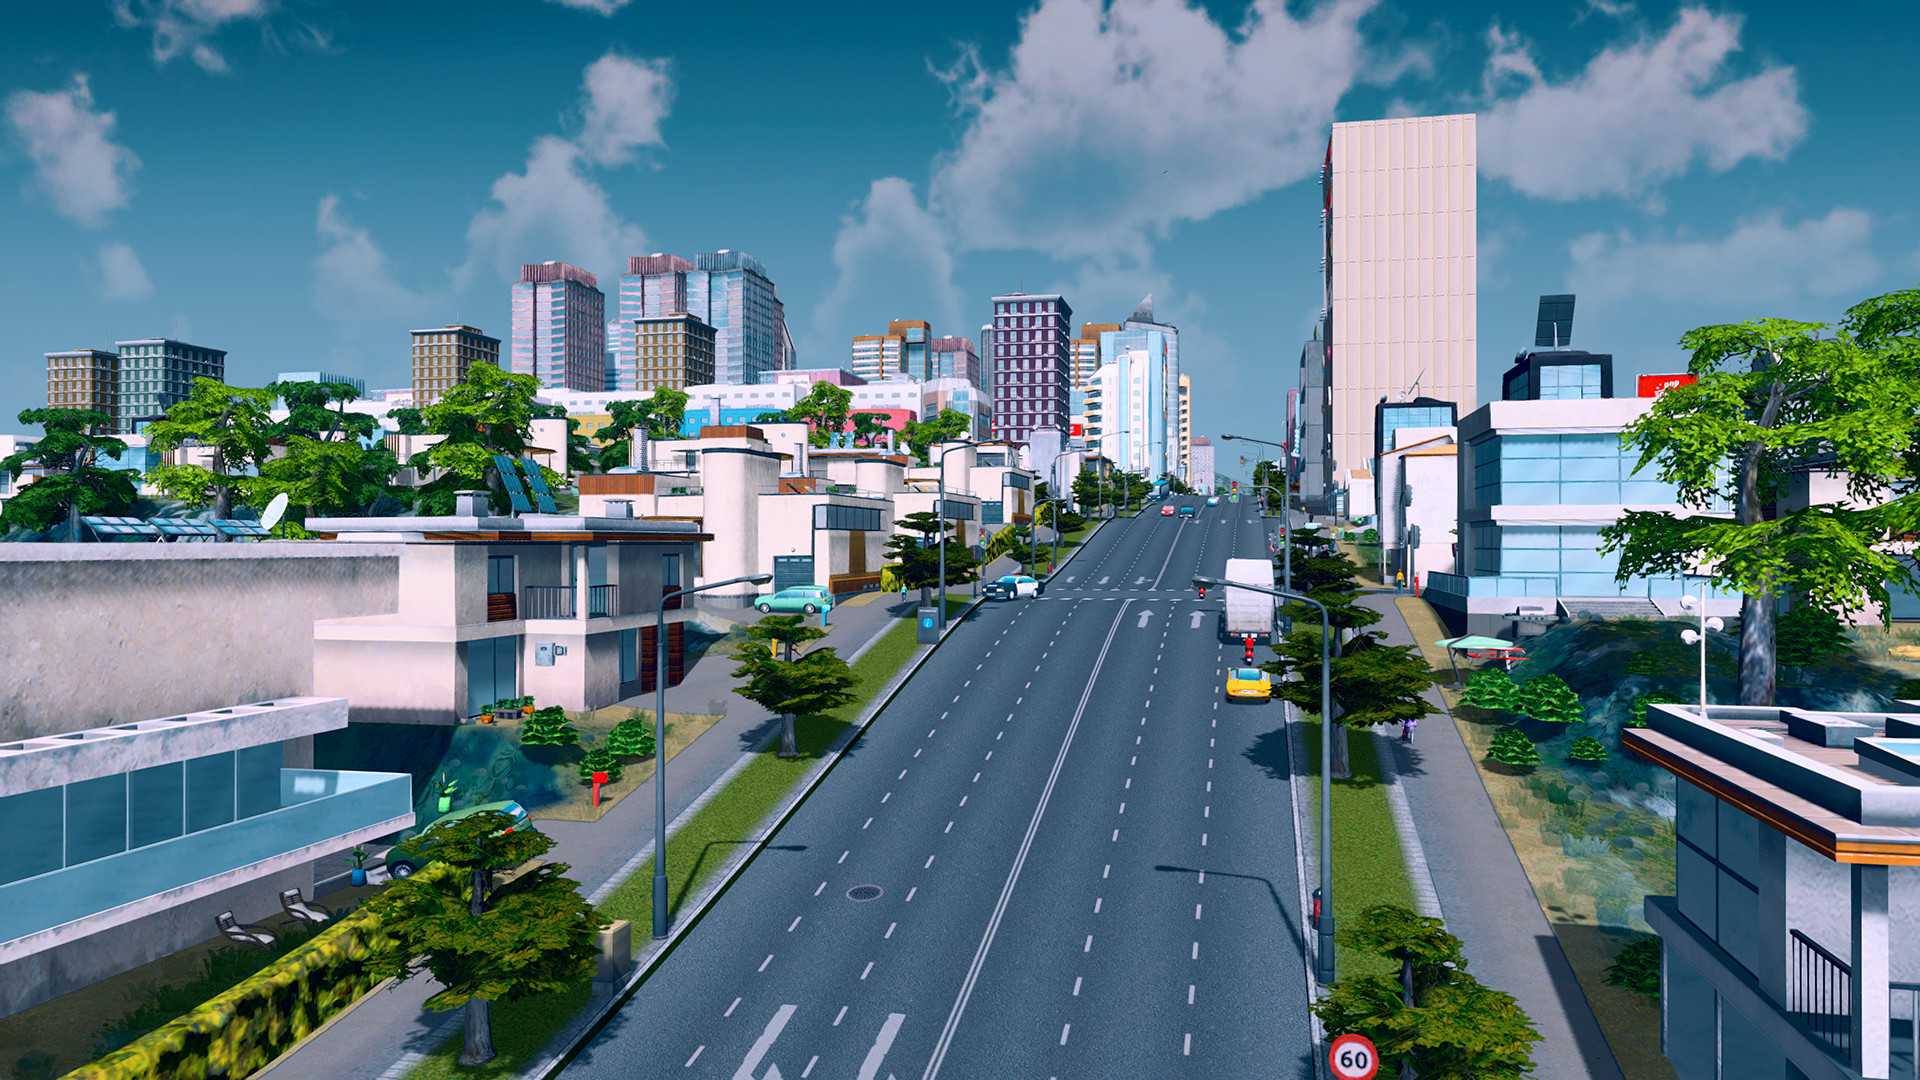
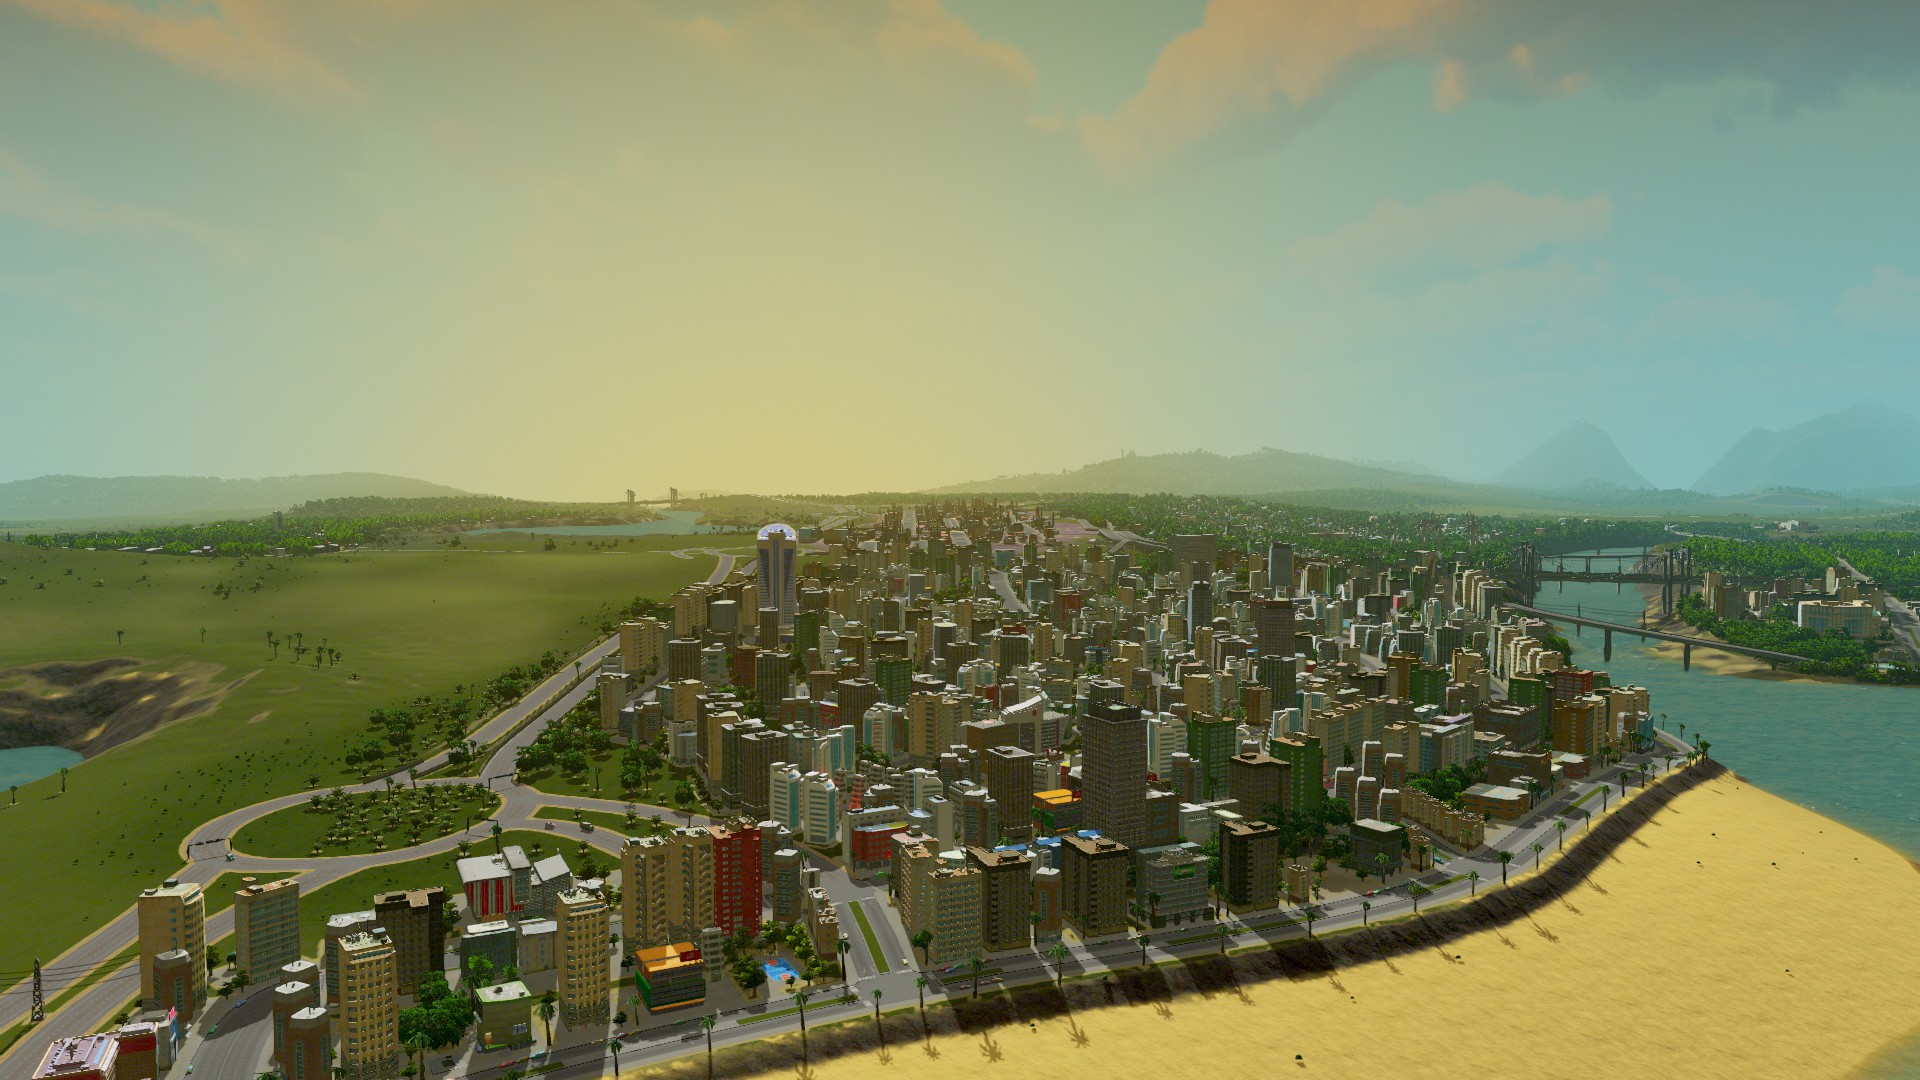
Multi-tiered and challenging simulation: Constructing your city from the ground up is easy to learn, but hard to master. Playing as the mayor of your city you’ll be faced with balancing essential requirements such as education, water electricity, police, fire fighting, healthcare and much more along with your citys real economy system. Citizens within your city react fluidly, with gravitas and with an air of authenticity to a multitude of game play scenarios.
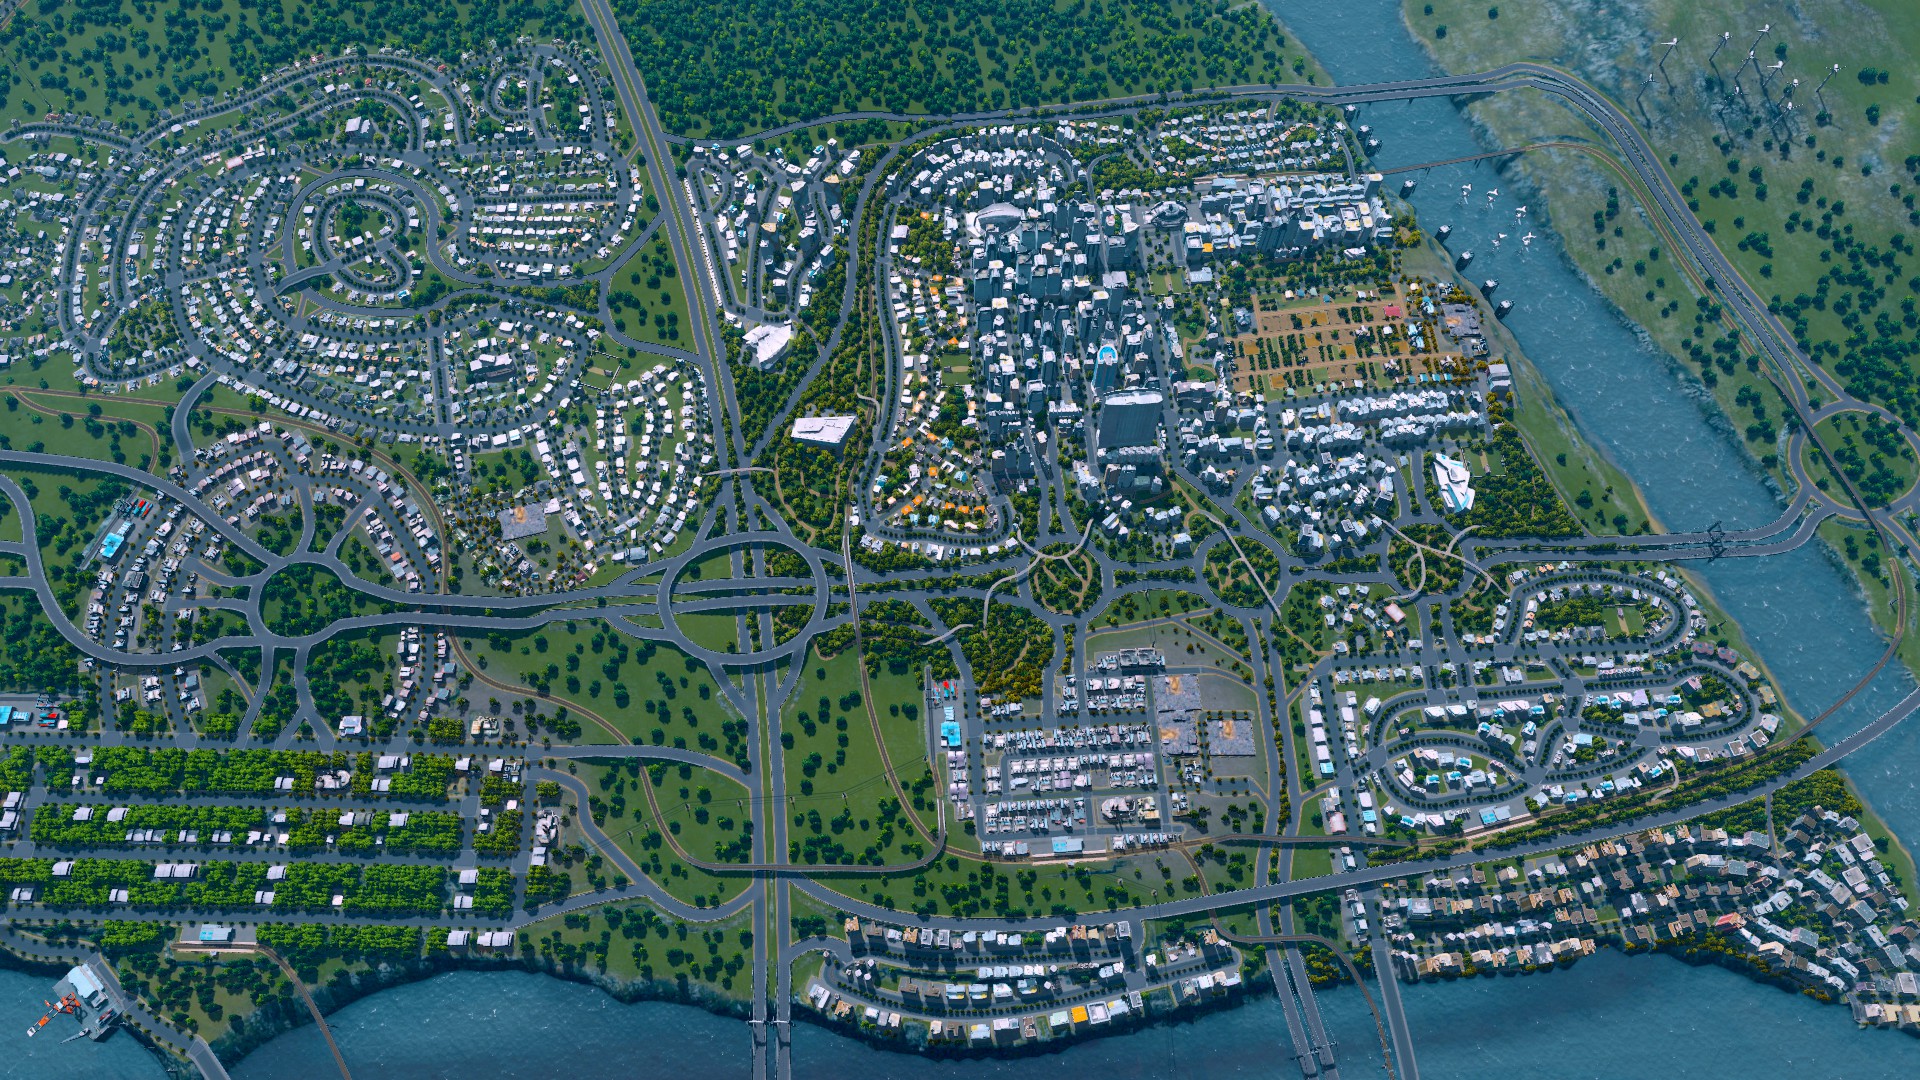
Extensive local traffic simulation: Colossal Orders extensive experience developing the Cities in Motion series is fully utilized in a fully fleshed out and well-crafted
Districts and Policies: Be more than just an administrator from city hall. Designating parts of your city as a district results in the application of policies which results in you rising to the status of Mayor for your own city.
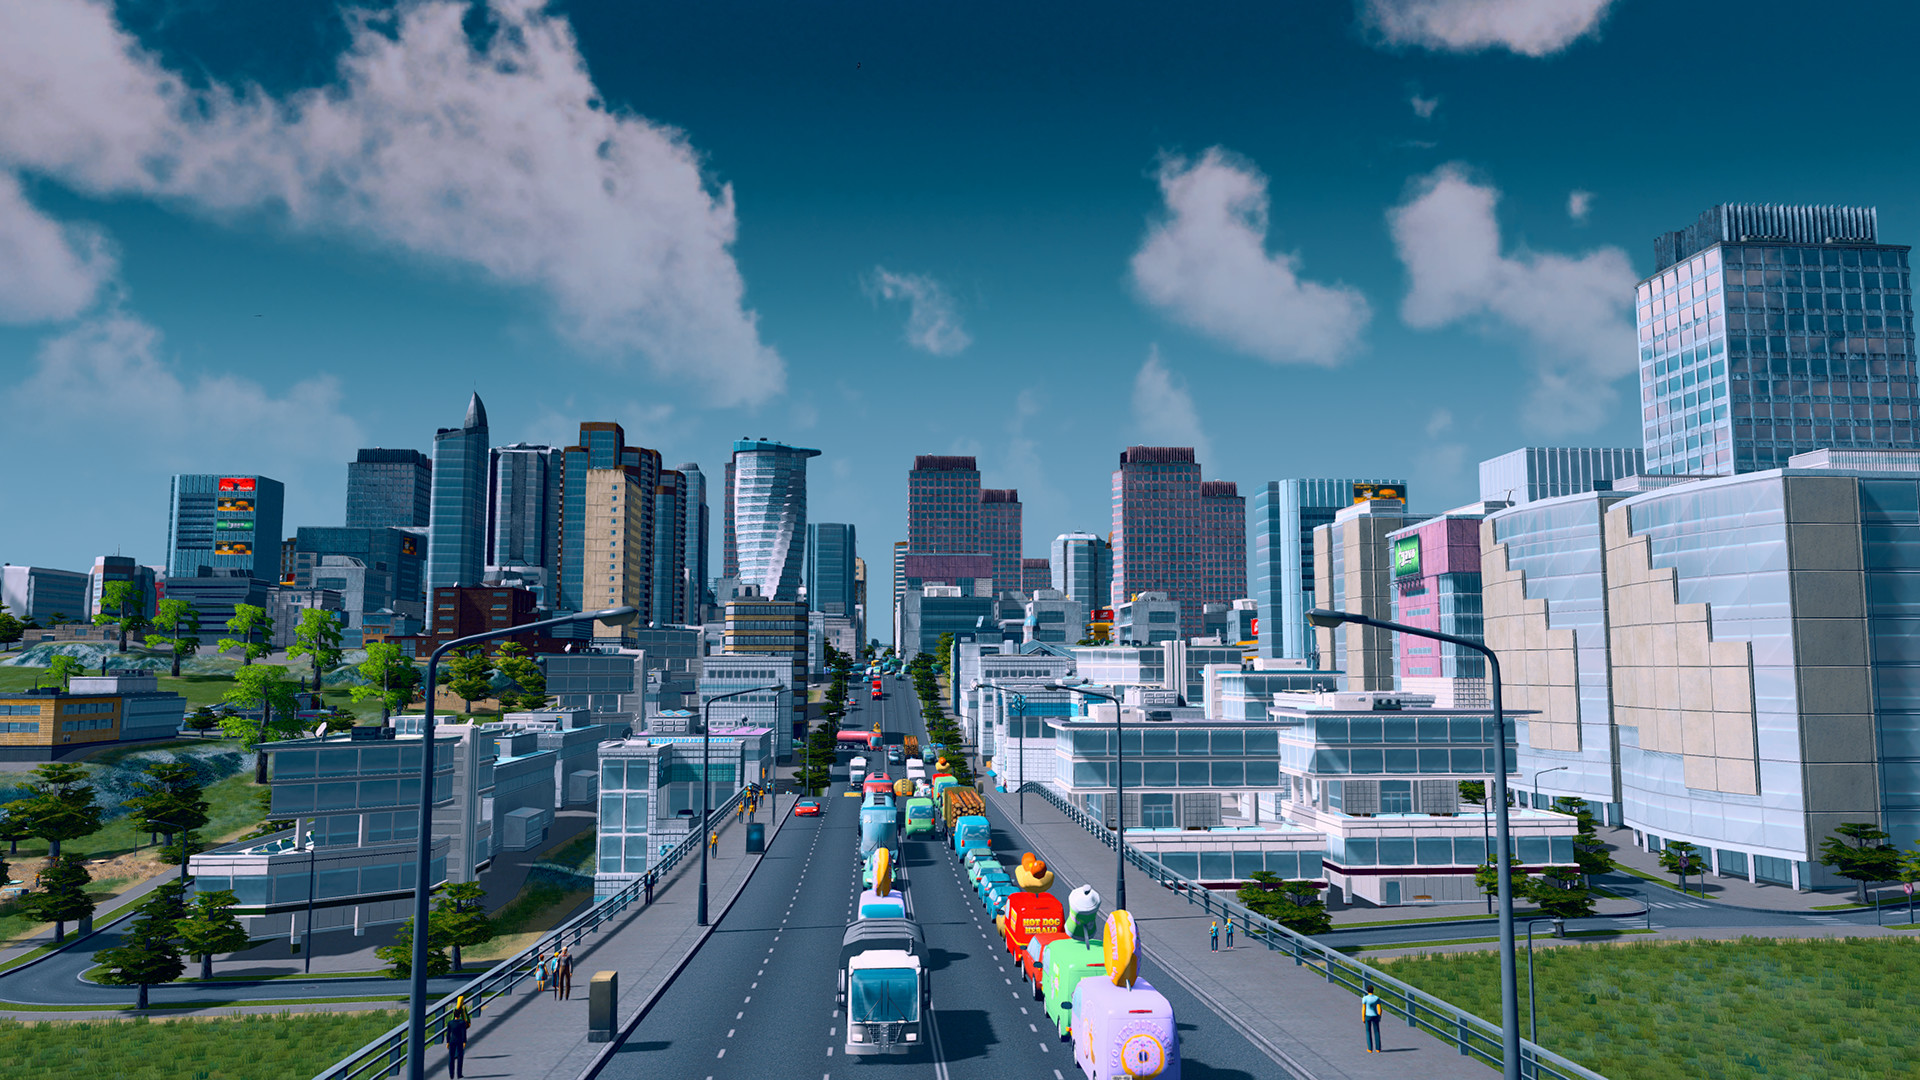
Utilize the Day and Night Cycle:
The city changes during the hours of the day and affects citizen schedules. Traffic is visibly slower at night and some zoned areas do not work with full efficiency. This expansion will put you in control of managing the different aspects of the day and night cycles.
Extensive modding support: Build or improve on existing maps and structures. You can then import them into the game, share them as well as download the creations of other city builders on the Steam workshop.
🕹️ Partial Controller Support
- Cities: Skylines Linux [4.74 G]
- Cities: Skylines - Station1 Linux [238.36 M]
- Cities: Skylines - Station2 Linux [210.94 M]
- Cities: Skylines - Event Linux [181.41 M]
- Cities: Skylines - AppID1 Linux [58.87 M]
- Cities: Skylines - AppID2 Linux [213.55 M]
- Cities: Skylines - CRR Linux [192.45 M]
- Cities: Skylines - Synthetic Dawn Radio Linux [200.87 M]
- Cities: Skylines - Radio Station 6 Linux [77.75 M]
- Cities: Skylines - Radio Station 7 Linux [63.88 M]
- Cities: Skylines - Chocolate Linux [66.13 M]
- Cities: Skylines - Cookies Linux [84.04 M]
- Cities: Skylines - Hawk Linux [70.18 M]
- Cities: Skylines - Breeze Linux [68.1 M]
- Cities: Skylines - Jelly Linux [73.95 M]
- Cities: Skylines - Brass Linux [65.07 M]
- Cities: Skylines - Cotton-Candy Linux [68.19 M]
- Cities: Skylines - Splooshies Linux [75.73 M]
- Cities: Skylines - Milkyway Linux [62.69 M]
- Cities: Skylines - RA Linux [78.51 M]
- [64.28 M]
- [73.51 M]
- [72.1 M]
- [69.41 M]
- [69.43 M]
- Cities: Skylines - After Dark
- Cities: Skylines - Snowfall
- Cities: Skylines - Match Day
- Cities: Skylines - Content Creator Pack: Art Deco
- Cities: Skylines - Natural Disasters
- Cities: Skylines - Content Creator Pack: High-Tech Buildings
- Cities: Skylines - Relaxation Station
- Cities: Skylines - Mass Transit
- Cities: Skylines - Pearls From the East
- Cities: Skylines - Green Cities
- Cities: Skylines - Concerts
- Cities: Skylines - Rock City Radio
- Cities: Skylines - Content Creator Pack: European Suburbia
- Cities: Skylines - Parklife
- Cities: Skylines - Carols, Candles and Candy
- Cities: Skylines - All That Jazz
- Cities: Skylines - Industries
- Cities: Skylines - Country Road Radio
- Cities: Skylines - Synthetic Dawn Radio
- Cities: Skylines - Campus
- Cities: Skylines - Content Creator Pack: University City
- Cities: Skylines - Deep Focus Radio
- Cities: Skylines - Campus Radio
- Cities: Skylines - Sunset Harbor
- Cities: Skylines - Content Creator Pack: Modern City Center
- Cities: Skylines - Downtown Radio
- Cities: Skylines - Content Creator Pack: Modern Japan
- Cities: Skylines - Coast to Coast Radio
- Cities: Skylines - Content Creator Pack: Train Stations
- Cities: Skylines - Content Creator Pack: Bridges & Piers
- Cities: Skylines - Rail Hawk Radio
- Cities: Skylines - Sunny Breeze Radio
- Cities: Skylines - Airports
- Cities: Skylines - Content Creator Pack: Vehicles of the World
- Cities: Skylines - Content Creator Pack: Map Pack
- Cities: Skylines - On Air Radio
- Cities: Skylines - Calm The Mind Radio
- Cities: Skylines - Content Creator Pack: Mid-Century Modern
- Cities: Skylines - Content Creator Pack: Seaside Resorts
- Cities: Skylines - Shoreline Radio
- Cities: Skylines - Paradise Radio
- Cities: Skylines - Plazas & Promenades
- Cities: Skylines - Content Creator Pack: Heart of Korea
- Cities: Skylines - Content Creator Pack: Skyscrapers
- Cities: Skylines - K-pop Station
- Cities: Skylines - 80's Downtown Beat
- Cities: Skylines - Financial Districts
- Cities: Skylines - Content Creator Pack: Map Pack 2
- Cities: Skylines - African Vibes
- Cities: Skylines - Content Creator Pack: Africa in Miniature
- Cities: Skylines - JADIA Radio
- Cities: Skylines - Content Creator Pack: Sports Venues
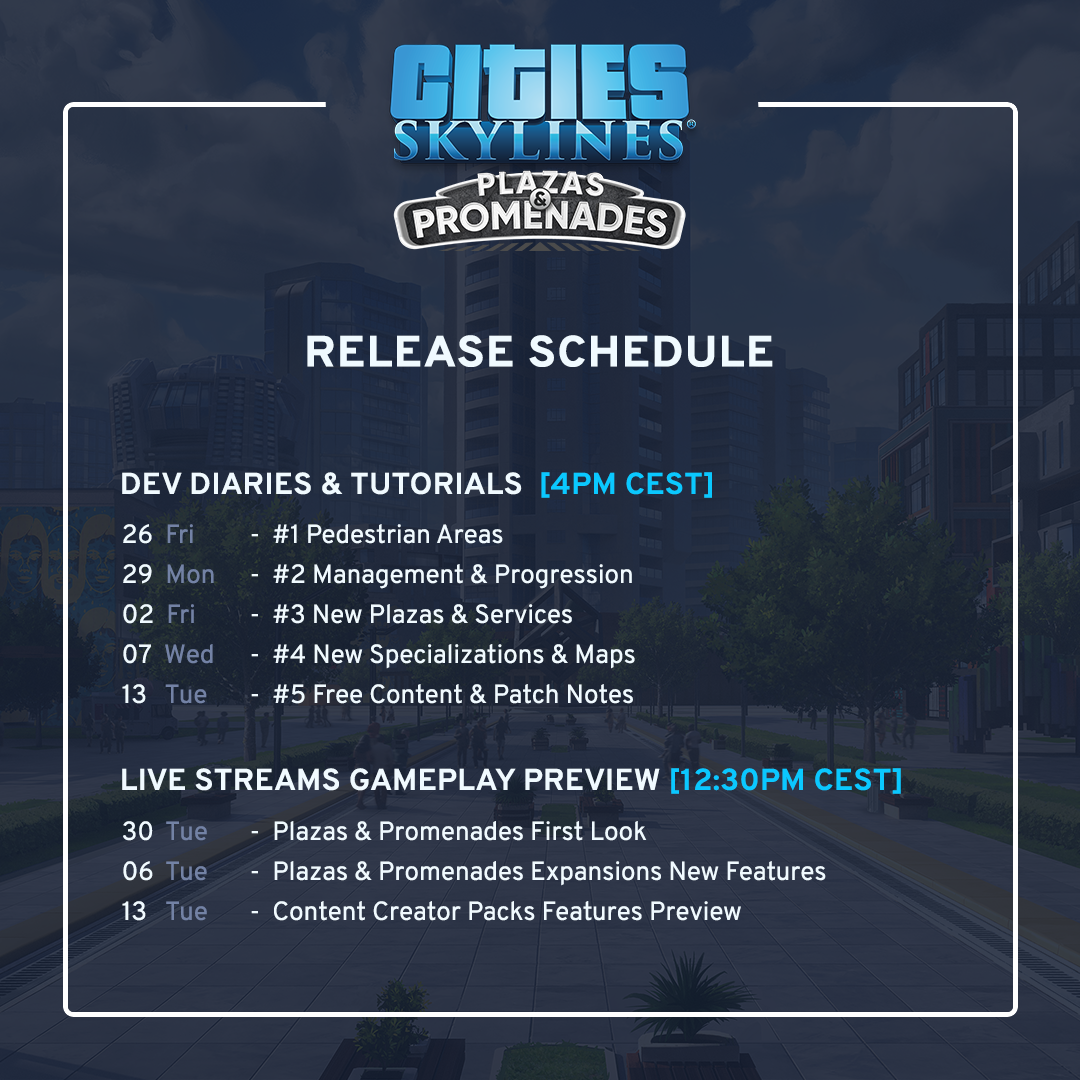
Greetings mayors, and welcome to another set of Dev Diaries! Are you excited about Cities: Skylines Plazas and Promenades? Over the course of the next two weeks, I will walk you through all the new content from pedestrian areas and streets to new specializations and service buildings - and plazas of course! And without further ado, lets have a look at the announcement video:
At the center of Cities: Skylines Plazas and Promenades we have pedestrian areas and streets, which give you the tools to create neighborhoods focused on walkability. These will work to reduce traffic as well as noise pollution. To ensure you are able to create areas suited for your specific city, the pedestrian areas work with all existing zoned buildings!
Creating Pedestrian Areas
Pedestrian areas take advantage of the Area Tool, which you may be familiar with already. It can be found in the Districts and Areas menu and becomes available when you reach Milestone 3 - Tiny Town. Paint over empty land if you want to create a new pedestrian neighborhood, or over an existing part of your city if you wish to turn it into a pedestrian area. Like other areas and districts, it can be adjusted later as needed.
Paint a pedestrian area to unlock service points
Once you are satisfied with the area, its time to place a Service Point, which can be found in the Pedestrian Areas menu under Parks & Plazas. Service points are essential to pedestrian areas as most vehicles, including garbage and delivery trucks, are not allowed on pedestrian streets. Instead, garbage is automatically collected from buildings on pedestrian streets to be picked up at the service point. Similarly, resources, goods, and mail are all routed through the service point, so make sure its placed on a road that can handle increased truck traffic!
Service points come in two different sizes and three different types: The general Service Points, which cover all the listed needs, Garbage Service Points, which focus on waste management, and Cargo Service Points, which handle resources, goods, and mail.

Service points are vital for your pedestrian areas
The different service points are important as they each have a capacity and if the area exceeds this, some buildings on pedestrian streets will not have their needs taken care of. Large pedestrian areas will need more service points to provide for the buildings on pedestrian streets, and depending on the mix of buildings in an area, you may need a higher capacity for garbage collection or cargo delivery.
Pedestrian Streets
With the pedestrian area created and a service point placed, its time to place pedestrian streets! These paved roads can only be used by walking or biking citizens and, when necessary, emergency vehicles like ambulances, hearses, police cars, and fire trucks. As citizens are the main users of the pedestrian streets, vehicles have to obey slow speed limits unless responding to an emergency.We have included a lot of variation in the pedestrian streets so that you can customize the look and feel of your areas. There are 3 styles: Sandstone, Bluestone, and Cobblestone, which come in two different widths. Each street also comes with 5 different variations with things like added grass, trees, and bus-only lanes. Thats a total of 30 different pedestrian streets for you to choose from!

Bluestone on the left, Sandstone in the middle, and Cobblestone on the right
As youre building your pedestrian streets, you may go outside the pedestrian area you defined earlier. If that happens, the streets will automatically extend the area to follow them. This option can be enabled or disabled when placing the streets. Pedestrian streets can also be placed outside pedestrian areas, but keep in mind that any buildings placed on these streets will need a pedestrian area and a service point to function.
Lastly, pedestrian streets come with a cool new little feature: Bollards automatically appear at the entrance to pedestrian streets to discourage vehicles from entering. When a vehicle needs to enter or exit the pedestrian street, they will stop and wait for the bollards to retract into the street before driving past. Isnt that cool?

Bollards retracting for a waiting police car
Thats all we have for you this time! In the next Dev Diary, well cover the management and progression of pedestrian areas, so stay tuned for more information on Monday at 4PM CEST / 7AM PDT! And dont forget to check out the video tutorial by Overcharged Egg below:
Minimum Setup
- OS: Ubuntu 12.04 (64-bit)
- Processor: Intel Core 2 Duo. 3.0GHz or AMD Athlon 64 X2 6400+. 3.2GHzMemory: 6 GB RAM
- Memory: 6 GB RAM
- Graphics: nVIDIA GeForce GTX 260. 512 MB or ATI Radeon HD 5670. 512 MB (Does not support Intel Integrated Graphics Cards)Network: Broadband Internet connection
- Storage: 4 GB available space
Recommended Setup
- OS: Ubuntu 14.10 (64-bit)
- Processor: Intel Core i5-3470. 3.20GHz or AMD FX-6300. 3.5GhzMemory: 8 GB RAM
- Graphics: nVIDIA GeForce GTX 660. 2 GB or AMD Radeon HD 7870. 2 GB (Does not support Intel Integrated Graphics Cards)Network: Broadband Internet connection
- Storage: 4 GB available space

[ 6370 ]
[ 5870 ]
[ 1991 ]
[ 1943 ]
[ 986 ]

Time left:
356099 days, 17 hours, 59 minutes

Time left:
356099 days, 17 hours, 59 minutes
Time left:
4 days, 1 hours, 59 minutes

Time left:
32 days, 1 hours, 59 minutes

Time left:
35 days, 1 hours, 59 minutes

Time left:
36 days, 1 hours, 59 minutes

Time left:
9 days, 11 hours, 59 minutes
Time left:
4 days, 19 hours, 59 minutes
Time left:
10 days, 19 hours, 59 minutes
Time left:
11 days, 19 hours, 59 minutes
Time left:
16 days, 19 hours, 59 minutes
Time left:
18 days, 19 hours, 59 minutes
Time left:
22 days, 19 hours, 59 minutes
Time left:
2 days, 9 hours, 14 minutes

Time left:
7 days, 2 hours, 0 minutes

Time left:
9 days, 1 hours, 0 minutes
Time left:
14 days, 8 hours, 10 minutes


