The game is open world (choose your route and progress at your leisure), and contain both SFW(Twitch TOS) and NSFW(OffBrand) options (via a switch) for streaming convenience. Art Galleries: both Hentai Scenes (Animated), and Fan Art Collectables (includes Fanfics), are at your disposal. The dialogue is fully voiced, including MC dialogue by VincentHeartSN (Male) and Minizhirra (Female). With each route, you can play as male, female, or a non-binary option, which your decisions will matter, and change the perspective and decisions down the road. All routes will be intertwined and will reveal the main story as you progress through each one. Complete all all Main Routes with Male, Female, or Non-Binary, to get a treat.
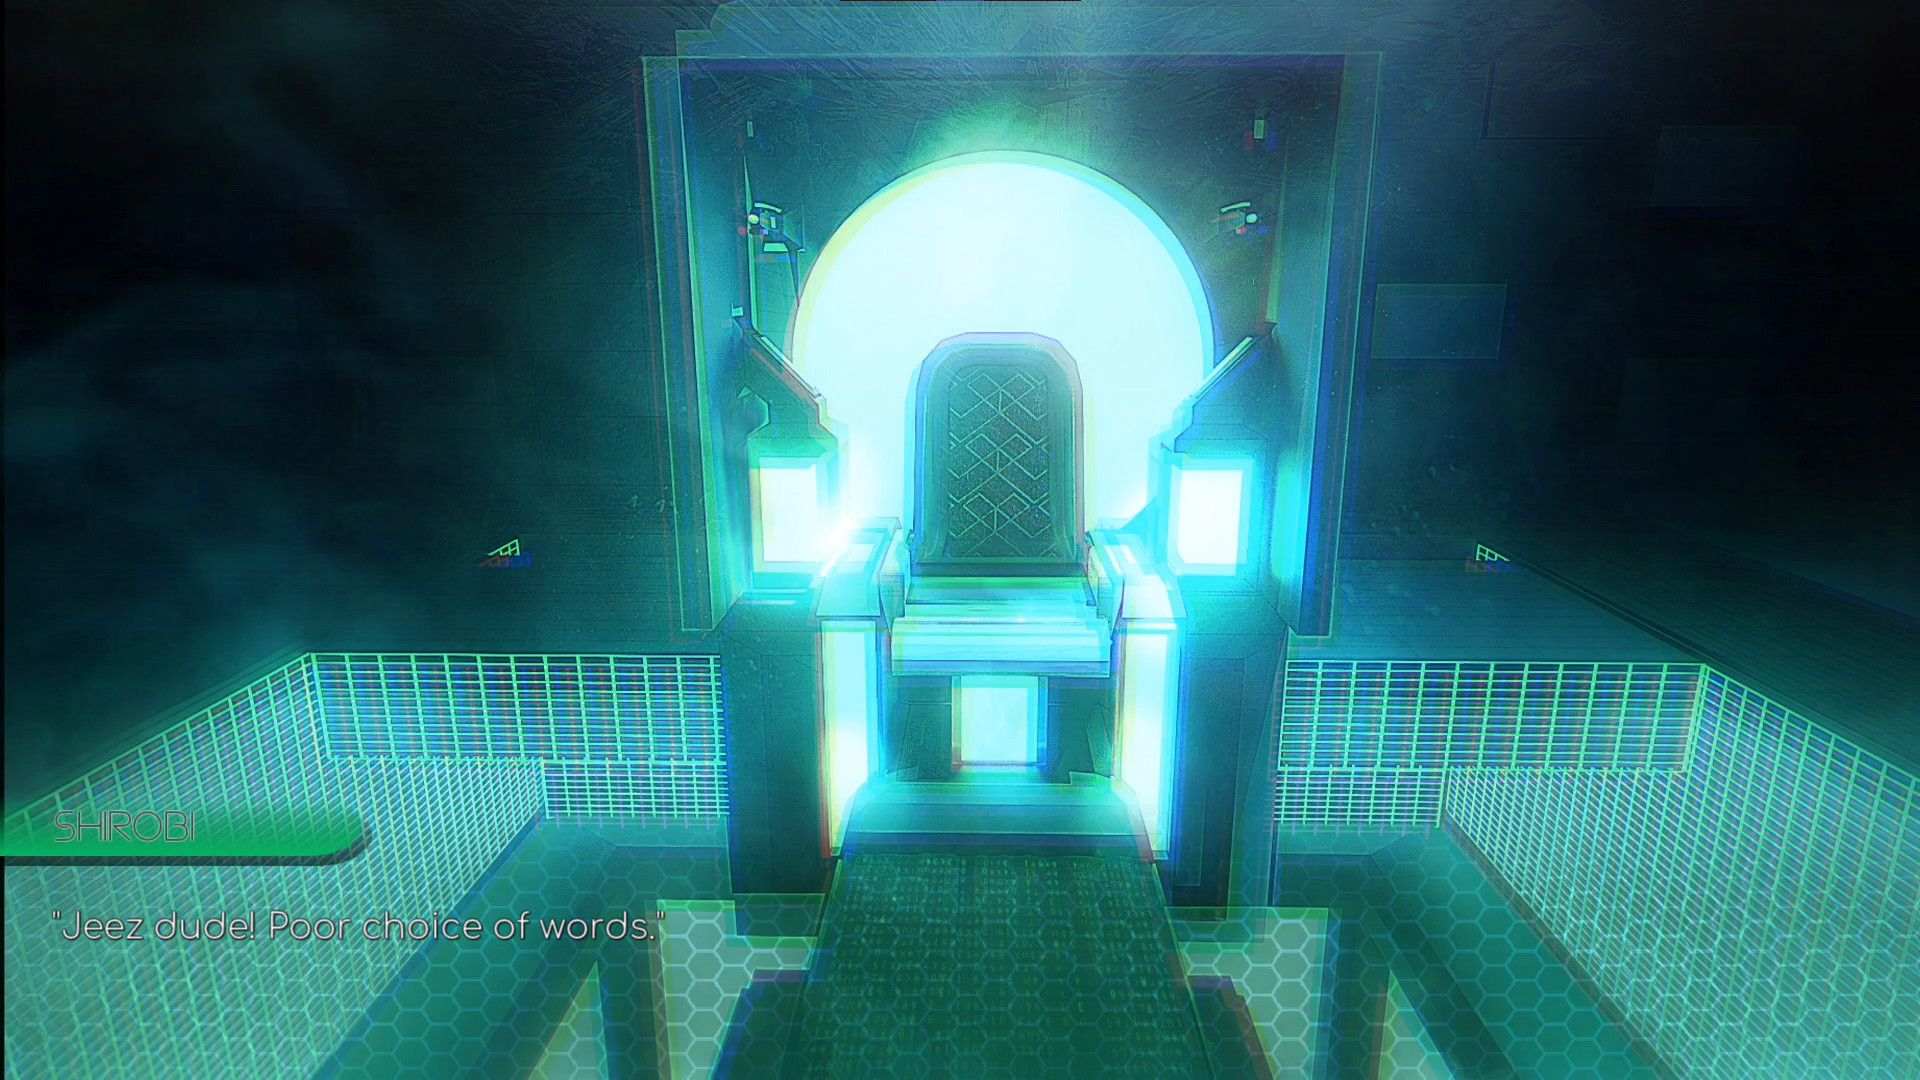
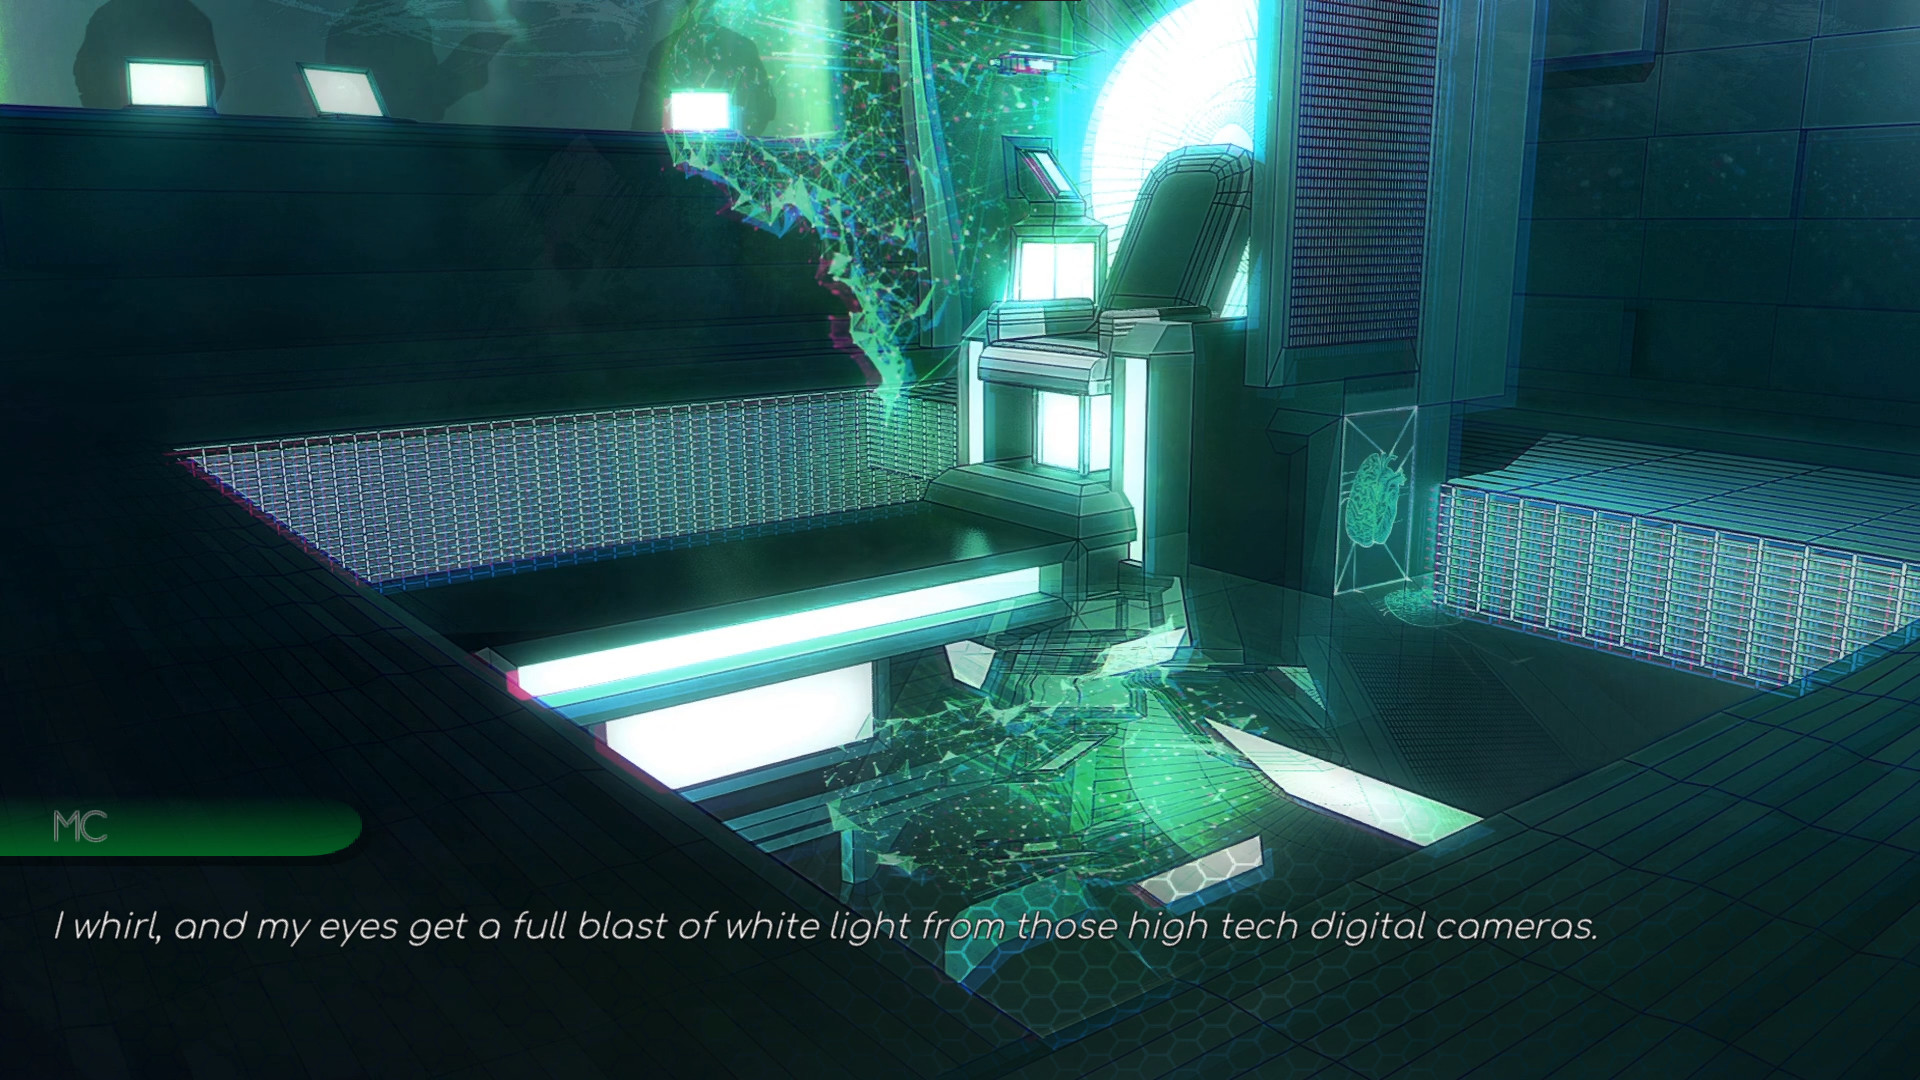
It's 2040. Humanity has entered another phase in it's evolution: the digitizing of human thought patterns. The idea had been studied for over a decade, and now the first human to ever be digitized has been chosen. As you, the MC, were being digitized on live TV, you suddenly vanished out of sight of the lab techs. Somehow, your thought patterns had been sucked into the Twitch servers. In this strange digital space, you find that you can engage with your favorite Vtubers and run into a variety of... interesting situations. However, this place is far from paradise. There are dark whispers within the code, and if you don’t tread carefully, you could become a target. As you discover new places, you realize that there are many ways to play out your story. There is a big difference between casual sex and love, and you will be able to explore either one... provided the AI is willing.
Date all of the characters, become friends with them, and even bring one of them back with you to the real world. Have friend date nights and join threesomes/foursomes. Uncover the secret danger lurking in the internet. Collect fan art for your home and gallery. Become Team Leader of the Vtubers, become the Harem King/Queen, go back to the Real World to champion AI rights, the choice is (almost) entirely in your hands.
As I am writing, I decided to make a full reference manual this past month and knock out the future GitHub Use Manual at the same time.
[p align=\"start\"]B1NARY is not just a VN, B1NARY is platform for new VN\'s and is designed to be flexible, modular, fairly straightforward to use. [/p][p align=\"start\"]The information below won\'t spoil much story, but it\'s a long read (44 Pages!). There\'s alot of work we put into this. [/p][p align=\"start\"]So if you are not into the technical, this was the TLDR lol. [/p][p align=\"start\"][/p][p align=\"start\"]Spank Engine Commands[/p][p align=\"start\"]Writers Script:[/p][img src=\"https://cdn.cloudflare.steamstatic.com/steamcommunity/public/images/clans/40086735/fcc11b2c6d831ab3fe3332624c6472d8e0651b67.png\"][/img]
[p align=\"start\"]The Writers Script is the name of the script format the writer uses to control backgrounds, speech, text, audio, themes, choices, and characters. All of the formatting is below to help writers have the ultimate adaptability and control while still being relatively straightforward, which avoiding programming.[/p][p align=\"start\"]The system is very thorough, but this comes at a cost. Some design decisions can be tedious in nature. Overall performance, memory allocation, and efficiency is kept in mind, while ensuring the maximum adaptability.[/p][p align=\"start\"]The original intention, and it remains so, was to create a system I, as a writer, can write many different visual novels with only changing UI format. I also wanted a translation system more friendly to additions and editing. In the end, I decided to make the whole setup available to other developers that want to use it as base backdrop for their visual novels.[/p][p align=\"start\"]Focus was modularity, ease of coding, and the max capability I can manage to have inside of Unity; to try and keep it easy to navigate, work has been done to utilize the basic principles of Unity in the process.[/p][p align=\"start\"]I will be using this for many visual novels in the future. B1NARY will be my first full sized VN.[/p][p align=\"start\"]Text:[/p][p align=\"start\"]Additive Text:[/p][p align=\"start\"]Allows each line to be added onto the panel one line at a time.[/p][p align=\"start\"][/p][p align=\"start\"]{additive: on}[/p][p align=\"start\"]{additive: off}[/p][p align=\"start\"][/p][p align=\"start\"]Italic:[/p][p align=\"start\"]Makes text italic. Requires Start and End Brackets[/p][p align=\"start\"][/p][p align=\"start\"](Front), (End) [/p][p align=\"start\"][/p][p align=\"start\"]Bold:[/p][p align=\"start\"]Makes text bold inside the brackets. Requires Start and End Brackets[/p][p align=\"start\"](Front), (Back)[/p][p align=\"start\"][/p][p align=\"start\"]Characters / Object Control:[/p][p align=\"start\"]Character Focus:[/p][p align=\"start\"]Character focus is a central point of the way the systems work. Lines below the Character Focus command will show the Name of the Character that is focused on in the name template of the UI.[/p][p align=\"start\"]This will also affect expressions.[/p][p align=\"start\"]If the last focus was the object that you want to get expressions or animations from, then you do not need to set focus again.[/p][p align=\"start\"]There is currently no limit on the lines between focus switch and animations/expressions.[/p][p align=\"start\"][/p][p align=\"start\"]NOTE: All current objects and items are required to be at least deactivated in scene for the system to see them.[/p][p align=\"start\"][/p][p align=\"start\"]To change character focus:[/p][p align=\"start\"](Name of Character)::[/p][p align=\"start\"]Example:[/p][p align=\"start\"][/p][p align=\"start\"]MC::[/p][p align=\"start\"](now focused on MC.)[/p][p align=\"start\"]Asterella::[/p][p align=\"start\"][/p][p align=\"start\"][/p][p align=\"start\"](Now focused on Asterella. If she has expressions you can trigger them via command as long as she is in focus.)[/p][p align=\"start\"][img src=\"https://cdn.cloudflare.steamstatic.com/steamcommunity/public/images/clans/40086735/b91d13a211987067306a5f481f52a6ed8246ed17.png\"][/img][/p][p align=\"start\"][/p][p align=\"start\"]Spawning:[/p][p align=\"start\"]Spawning and positioning of a character. This is for any object. If they are characters, they will have set audio channels in the Component Menu in the Object. Center Position is .5 with 0 being Left off Screen, and 1 being on the Right Side.[/p][p align=\"start\"][/p][p align=\"start\"]{spawnChar: (Name of Object), (Position Start: 0 is Dead Center), (Change Name To)}[/p][p align=\"start\"][/p][p align=\"start\"]Example:[/p][p align=\"start\"]{spawnChar: Haru, .25, Haru}[/p][p align=\"start\"]Position would be almost the far left side of the screen.[/p][img src=\"https://cdn.cloudflare.steamstatic.com/steamcommunity/public/images/clans/40086735/b9e3817134d73d9428e461e03ed6212d163f2bc7.png\"][/img]
[p align=\"start\"][/p][p align=\"start\"][/p][p align=\"start\"]Non Object Spawning:[/p][p align=\"start\"]When you need a voice without an object to position you can use this command. The command is slightly altered to allow you add an audio channel.[/p][p align=\"start\"]{spawnEmpty: (Name you want), (Audio Channel)}[/p][p align=\"start\"]Example:[/p][p align=\"start\"]\\[spawnEmpty: Burbon, NPC}[/p][img src=\"https://cdn.cloudflare.steamstatic.com/steamcommunity/public/images/clans/40086735/a44bed9c671bb7f6f3f47a8b947e983f86f80c91.png\"][/img]
[p align=\"start\"][/p][p align=\"start\"]Movement of Objects:[/p][p align=\"start\"]Movement of Objects is one speed with a fade on the start and end. Code is open to adjust this or add other options. EX: Moving Focus Object around.[/p][p align=\"start\"][/p][p align=\"start\"]Center Position is .5 with 0 being Left off Screen, and 1 being on the Right Side.[/p][p align=\"start\"][/p][p align=\"start\"]If negative number, it will be off screen on the left and if positive over 1 it will be off screen on the right.[/p][p align=\"start\"][/p][p align=\"start\"]{moveChar: (Name of Object), (New Position)}[/p][p align=\"start\"][/p][p align=\"start\"]Example:[/p][p align=\"start\"]{moveChar: Female Bystander, .50}[/p][img src=\"https://cdn.cloudflare.steamstatic.com/steamcommunity/public/images/clans/40086735/dbab5f5ff6f8d16de99fe9ea8c741d0b6790903d.png\"][/img]
[p align=\"start\"][/p][p align=\"start\"][/p][p align=\"start\"]Live 2D Eye Tracking:[/p][p align=\"start\"]Live 2D Models have the capability to track an object, allowing for the writer to control who or what the models are collectively looking at. You can even add multiple focus objects to allow models to look at different things.[/p][p align=\"start\"][/p][p align=\"start\"]The item can be controlled via script using x and y axis using this command:[/p][p align=\"start\"][/p][p align=\"start\"]{movecube: (x), (y)}[/p][p align=\"start\"]Example:[/p][p align=\"start\"]This functionality is handled via object control by adding the Follow Cube Function.[/p][img src=\"https://cdn.cloudflare.steamstatic.com/steamcommunity/public/images/clans/40086735/a4fbcf0965bf7de4ce621200698aa38bbb2b5c2a.png\"][/img]
[p align=\"start\"]This is the Script attached to a live 2D model.[/p][img src=\"https://cdn.cloudflare.steamstatic.com/steamcommunity/public/images/clans/40086735/5d7c7465ec1831b9760a2548dc5fd94d4b8f2bd5.png\"][/img]
[p align=\"start\"][/p][p align=\"start\"][img src=\"https://cdn.cloudflare.steamstatic.com/steamcommunity/public/images/clans/40086735/0fac247d22b5b1581ad4eeb00e10a7236cc6656b.png\"][/img][/p][p align=\"start\"]In order for it to properly work, the model prefabs have to be in the scene prefab attached to the models and rigged properly. This design is to keep things straight forward and allow for maximum adaptability.[/p][p align=\"start\"][/p][p align=\"start\"][/p][p align=\"start\"]Change Names of Models:[/p][p align=\"start\"]You can change the name of a current model by using this command. After the name change it will go by the name you assign until the change of Scenes. Changing Scenes resets character layouts.[/p][p align=\"start\"]Also audio is attached to the model and will remain the same. If you change the name of a non model object, the former assignment of audio channel remains.[/p][p align=\"start\"][/p][p align=\"start\"]Command:[/p][p align=\"start\"][/p][p align=\"start\"]{changeName: (old name), (New Name)}[/p][p align=\"start\"][/p][p align=\"start\"]Example:[/p][img src=\"https://cdn.cloudflare.steamstatic.com/steamcommunity/public/images/clans/40086735/023bc55d2f087fd318d5386cf699114be9630122.png\"][/img]
[p align=\"start\"]Expressions:[/p][p align=\"start\"]Expressions are motions used by Live 2D to change the expression of the facial features. Motions are not the same as animations. These would be considered Toggles. You should even be able to toggle different outfits this way. They are for now only for live 2D and 3D models.[/p][p align=\"start\"]The names of these are based on Unitys naming scheme when the characters are rigged in Unity. This can also be used for 3D models.[/p][p align=\"start\"]The expression used is based on name and which focus the character is set up.[/p][p align=\"start\"][/p][p align=\"start\"]\\[(Expression Name)][/p][p align=\"start\"][/p][p align=\"start\"]Example:[/p][p align=\"start\"][/p][p align=\"start\"]MC::[/p][p align=\"start\"](Change Focus to Asterella)[/p][p align=\"start\"]Asterella::[/p][p align=\"start\"]\\[Smile] (This activates the smile motion for the object named Asterella)[/p][p align=\"start\"][/p][p align=\"start\"][/p][p align=\"start\"]Animations:[/p][p align=\"start\"]Animations are named via the Unity animation system and require a full rig set up. These can be looped animations, or one time animations and can be used at any time. Focus as well is required to be on the model in question. You can also rename these using Unity.[/p][p align=\"start\"][img src=\"https://cdn.cloudflare.steamstatic.com/steamcommunity/public/images/clans/40086735/eb451c46750bf2dea9dd521b17665cfc676c2088.png\"][/img][/p][p align=\"start\"]{anim: (name), (name of animation)}[/p][p align=\"start\"][/p][p align=\"start\"]Example:[/p][p align=\"start\"][/p][p align=\"start\"]Asterella::[/p][p align=\"start\"]{anim: Asterella, Dance}[/p][p align=\"start\"][/p][img src=\"https://cdn.cloudflare.steamstatic.com/steamcommunity/public/images/clans/40086735/7cf96be150787bb5f2e9b5d5f4dabb2b2f49c214.png\"][/img]
[p align=\"start\"][/p][p align=\"start\"][/p][p align=\"start\"]Activating and Deactivating Objects and Characters:[/p][p align=\"start\"]These two commands utilize the object activate and deactivate function with game objects in scene. Normally this was introduced for performance optimization and UI components that are custom (Binary / Non Binary Choice panel is a good example). Two sub commands: char for character models, and gameobject for non model items.[/p][p align=\"start\"]For character models, use the spawnChar command to activate them.[/p][p align=\"start\"]Uses Unity system to deactivate character prefab.[/p][p align=\"start\"][/p][p align=\"start\"]{disablechar: (name of object currently)}[/p][p align=\"start\"][/p][p align=\"start\"]Example:[/p][img src=\"https://cdn.cloudflare.steamstatic.com/steamcommunity/public/images/clans/40086735/f883355d48b558a78d888a574b64b1ad05b5ddd3.png\"][/img]
[p align=\"start\"]Question: Can you use this functionality to create object based transitions?! YES! We do already.[/p][p align=\"start\"]Activates game object currently in scene. Name is case sensitive.[/p][p align=\"start\"][/p][p align=\"start\"]{usegameobject: (name of object)}[/p][p align=\"start\"][/p][p align=\"start\"]Example:[/p][img src=\"https://cdn.cloudflare.steamstatic.com/steamcommunity/public/images/clans/40086735/fd1a422e23d5739d4255b1c3d63b80e44230c4cc.png\"][/img]
[p align=\"start\"][/p][p align=\"start\"][/p][p align=\"start\"]Choices:[/p][p align=\"start\"]Choices are the core of any good branching narrative. Add on the ability to save flags in the save files for future selections, and you have the tools to further your interaction with players.[/p][p align=\"start\"]Choices are the closest to full time programming that you will get. You can go as simple or as complex as you want.[/p][p align=\"start\"][/p][p align=\"start\"]Commands:[/p][p align=\"start\"][/p][p align=\"start\"]Choice Basic Structure:[/p][p align=\"start\"]This is the basic structure of s a simple choice. { } Indicate full actionable items, and the \\[ ] brackets denote the sub choice optional content. After the choice bracket, a second set of { } brackets will be all the options in the below format. Any commands can be used inside these brackets and stacked.[/p][p align=\"start\"][/p][p align=\"start\"]{choice: (Insert the statement or question you want answered)} [/p][p align=\"start\"]{[/p][p align=\"start\"] Option 1. (This is what will show up as a choice option)[/p][p align=\"start\"] \\[[/p][p align=\"start\"] Everything inside these brackets is a part of Option 1 Choice. You can go as far as you would like. [/p][p align=\"start\"] ][/p][p align=\"start\"] Option 2.[/p][p align=\"start\"] \\[[/p][p align=\"start\"] Note: you should reset character focus for each choice as a precaution. Bottom of [/p][p align=\"start\"]your choice will.[/p][p align=\"start\"] continue at the end of the choice assembly.[/p][p align=\"start\"] ][/p][p align=\"start\"]}[/p][p align=\"start\"]Bracket above is end of choice block.[/p][p align=\"start\"][/p][p align=\"start\"][/p][p align=\"start\"]Set Flags:[/p][p align=\"start\"]Flags are commands and flags that you want to retain in the save file for later, allowing additional content for more diversity of narration. The player picked up a pickle from the fridge, and you set a flag to mark that he did pick up that pickle. In several scenes down that road, you can add the flag and make a section of writing only for players that picked up that pickle. \n\nFirst you have to set the bool (program speak) for the flag using true and false. This allows more flexibility with the tiers of information saved. In the save, it will save whether the flag is true or false for future interactions.[/p][p align=\"start\"]You can also nest choices inside of choices without breaking the system. So have fun![/p][p align=\"start\"][/p][p align=\"start\"]Basic Commands:[/p][p align=\"start\"][/p][p align=\"start\"]{setbool: (name of flag), (true or false)}[/p][p align=\"start\"][/p][p align=\"start\"]You need both a false and true statement.[/p][p align=\"start\"][/p][p align=\"start\"]{if: (name of flag)}[/p][p align=\"start\"]{[/p][p align=\"start\"] Everything inside here will show up if the flag is true. If false, this whole line will be skipped.[/p][p align=\"start\"]}[/p][p align=\"start\"]Finished[/p][p align=\"start\"][/p][p align=\"start\"]Below is a solid example of nested choices with booleans set. The boolean will be saved so you can be hours into the story and be able to pull up this decision.[/p][img src=\"https://cdn.cloudflare.steamstatic.com/steamcommunity/public/images/clans/40086735/bd30e30c003c84af5e6d05decb7e93072e59aabd.png\"][/img]
[p align=\"start\"]If you want to use a false bool to also add more content, the option is available. Simply add a ! to the front.[/p][p align=\"start\"][/p][p align=\"start\"]{if: !(name of flag)}[/p][p align=\"start\"]{[/p][p align=\"start\"] Everything inside here will show up if the flag is false.[/p][p align=\"start\"]}[/p][p align=\"start\"]Finished[/p][p align=\"start\"][img src=\"https://cdn.cloudflare.steamstatic.com/steamcommunity/public/images/clans/40086735/5b8abb1f04d5cfce976705689e06ce10ee809b07.png\"][/img][/p][p align=\"start\"][/p][p align=\"start\"][/p][p align=\"start\"]Backgrounds:[/p][p align=\"start\"]Backgrounds are handled via Unity Components. Changing them via script is fairly easy. Changing Scene and Changing background are two completely different processes. This provides an instant change of background, and will reset upon scene change. The transition is instant but you can code in some fade animations for your project.[/p][p align=\"start\"]The file tree is very important for the backgrounds.[/p][p align=\"start\"]This can be adjusted in the code for other projects. For B1NARY, the base tree it looks in is /Resources/Backgrounds.[/p][p align=\"start\"][/p][p align=\"start\"][/p][p align=\"start\"]Commands:[/p][p align=\"start\"][/p][p align=\"start\"]{changeBG: (folder path and then name of the background you want to use)}[/p][p align=\"start\"][img src=\"https://cdn.cloudflare.steamstatic.com/steamcommunity/public/images/clans/40086735/826cb9af7796c15783a1abb983db18d36563804d.png\"][/img][/p][p align=\"start\"][/p][p align=\"start\"]Scenes:[/p][p align=\"start\"]Changing scenes will change to premade scenes in Unity. This will follow a door close and open animation and allow preset mats like post processing changes, different models, or a base background.[/p][p align=\"start\"]Changing scenes also resets character spawns, positions, and any audio not shared between two scenes.[/p][p align=\"start\"]The system will search the Unity Standard Scene Folder for the exact name.[/p][p align=\"start\"][/p][p align=\"start\"]Commands:[/p][p align=\"start\"][/p][p align=\"start\"]{changeScene: (Name of Scene)}[/p][p align=\"start\"][/p][p align=\"start\"]Changing scene allows a time to load assets and uses an animated door to move to the next scene.[/p][p align=\"start\"][/p][img src=\"https://cdn.cloudflare.steamstatic.com/steamcommunity/public/images/clans/40086735/ce6ab9dbc48142db584e8e046440534326020d6e.png\"][/img]
[p align=\"start\"][/p][p align=\"start\"][/p][p align=\"start\"]ChangeScript:[/p][p align=\"start\"]changeScript allows access to a user level .txt file that is nested in Unitys default /StreamingAssets/Docs[/p][p align=\"start\"][/p][p align=\"start\"]{changeScript: (folder location and name of the .txt )}[/p][p align=\"start\"][/p][img src=\"https://cdn.cloudflare.steamstatic.com/steamcommunity/public/images/clans/40086735/1700396aeed5e7eaa40bd54d32b8987a19c79bac.png\"][/img]
[p align=\"start\"][/p][p align=\"start\"][/p][p align=\"start\"]changeScript: Skipping Lines[/p][p align=\"start\"]You can command the narration to skip to a specific line. This is manual, so if you change the script, you will need to alter this with the new line number.[/p][p align=\"start\"][/p][p align=\"start\"]{changeScript: (folder location and name of .txt), (Line Number)}[/p][p align=\"start\"][/p][p align=\"start\"][img src=\"https://cdn.cloudflare.steamstatic.com/steamcommunity/public/images/clans/40086735/70eed4db80e28eb7c69eb84171114487f60c38ef.png\"][/img][/p][p align=\"start\"][/p][p align=\"start\"]UI and Themes:[/p][p align=\"start\"]UI themes are user changeable via a theme tool that plugs into the entire UI so you can pick and choose colors for every section of the UI. You dont even require Unity Editor to change them. The main priority of the themes is to match the color scheme of the background to allow the UI to blend further into the background itself.[/p][p align=\"start\"]A user can adjust color tones in Streaming Assets if they understand XML.[/p][p align=\"start\"]The writer can change a theme whenever they want to allow the colors to match backgrounds. However, any user can change the UI theme in options and override the default.[/p][p align=\"start\"][/p][p align=\"start\"]Themes are found in XML Format in /Assets/StreamingAssets/Color Formats[/p][p align=\"start\"][/p][p align=\"start\"]To properly use the theme engine, you have to manually put in the UI Theme Handler Script as a component in the Image and set the color option you want it to follow. It benefits the colors by ensuring the image is white and has no transparency by default (This allows control of both color and transparency of each sub category.[/p][p align=\"start\"][/p][img src=\"https://cdn.cloudflare.steamstatic.com/steamcommunity/public/images/clans/40086735/97cbc793fd43399fa9f6116df20c5280ae6641e3.png\"][/img]
[p align=\"start\"][/p][p align=\"start\"][/p][p align=\"start\"]Color Themes[/p][p align=\"start\"][/p][p align=\"start\"]In Unity, here are the steps to properly set up themes.[/p][olist]Click on the B1NARY tab in upper Unity Menu.
[/*]Create New Theme (This will make a new XML File in Color Formats)
[/*]Adjust colors for each labelled section based on preference.
[/*]Be sure to hit the save button to ensure the settings are locked in.
[/*][/olist][p align=\"start\"][/p][img src=\"https://cdn.cloudflare.steamstatic.com/steamcommunity/public/images/clans/40086735/2e95d08dee5e76ccef0156ecb6289e84820129fd.png\"][/img]
[img src=\"https://cdn.cloudflare.steamstatic.com/steamcommunity/public/images/clans/40086735/116f479fab1b9a1aaa74ed6f824aa1c2b29364ba.png\"][/img]
[img src=\"https://cdn.cloudflare.steamstatic.com/steamcommunity/public/images/clans/40086735/2552ae8af9744c2c65ee8a9303d647d2a34f3d14.png\"][/img]
[p align=\"start\"][/p][p align=\"start\"][/p][p align=\"start\"]Commands:[/p][p align=\"start\"]Once these themes are made and ready to use, you can use the command to set the default theme in a scene. Users can manually change this theme in options and it will remain locked to the user controlled theme. However, if the user goes back to default, it will use the theme specified in the script for the scene.[/p][p align=\"start\"]These themes can be switched mid script and there is no fade currently. I may add a small fade transition to make things cleaner.[/p][p align=\"start\"][/p][p align=\"start\"]{colorformat: (name of theme)}[/p][p align=\"start\"][/p][img src=\"https://cdn.cloudflare.steamstatic.com/steamcommunity/public/images/clans/40086735/611f832d278b0f89008aa0c348b322e2efeb35ce.png\"][/img]
[p align=\"start\"][/p][p align=\"start\"][/p][p align=\"start\"][/p][p align=\"start\"]Audio System:[/p][p align=\"start\"]The audio system is setup to be simple to use and modular by design. Some design compromises have had to be decided. There are basic subsections that comprise the system:[/p][olist]Voice Acting Lines System (VALS)
[/*]Sound Libraries
[/*]Audio Channels (Unity)
[/*]Audio Channels (Models)
[/*][/olist][p align=\"start\"][/p][p align=\"start\"][/p][p align=\"start\"]Voice Acting Lines System:[/p][p align=\"start\"]The VALS is line by line, based on the script or TXT that is mirrored.[/p][p align=\"start\"]The location that the code looks in is /Assets/Resources/Voice.[/p][p align=\"start\"]Each folder has to have the same name as the script you are running in Streaming Assets/Docs Folder. It also requires the same file tree in the Voice Folder as in the StreamingAssets Docs Folder.[/p][p align=\"start\"][/p][p align=\"start\"]Example:[/p][p align=\"start\"][/p][p align=\"start\"]There is a story script called PrologueStory.txt in the base folder of StreamingAssets/Docs.[/p][p align=\"start\"]To have the voice files play per line for that .txt file, you have to have a folder in /Resources/Voice named PrologueStory; same as the screens below.[/p][img src=\"https://cdn.cloudflare.steamstatic.com/steamcommunity/public/images/clans/40086735/76cebae17c7a92a513906045ba9675f85877ef9b.png\"][/img]
[img src=\"https://cdn.cloudflare.steamstatic.com/steamcommunity/public/images/clans/40086735/9488ff2e60479725cd6e89b461d52b9535f455d6.png\"][/img]
[p align=\"start\"]Example:[/p][p align=\"start\"]Male Domain.txt has to have a folder in the Voice folder named Male Domain.[/p][img src=\"https://cdn.cloudflare.steamstatic.com/steamcommunity/public/images/clans/40086735/420c5dfa10d564b4c9513d70e788c8aa5a4cfac0.png\"][/img]
[p align=\"start\"]Each audio file is labeled by the line number it sits on. Example above shows the line spoken Ceiling That audio file would be labeled as simply 13. If you add additional commands that change the line that voice line is on, you have to relabel them all to match the line change.[/p][p align=\"start\"]I understand this is tedious by nature. However, to ensure things are simple, efficient on resources, we decided this was the best route to provide Voice Acting files that can easily be dropped in. Imagine dropping in different language files post game release![/p][p align=\"start\"]We have two tools. One that is a stand alone exe file, and one built into Unity to change the names of all the files in that folder.[/p][p align=\"start\"][/p][p align=\"start\"]Note: Mentioned later in Translation Section, both the English Base and the Switched Language Folders must mirror exactly.[/p][p align=\"start\"][/p][p align=\"start\"][/p][p align=\"start\"]Voice Lines Overlap:[/p][p align=\"start\"]Voice lines will overlap by default if they are played back to back. However, there is a command to cease this behavior.[/p][p align=\"start\"][/p][p align=\"start\"]{stopvoices: true}[/p][p align=\"start\"]This blocks voices from overlapping. If you change to the next line, it will cut off the prior voiceline.[/p][p align=\"start\"][/p][p align=\"start\"]{stopvoices: false}[/p][p align=\"start\"]This allows voice line overlap. This can create some funny situations. However, the intent is for multiple actors to voice at the same time.[/p][p align=\"start\"][/p][p align=\"start\"][/p][p align=\"start\"]Audio Formats:[/p][p align=\"start\"]All audio formats that Unity uses can be used. Good ones are .ogg (small size), and .wav (large but compatible across OSes).[/p][img src=\"https://cdn.cloudflare.steamstatic.com/steamcommunity/public/images/clans/40086735/4c345523d004e97da6b50241fd10e503008cd83a.png\"][/img]
[img src=\"https://cdn.cloudflare.steamstatic.com/steamcommunity/public/images/clans/40086735/c3c47e0dd99488316a14b3f2adaae4b0d7f72466.png\"][/img]
[p align=\"start\"]To Use EXE file, the file has to be in the folder you naming the files in. Its rather simple to use and easy to follow.[/p][img src=\"https://cdn.cloudflare.steamstatic.com/steamcommunity/public/images/clans/40086735/0dc5a5bc7f76d122912f5080df7069ad342ad6a3.png\"][/img]
[p align=\"start\"]The one above is almost finished being tested, and will provide much more automated line renaming. Still working out some bugs, but will come packaged with the rest of B1NARYs toolkit.[/p][p align=\"start\"][/p][p align=\"start\"][/p][p align=\"start\"]Sound Libraries:[/p][p align=\"start\"]Sound libraries are unity scriptable objects, set up to increase performance and allow granular control over audio files per scene. Each Scene has its own Sound Library.[/p][p align=\"start\"]The main Script System will use this list to pull audio files into the scene. If there is not a reference of the file in the scene sound library, the file will not play.[/p][img src=\"https://cdn.cloudflare.steamstatic.com/steamcommunity/public/images/clans/40086735/ff82d5856ade9cc0c850652b7dd26dd68ca6039a.png\"][/img]
[p align=\"start\"]Taking this approach allows:[/p]Mixer Group and Audio Channel Control
[/*]Starting Volume
[/*]Granular Pitch Control and Variance.
[/*]Looping Options
[/*]Scene Transition Handling (Do you want it to cut off on scene change or carry over to the next scene?)
[/*][p align=\"start\"]You want multiple types of the same clip. You can rename the label and have different features on each audio file while using the same audio clip.[/p][img src=\"https://cdn.cloudflare.steamstatic.com/steamcommunity/public/images/clans/40086735/a492a6a1960ba37d80df8e9a79819f09c6148537.png\"][/img]
[p align=\"start\"]NOTE: I would recommend keeping the option to destroy the audio when scene changing unless its a very specific sound you want to carry over.[/p][p align=\"start\"][/p][p align=\"start\"]Additionally, in order to properly feed audio files between scenes, the same audio file needs to be in the next scenes Sound Library.[/p][p align=\"start\"][/p][p align=\"start\"]There is some room in the code for audio to add a volume control in the command but it was not currently needed for the project.[/p][p align=\"start\"][/p][p align=\"start\"][/p][p align=\"start\"]Audio Start / Stop:[/p][p align=\"start\"]All of the files in the Sound Library can be started, stopped, and faded in and out, directly from the Writers Script.[/p][p align=\"start\"]All audio files have a start and stop feature, but come with fade by default. You can manually adjust this via the command.[/p][p align=\"start\"][/p][p align=\"start\"][/p][p align=\"start\"]Audio Fade:[/p][p align=\"start\"][/p][p align=\"start\"]Fade in:[/p][p align=\"start\"][/p][p align=\"start\"]{fadeinsound: (name of sound in Sound Library), (How long in Seconds to fade in)}[/p][p align=\"start\"][/p][p align=\"start\"]Example Below:[/p][p align=\"start\"][img src=\"https://cdn.cloudflare.steamstatic.com/steamcommunity/public/images/clans/40086735/842a74dce213ef639dddbd7bfa44322c81feb3ef.png\"][/img][/p][p align=\"start\"]Fade Out:[/p][p align=\"start\"]If the sound is set to loopable in the Library, you will have to fade it out. The command is as follows:[/p][p align=\"start\"][/p][p align=\"start\"]{fadeoutsound: (name of sound in Sound Library), (How Long in Seconds to Fade out)}[/p][p align=\"start\"][/p][p align=\"start\"]Example:[/p][p align=\"start\"][img src=\"https://cdn.cloudflare.steamstatic.com/steamcommunity/public/images/clans/40086735/6b65cd9840b177ebecc0561b93dda173c17ddcaa.png\"][/img][/p][p align=\"start\"][/p][p align=\"start\"]Audio Channels:[/p][p align=\"start\"]Audio channels are Unity based, and we rely on them. The mixer groups add user control over sections of audio, and you can adjust it as much as you need to. For B1NARY, we have groups for general audio, and specific characters in game.[/p][p align=\"start\"]They are coded in, and then attached to the mixer groups. The Settings are found in /Assets/Scripts/Audio/SoundSyncer.cs[/p][p align=\"start\"]Some are hard coded, like Master, Music, SFX, UI.[/p][p align=\"start\"]The rest can be added and assigned to characters, or other channels. The hard code is for the options panel.[/p][img src=\"https://cdn.cloudflare.steamstatic.com/steamcommunity/public/images/clans/40086735/ac39d071ec08855eaace282755357518e0543708.png\"][/img]
[p align=\"start\"]/Assets/Scripts/Options Panel/Sound/ SoundOptionsBehavior.cs is where you can attach new channels. Below is where the CS file is attached to the Unity Channels.[/p][img src=\"https://cdn.cloudflare.steamstatic.com/steamcommunity/public/images/clans/40086735/2ef8d5598dd5f5fbf00974592a8524ea732f43b3.png\"][/img]
[p align=\"start\"][/p][p align=\"start\"][/p][p align=\"start\"]Binary Non Binary:[/p][p align=\"start\"]Gender Option is hardcoded into B1NARYs systems. However, you can simply not use it you dont need it. Mostly its to allow gender neutral options when you pick male or female sex route.[/p][p align=\"start\"]So false is denoted with a ! and the non binary is default.[/p][p align=\"start\"]In a similar format to choice blocks, it allows someone that chose binary or non binary options. No other work is required.[/p][img src=\"https://cdn.cloudflare.steamstatic.com/steamcommunity/public/images/clans/40086735/5c677cd56774353f705e850b5aab9487f4c30eb9.png\"][/img]
[p align=\"start\"][/p][p align=\"start\"][/p][p align=\"start\"]Language Translation Audio and Scripts:[/p][p align=\"start\"]Language translation is set up to be modular and easy to add to. In order to keep things easy, the translation folders must mirror scripts and audio. The folder trees must mirror the default languages tree (Doesnt have to be english, but currently the default is English)[/p][p align=\"start\"]In order to properly have all languages to switch on the fly, the scripts need to be line for line mirrors of each other.[/p][p align=\"start\"][/p][p align=\"start\"]Writing Script Location:[/p][p align=\"start\"]/Assets/StreamingAssets/Docs/Language Packs[/p][p align=\"start\"][/p][p align=\"start\"]Language Audio files location:[/p][p align=\"start\"]/Assets/Resources/Voice/Language Packs[/p][img src=\"https://cdn.cloudflare.steamstatic.com/steamcommunity/public/images/clans/40086735/15f30fe08903e4a2ec7b4ee4bcb0c20b5dd5b407.png\"][/img]
[img src=\"https://cdn.cloudflare.steamstatic.com/steamcommunity/public/images/clans/40086735/409730a7ec0533cad598812fda129887f30107ef.png\"][/img]
[img src=\"https://cdn.cloudflare.steamstatic.com/steamcommunity/public/images/clans/40086735/41be07d3b36d4cfaccd1956042d1b82e1e96ccbb.png\"][/img]
[p align=\"start\"][/p][p align=\"start\"]You can control the language swap via the options panel, and customize many features. You can even add new language options.[/p][p align=\"start\"][/p][p align=\"start\"]Code:[/p][p align=\"start\"]/Assets/Scripts/UI/Options Panel/Display/LanguageDropdown.cs[/p][img src=\"https://cdn.cloudflare.steamstatic.com/steamcommunity/public/images/clans/40086735/9002c4f62550f9dba36ca09410cba0ca5344722b.png\"][/img]
[img src=\"https://cdn.cloudflare.steamstatic.com/steamcommunity/public/images/clans/40086735/c10b5460befd80cfd024e93664908f5a982e6583.png\"][/img]
[p align=\"start\"][/p][p align=\"start\"][/p][p align=\"start\"]Textbox Language Globalizer:[/p][p align=\"start\"]For UI Buttons, Panels, and Titles, including UI based PDA Text, the globalizer script and unity component can be activated so when you switch languages, they switch to the language you require. The language translation is NOT automatic. You will have to manually put in the translation into the text boxes below.[/p][img src=\"https://cdn.cloudflare.steamstatic.com/steamcommunity/public/images/clans/40086735/3f2c433fb75ae43de90a7d5de79fbda042492fe3.png\"][/img]
[p align=\"start\"]Note: Without the editor, users can add voice lines for each language by using the normal VALS system and labeling the folders to mirror the english version! Just ensure the new folder is labeled (EX: German) in the Language Packs Folder.[/p][p align=\"start\"]If the audio file is missing for the added language, the system will automatically play the audio file from the default folder. This behavior is identical to the Writers Script.[/p][p align=\"start\"][/p][p align=\"start\"][/p][p align=\"start\"]Achievements / Unlocks:[/p][p align=\"start\"]Like choice blocks, Achievements and unlocks help add some player interaction. The unlocks and steam achievements are both set up a bit different and have different purposes.[/p][p align=\"start\"]Locks are saved and react in real time. There are two basic types.[/p][olist]Local Unlocks that save to the save file and Local Prefs (Unity)
[/*]Steam Network Achievements Using Steamworks.
[/*][/olist][p align=\"start\"][/p][p align=\"start\"]Steam:[/p][p align=\"start\"]Steam unlocks are saved and checked through Valve and Steamworks.NET .[/p][p align=\"start\"]These are used to activate online achievements on your steam account.[/p][p align=\"start\"]These achievements have to be added to AchievementManager.cs[/p][img src=\"https://cdn.cloudflare.steamstatic.com/steamcommunity/public/images/clans/40086735/aa69317d8519ddd3659f950b704b4481e8e50b13.png\"][/img]
[p align=\"start\"]Command:[/p][p align=\"start\"]{setachievement: (Name of Achievement on Steam)}[/p][p align=\"start\"][/p][p align=\"start\"]Example:[/p][img src=\"https://cdn.cloudflare.steamstatic.com/steamcommunity/public/images/clans/40086735/e6df0b6d247707c464e2eac80808d7695e133e02.png\"][/img]
[p align=\"start\"][img src=\"https://cdn.cloudflare.steamstatic.com/steamcommunity/public/images/clans/40086735/1b85c566fd9c0830c64c26eba55d8a64c7b90aeb.png\"][/img][/p][p align=\"start\"]Steam vs Offline Version:[/p][p align=\"start\"]Steam versions are set up for Steam only, and will not work outside of steam. However, there is an offline only version that can be activated via the Unity Editors Project Settings in the Player Options.[/p][p align=\"start\"]Script Compilation Symbol:[/p][p align=\"start\"]All Caps DISABLESTEAMWORKS and then hit apply.[/p][p align=\"start\"]Once complete, steamworks will be disabled, and builds after will work offline. PDA and other unlocks work the same on offline and steam versions.[/p][p align=\"start\"][img src=\"https://cdn.cloudflare.steamstatic.com/steamcommunity/public/images/clans/40086735/ff29cada3fb6b8e1981b94ca96ab62782045d516.png\"][/img][/p][p align=\"start\"][/p][p align=\"start\"][/p][p align=\"start\"]PDA Unlock Flags:[/p][p align=\"start\"]The PDA is your source of information in the game and it uses the unlocks to dynamically add new information as you progress through the story. When you unlock new content, the PDA will even activate a blinking light and leave a notification. The information is organized and saved no just in the save file, but in the Unity Config file in the B1NARY Document folder.[/p][p align=\"start\"]For Mac the location is: /user/Library/Application Support/Coffee and Cookies Dev Team/B1NARY/config.xml[/p][p align=\"start\"]For Windows: /user/AppData/LocalLow/Coffee and Cookies Dev Team/B1NARY/config.xml[/p][img src=\"https://cdn.cloudflare.steamstatic.com/steamcommunity/public/images/clans/40086735/14817999c06bf1370c34c0ad4f97b20b654ac5bc.png\"][/img]
[p align=\"start\"]There are 3 Categories of Flags:[/p]Gallery
[/*]Map
[/*]CharProfile
[/*][p align=\"start\"][/p][p align=\"start\"]Once unlocked, the game remembers the unlocks, regardless of the save you load. You will reset all of the flags by deleting the config.xml file. However, you load a save that has all of the unlocks, and it will reload those into the config file.[/p][p align=\"start\"][/p][p align=\"start\"]As per the example below the command is simple.[/p][p align=\"start\"][/p][p align=\"start\"]{unlock: (category of flag), (name of unlock)}[/p][p align=\"start\"][/p][p align=\"start\"]NOTE: The name of the unlock command, and flag are both case sensitive.[/p][img src=\"https://cdn.cloudflare.steamstatic.com/steamcommunity/public/images/clans/40086735/29a47a8cd5e3db9776d00ae9cee1721fd3996108.png\"][/img]
[p align=\"start\"]Assets like text boxes, images, ect, are blocked by a lockbox. When the flag is triggered, the lockbox that the toggle component is attached to is deactivated everywhere.[/p][p align=\"start\"][/p][p align=\"start\"]Example: If malemcprofile is flagged to unlock, the lock box toggler on profile picture, the first page of information are both removed at the same time.[/p][p align=\"start\"][/p][p align=\"start\"]The CrossScene will keep track of all flags in the prefab.[/p][img src=\"https://cdn.cloudflare.steamstatic.com/steamcommunity/public/images/clans/40086735/07b9864f5e49eba633fedfab90af145a5c8038af.png\"][/img][img src=\"https://cdn.cloudflare.steamstatic.com/steamcommunity/public/images/clans/40086735/3a82dad821bf6066e7bbbce8e4d1578357b51720.png\"][/img]
[p align=\"start\"]Example below is the location of Locked Box Covering Page 1 of the malemcprofile.[/p][img src=\"https://cdn.cloudflare.steamstatic.com/steamcommunity/public/images/clans/40086735/0fd7338692312f2b6e4760421abc24dc921ac713.png\"][/img]
[p align=\"start\"][/p][p align=\"start\"]Example: malemcprofile unlocked in the PDA[/p][img src=\"https://cdn.cloudflare.steamstatic.com/steamcommunity/public/images/clans/40086735/a61ef9760a01976ae243b5653646563bed2866bc.png\"][/img]
[p align=\"start\"]Example: Notification when a flag is unlocked. These are not automatic. You can manually control them, and they are translated to all the languages you choose.[/p][img src=\"https://cdn.cloudflare.steamstatic.com/steamcommunity/public/images/clans/40086735/761bdbc8c9087193e3af7f176a14f80fb74b0420.png\"][/img]
[p align=\"start\"]Example:[/p][p align=\"start\"]Using Notification Behavior Script can activate with the flags name allows an alert to the player that new content is available and unlocked. I recommend adding the category in the notification to make finding the information easier.[/p][p align=\"start\"]Like for mcmaleprofile, the text for the notification is NPC Profile Unlocked: You. It indicates that the new unlock is in the Profiles Tab under the NPC tab.[/p][p align=\"start\"][img src=\"https://cdn.cloudflare.steamstatic.com/steamcommunity/public/images/clans/40086735/9b2a9612ef4cf8100e1e3d51a789686ad705d89a.png\"][/img][/p][p align=\"start\"]This Document is meant to properly use Writers Script and all of the features. This is by no means an indepth documentation on the different systems employed.[/p]Minimum Setup
- OS: Ubuntu 14.04 or later
- Processor: 2.8 GHz Intel Core 2 Duo or betterMemory: 4 GB RAM
- Memory: 4 GB RAM
- Graphics: OpenGL 3.2 compatible GPU with at least 1GB of VRAM
- Storage: 5 GB available space
Recommended Setup
- OS: Ubuntu 14.04 or later
- Processor: Intel(R) Core(TM) i5-3470 or betterMemory: 8 GB RAM
- Graphics: OpenGL 3.2 compatible GPU with at least 1GB of VRAM
- Storage: 5 GB available space

[ 6368 ]
[ 5873 ]
[ 1991 ]
[ 1943 ]
[ 988 ]

Time left:
356099 days, 9 hours, 26 minutes

Time left:
356099 days, 9 hours, 26 minutes
Time left:
3 days, 17 hours, 26 minutes

Time left:
31 days, 17 hours, 26 minutes

Time left:
34 days, 17 hours, 26 minutes

Time left:
35 days, 17 hours, 26 minutes

Time left:
9 days, 3 hours, 26 minutes
Time left:
4 days, 11 hours, 26 minutes
Time left:
10 days, 11 hours, 26 minutes
Time left:
11 days, 11 hours, 26 minutes
Time left:
16 days, 11 hours, 26 minutes
Time left:
18 days, 11 hours, 26 minutes
Time left:
22 days, 11 hours, 26 minutes
Time left:
2 days, 0 hours, 27 minutes
Time left:
6 days, 17 hours, 27 minutes

Time left:
8 days, 16 hours, 27 minutes
Time left:
13 days, 23 hours, 37 minutes


